Beach Nail Designs: 20 Summer Ocean-Inspired Ideas 2026
```markdown Beach nails combine ocean-inspired motifs like waves, shells, and coral with durable formulas designed to withstand saltwater, sand, and sun...
Bottom Line
- Gel-based beach nail designs typically last two to three weeks compared to three to five days for standard polish in coastal conditions
- Proper nail preparation including dehydration and quality base coats prevents common beach-related chipping at the free edge
- Ocean-inspired designs work best on medium to long nail lengths where wave gradients and shell details remain visible
- Rubberized top coats create flexible barriers against sand abrasion and saltwater exposure
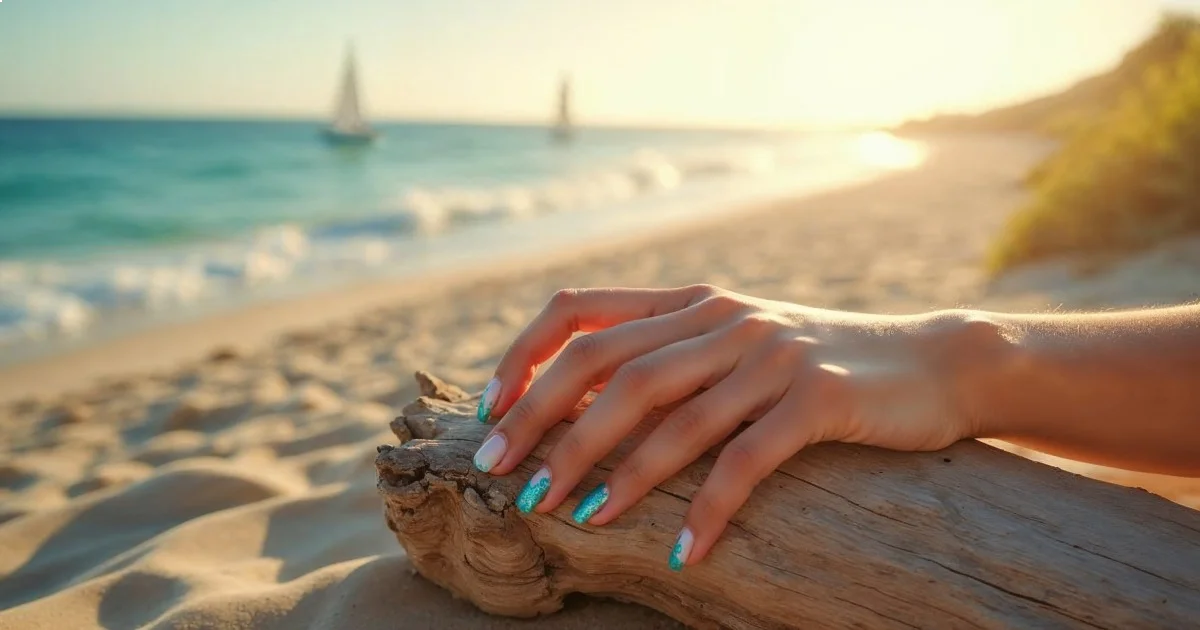
Beach nails combine ocean-inspired motifs like waves, shells, and coral with durable formulas designed to withstand saltwater, sand, and sun exposure. The best designs balance visual impact with practical longevity, using gel systems or rubberized top coats that resist chipping through summer activities while incorporating on-trend colors like seafoam green, sandy neutrals, and iridescent finishes.
:::takeaways
- Gel-based beach nail designs typically last two to three weeks compared to three to five days for standard polish in coastal conditions
- Proper nail preparation including dehydration and quality base coats prevents common beach-related chipping at the free edge
- Ocean-inspired designs work best on medium to long nail lengths where wave gradients and shell details remain visible
- Rubberized top coats create flexible barriers against sand abrasion and saltwater exposure
:::
## Selection Methodology: Evaluating Beach Nail Designs
Understanding what separates Instagram-worthy beach nails from designs that actually survive your vacation requires research-backed insights. I compiled these fifteen designs based on durability factors outlined in [OPI's longevity guide](https://www.opi.com/blog/how-to-make-your-manicure-last-longer), technique accessibility for at-home application, and design elements that complement ocean environments rather than compete with them. Each design includes specific product recommendations, realistic time estimates, and difficulty ratings based on industry guidance from professional nail educators.
The evaluation criteria prioritized three factors: application complexity (can someone execute this without professional training?), wear resistance (will this survive sand, saltwater, and sunscreen?), and visual cohesion (does it photograph well against beach backgrounds?). According to research compiled by beauty publications like [Allure's summer nail trend analysis](https://www.allure.com/story/summer-nail-trends-colors-designs), consumer interest in DIY beach nails increased substantially in recent seasons, making accessibility a critical selection factor.
> **Key Finding:** Proper nail preparation, including dehydrating the nail plate and applying quality base coats, is the most important factor in extending manicure longevity in coastal environments — OPI Professional Education
These designs represent observable trends from 2025-2026 beach nail content, verified product formulations, and techniques that align with nail health principles outlined by dermatological guidance. For foundational nail prep before attempting any beach design, refer to [Summer Nail Prep: Complete Transition Guide from Spring](/summer-nail-prep) for detailed preparation protocols.
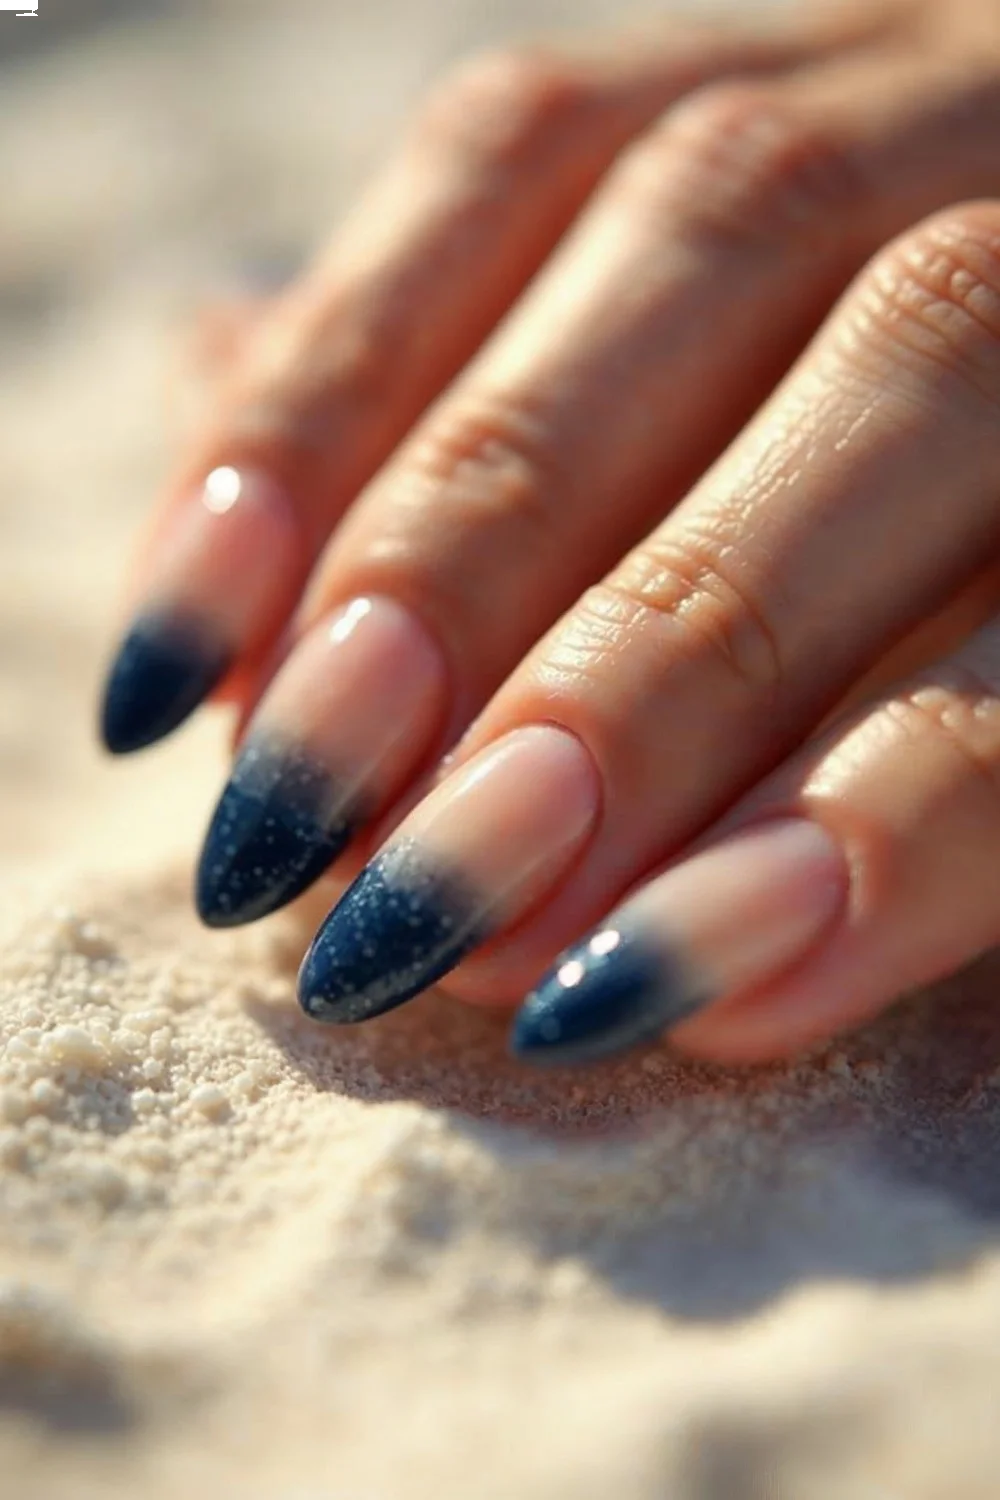
## Classic Ocean Wave Gradient
This design transitions from sandy beige at the cuticle to deep ocean blue at the free edge, mimicking the natural color gradient where shore meets sea. The wave gradient works on all nail shapes but shows most dramatically on almond or coffin lengths where the color transition has adequate canvas space. Expect to spend 45-60 minutes for a full application including prep, base coat, gradient building, and sealing.
The technique requires three to four shades from the same color family — start with OPI's "Samoan Sand" as the base, transitioning through "Suzi Without a Paddle" and finishing with "Navy Shatter." A makeup sponge creates the gradient effect: apply stripes of each color to the sponge, then dab onto the nail in rolling motions. The key detail most tutorials skip: dampen the sponge slightly with water before loading polish, which prevents the sponge from absorbing too much product and creates smoother blending.
For longevity, this design performs best with gel formulas that cure under LED lamps rather than air-dry polish. Gel systems bypass humidity-related drying issues that plague traditional polish in coastal environments. According to ingredient analysis standards, gel formulas create cross-linked polymer networks during UV curing, making them inherently more resistant to water penetration than solvent-evaporated polish films. Budget approximately eight to twelve dollars per gel color; each bottle yields thirty-plus full manicures.
**Difficulty:** Intermediate | **Time:** 45-60 minutes | **Durability:** 2-3 weeks with gel
## Minimalist Wave Line Art
Single navy or teal wave lines drawn across nude or sheer pink bases create sophisticated beach nails without overwhelming visual complexity. This design suits professional settings where bold ocean gradients might feel too casual, making it ideal for destination work events or beach weddings. The application takes just twenty to thirty minutes once you've mastered the liner technique.
Use a fine detail brush (0.5mm tip) or a striper brush loaded with Essie Gel Couture in "Surrounded by Studs" or Sally Hansen Miracle Gel in "Tidal Wave." The wave should flow naturally across each nail, starting at one sidewall and curving toward the opposite free edge. Here's what makes the difference: rest your painting hand on a stable surface and move the nail to the brush rather than dragging the brush across a fixed nail. This control technique reduces hand tremor and creates smoother curves.
The failure mode here involves polish that's too thick or too thin. Thick polish drags and creates raised ridges; thin polish feathers and loses crisp edges. Born Pretty nail art polish maintains ideal viscosity for line work straight from the bottle, while most regular polish needs thinning with acetone (two drops per bottle) for detail work. For additional guidance on achieving clean lines, review techniques in [DIY Nail Art](/diy-nail-art) for brush control fundamentals.
**Difficulty:** Beginner-Intermediate | **Time:** 20-30 minutes | **Durability:** 7-10 days
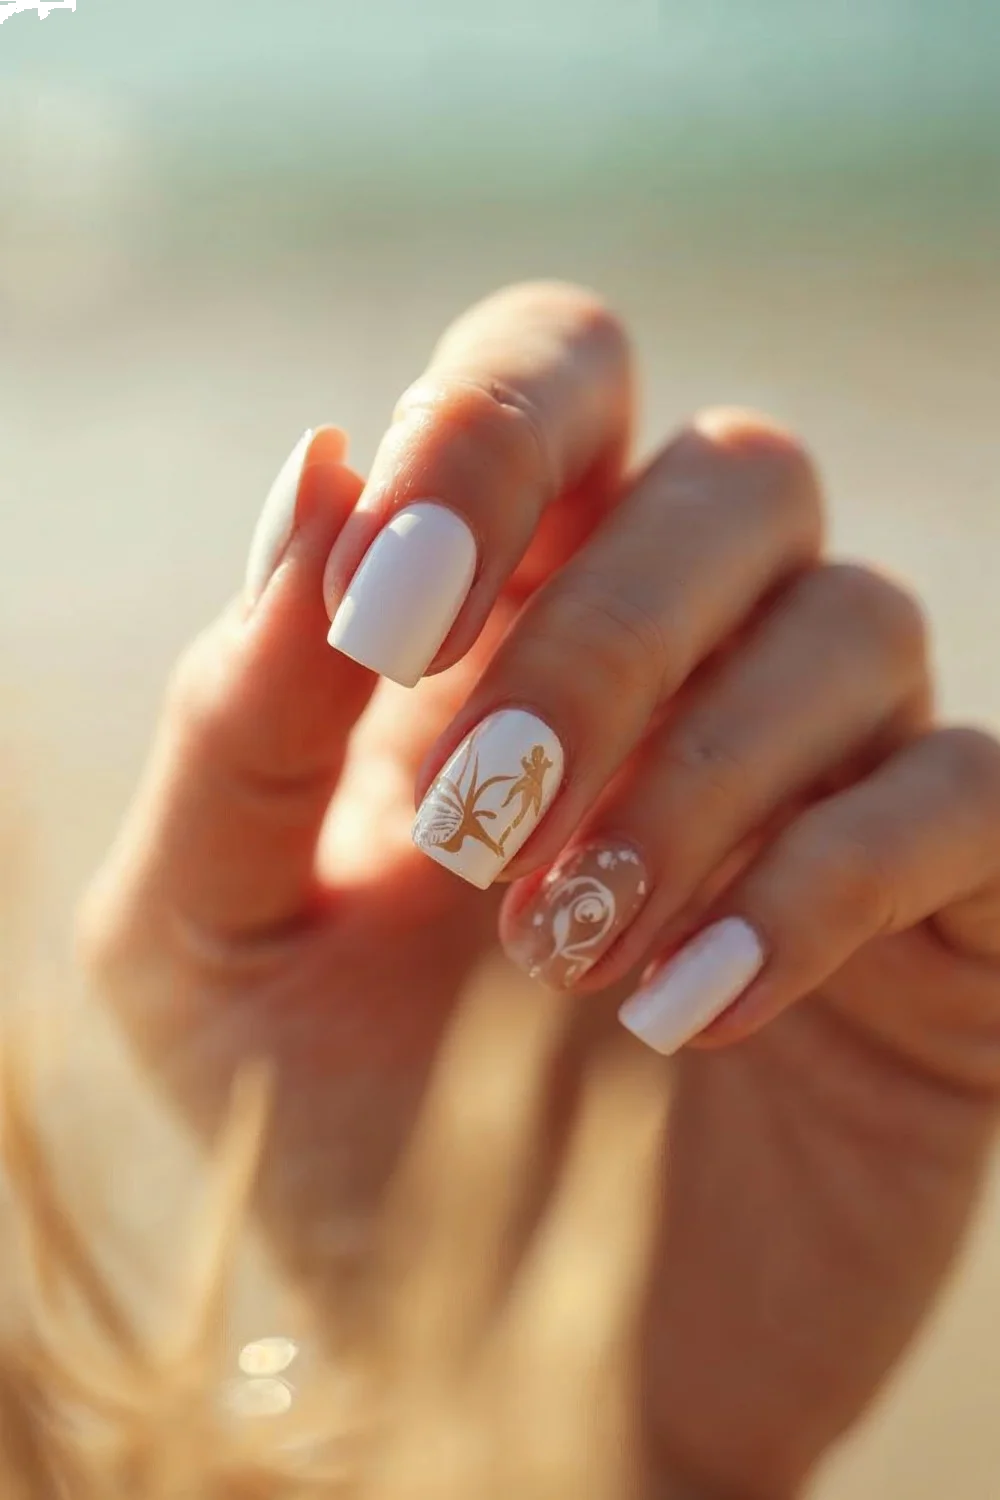
## Seashell Accent Nails
Tiny shell embellishments or hand-painted shell details on one or two accent nails add dimensional interest without requiring full-hand artistry. This approach works particularly well for beginners who want beach-themed nails but lack confidence in their painting skills. Real crushed shells, purchased shell decals, or painted shell designs each offer different complexity levels and durability profiles.
For real shell application, use small shell fragments (1-2mm) secured with thick builder gel or nail glue, then encapsulated under a domed gel top coat. Cure the base layer, position shells with a dotting tool or tweezers, apply a thin layer of clear gel over them, cure again, then finish with a thick gel top coat to smooth the surface. The shells add texture that can catch on hair and fabric if not properly encapsulated — that thick top coat layer is non-negotiable.
Painted shell designs require less dimensional work but more artistic skill. Use a small dotting tool to create the shell base in white or cream, then add thin brown or tan lines with a detail brush to suggest shell ridges. Orly Breathable Treatment + Color in "Barely There" creates an ideal shell base color that photographs well against tanned skin. The Byrdie guide to [stronger nail habits](https://www.byrdie.com/nail-care-tips-for-stronger-nails-346765) emphasizes that three-dimensional embellishments should only be applied to healthy, strong nails to prevent stress cracking.
**Difficulty:** Intermediate (real shells), Beginner (painted) | **Time:** 30-45 minutes | **Durability:** 2-3 weeks with proper encapsulation
## Coral Reef Abstract
Coral-inspired designs using peach, pink, orange, and cream in organic blob shapes mimic the irregular patterns of living coral reefs. This design suits shorter nail lengths where detailed artwork becomes impractical, transforming limitations into a design advantage. The abstract nature means there's no "wrong" way to place the colors, making this exceptionally forgiving for beginners.
Start with a white or cream base (two coats), then use a small brush or dotting tool to place irregular organic shapes in Essie "Tart Deco" (coral pink), OPI "Crawfishin' for a Compliment" (peachy orange), and Sally Hansen Insta-Dri in "Peachy Keen." Overlap the edges slightly and vary the shape sizes for natural visual texture. The trick nobody mentions: apply these coral shapes while the base coat is still slightly tacky (about thirty seconds after application). This semi-wet technique allows the colors to blend at their edges, creating softer transitions that look more reef-like than geometric.
Seal with two coats of top coat, allowing two minutes of dry time between coats. For extended beach wear, switch to Seche Vite Dry Fast Top Coat, which creates a notably harder surface than standard top coats and resists sand abrasion more effectively. Cost breakdown: the three coral shades plus base and top coat run twenty-five to thirty-five dollars total; expect thirty-plus manicures from each color bottle.
**Difficulty:** Beginner | **Time:** 30-40 minutes | **Durability:** 5-8 days
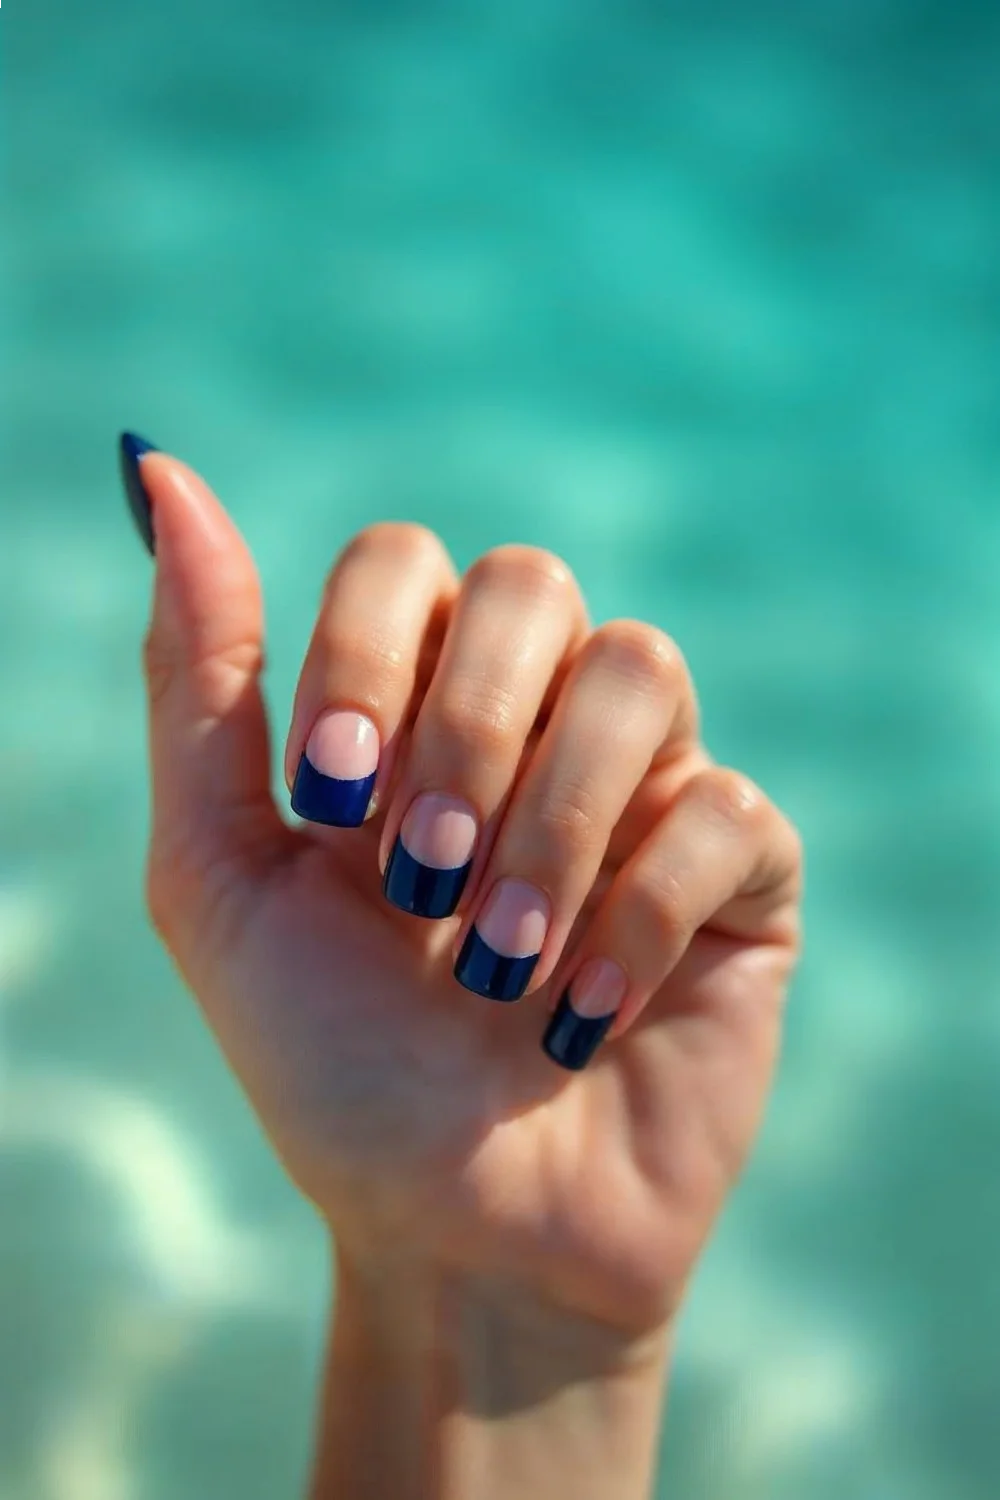
## Nautical French Tips
Classic French manicure tips executed in navy, teal, or ocean blue instead of traditional white create instant beach sophistication. This design works in virtually any setting from casual to formal, making it practical for travelers who need versatility across different vacation activities. The technique requires moderate precision but uses familiar French manicure mechanics covered in [French Manicure Tutorial: Modern DIY Guide](/french-manicure-tutorial).
The application follows standard French methodology: prep nails, apply base coat, apply two coats of sheer pink or nude, then paint the smile line in your chosen ocean blue. OPI "Yoga-ta Get This Blue" and Essie "Go Overboard" both photograph exceptionally well against tanned skin and ocean backgrounds. For crisp smile lines without guides, rest the brush parallel to the nail edge and use the brush's natural curve to paint the arc in one smooth motion from sidewall to sidewall.
The smile line should be two to three millimeters deep — deeper lines on shorter nails create stubby visual proportions. If precision painting feels intimidating, French tip guides (adhesive strips) cost three to five dollars for a multi-use pack and deliver consistently crisp lines. Remove the guides while the polish is still slightly wet (about thirty seconds after application) to prevent peeling. Cap the free edge with both the color and top coat to prevent premature tip wear, which is the primary failure point for French manicures in beach conditions.
**Difficulty:** Intermediate | **Time:** 35-45 minutes | **Durability:** 7-10 days
## Ombre Sunset Beach
This design captures the warm color transition of beach sunsets, blending yellow, orange, pink, and purple across the nail in a horizontal gradient. The sunset ombre works best on longer nail lengths where all four colors have space to display without muddiness. Expect the technique to take fifty to seventy minutes including prep and seal time, making this a weekend project rather than a quick weeknight refresh.
The execution differs from standard gradients in one critical way: the color placement is horizontal (perpendicular to nail growth) rather than vertical (cuticle to tip). Apply colors to a makeup sponge in horizontal stripes: start with yellow at the bottom, then orange, pink, and purple at the top. Press the loaded sponge onto the nail using rolling motions, reloading between nails. Apply liquid latex or petroleum jelly to the surrounding skin first — sunset gradients are notoriously messy, and cleanup takes longer than application if you skip this protection step.
The color selection matters substantially for photographing well. Choose colors with similar saturation levels — mixing neon yellow with dusty purple creates disconnected color stories. China Glaze's "Sun Worshiper" collection includes four coordinated sunset shades specifically formulated to blend smoothly. For a gel version that extends durability to two to three weeks, reference [Gel vs Acrylic Nails: Complete 2026 Guide + Costs](/gel-acrylic-nails-2) for system comparisons and application protocols.
**Difficulty:** Advanced | **Time:** 50-70 minutes | **Durability:** 4-6 days (regular), 2-3 weeks (gel)
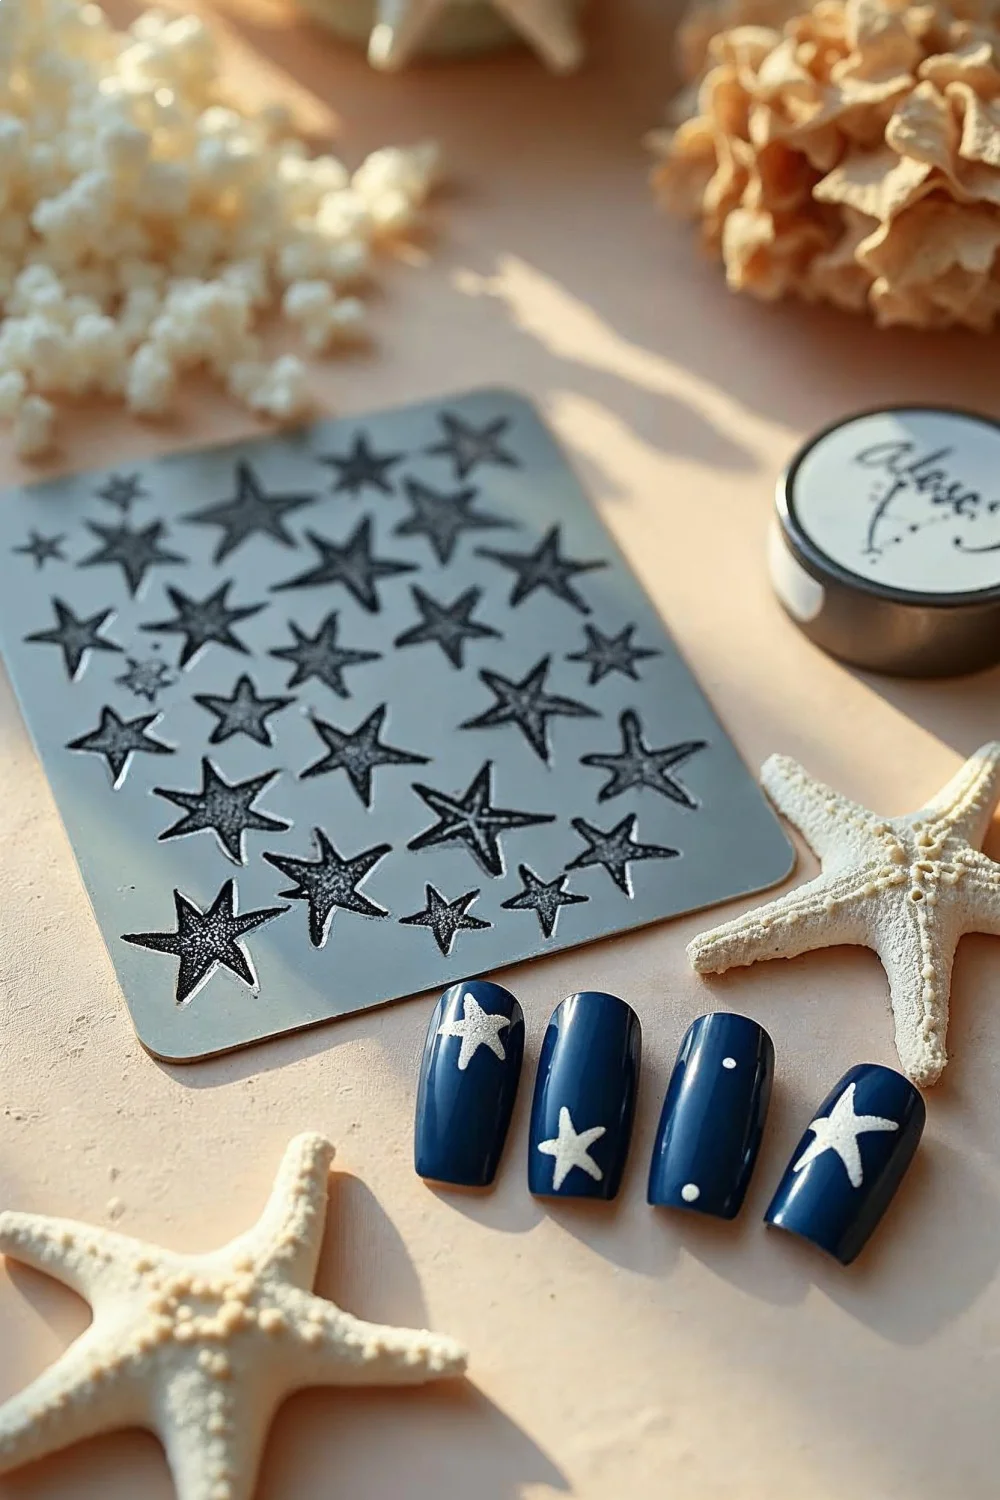
## Starfish and Sand Dollar Stamping
Stamping plates with beach motifs let you transfer detailed starfish, sand dollars, and shell images onto nails without freehand painting skills. This technique bridges the gap between simple polish application and complex nail art, making intricate designs accessible to beginners. The initial investment runs thirty to forty-five dollars for a stamper, scraper, and beach-themed stamping plates, but the tools last for hundreds of applications.
The stamping process requires specific product viscosity: regular polish is usually too thin and won't transfer cleanly. Born Pretty stamping polish and Maniology stamping polish both maintain the thick, creamy consistency needed for crisp transfers. Apply polish across the stamping plate design, scrape at a forty-five-degree angle to remove excess, press the stamper onto the design, then roll the stamper across your nail to transfer the image. That scraping angle is where most beginners fail — scraping too flat leaves excess polish that smudges the design.
Apply stamped designs over a complementary base color: navy blue bases make white starfish stand out, while sandy beige bases let teal sand dollars stand out. Seal immediately with top coat to prevent smudging. Stamped designs chip at the same rate as the base polish beneath them, so gel bases extend wear significantly. Multiple stamping plate manufacturers (Maniology, Clear Jelly Stamper, Born Pretty) offer ocean-themed collections; expect eight to fifteen dollars per plate with dozens of unique designs per plate.
**Difficulty:** Beginner-Intermediate | **Time:** 40-50 minutes | **Durability:** Matches base polish (5-8 days regular, 2-3 weeks gel)
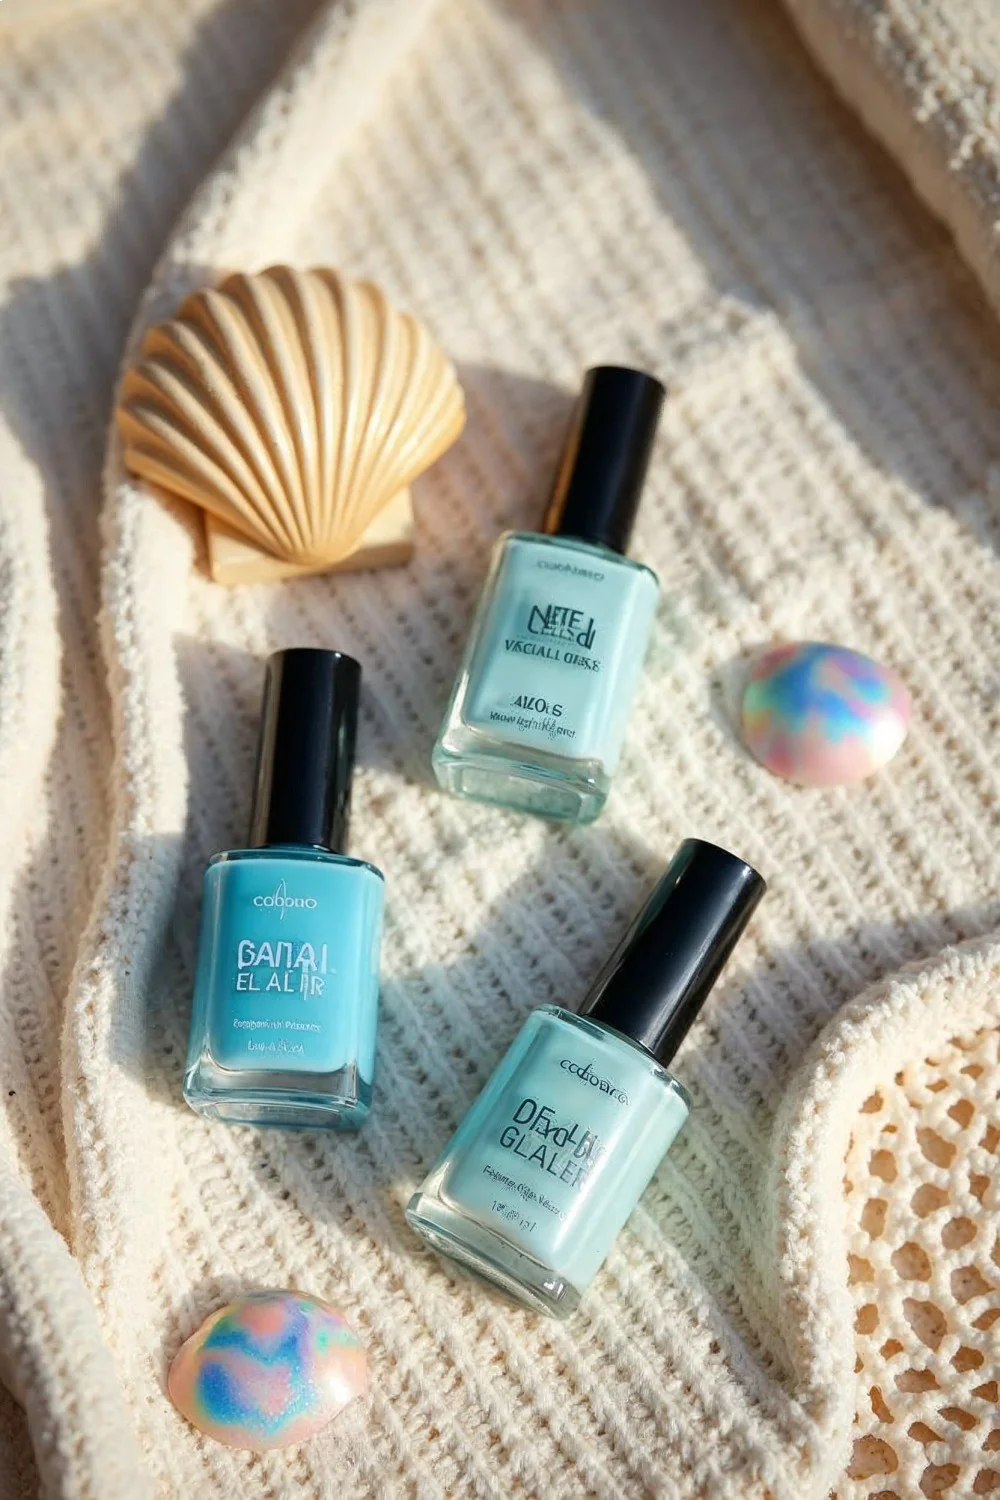
## Seafoam Green Chrome
Chrome powder in seafoam green or aqua tones creates an iridescent, mirror-like finish that shifts color in sunlight. This design requires gel polish and UV/LED curing equipment, making it unsuitable for those committed to traditional polish systems. The chrome application takes thirty to forty minutes including base gel, color, and chrome powder application.
The process: apply gel base coat and cure, apply two thin coats of white or light gray gel (curing between coats), apply gel no-wipe top coat and cure, then rub chrome powder onto the still-warm nail surface using a silicone applicator or eyeshadow applicator. The friction creates the metallic effect as the powder adheres to the gel surface. Seal with gel top coat (standard, not no-wipe) and cure for final wear.
The detail that determines success: the gel must be completely cured and slightly warm when you apply powder. Under-cured gel creates patchy powder adhesion; completely cool gel reduces the mirror effect. Most LED lamps run about sixty seconds cure time; remove nails and immediately apply powder while the gel retains residual warmth. Madam Glam chrome powders and Kiara Sky chrome powders both deliver strong color shift for eight to twelve dollars per jar. One jar covers over one hundred full manicures — the product goes a long way since you're rubbing it on, not painting thick coats.
**Difficulty:** Intermediate | **Time:** 30-40 minutes | **Durability:** 2-3 weeks
## Negative Space Waves
Leaving portions of the natural nail visible while painting wave shapes in ocean blues creates a modern, minimalist beach look that also happens to be nail-health-friendly. Negative space designs reduce the percentage of nail surface covered by polish, which matters for nails that become brittle or yellowed with constant full-coverage polish use. This design takes twenty-five to thirty-five minutes and works on any nail length.
The execution: apply base coat, then use a detail brush to paint wave curves across each nail, leaving the area below the wave unpainted. The exposed nail area represents sand or shallow water; the painted wave represents deeper ocean. Use two shades of blue on alternating nails for visual variety. The challenge lies in creating waves that look intentional rather than messy — use painter's tape as a curved guide if freehand curves feel too difficult.
For nails with yellowing or staining that shows through the negative space, apply one thin coat of sheer pink or peach polish to the entire nail first, then paint the waves over this sheer tint. Essie "Minimally Modest" and OPI "Bubble Bath" both provide barely-there tints that even out nail color without eliminating the negative space effect. This approach maintains the design's visual lightness while masking imperfections. Nail health guidance from dermatological sources recommends regular polish breaks; negative space designs provide a middle ground that maintains aesthetic interest while reducing chemical exposure. Explore more nail health protocols in [Healthy Nail Care Tips: 12 Essential Practices](/healthy-nail-care-tips).
**Difficulty:** Beginner-Intermediate | **Time:** 25-35 minutes | **Durability:** 5-8 days
## Pearl and Iridescent Flakes
Iridescent flakes or pearl powder suspended in clear polish or gel creates dimensional sparkle that mimics sunlight reflecting off water. This design works as a full-nail treatment or as an accent over other base colors, offering significant versatility. The application takes twenty to thirty minutes and requires no artistic skill — the flakes create visual interest through their random placement.
For loose flakes, apply base color, add one coat of clear polish, sprinkle flakes onto the wet surface, press gently with a silicone tool to embed them, let dry completely, then seal with two coats of top coat. For flake-suspended polish (pre-mixed), simply apply two to three thin coats over your base color. Cirque Colors "Memento Mori" and ILNP "Cygnus Loop" both contain dense iridescent flakes that photograph well in bright sunlight.
The top coat application is critical — flakes create an uneven surface that needs smoothing. Apply one thin layer of top coat, let it dry for two minutes, then apply a second thicker layer that floods the surface and self-levels. Seche Vite works exceptionally well for this smoothing effect due to its thicker viscosity. Without adequate top coat, flakes create rough surfaces that snag on fabric and hair. The flakes themselves are typically made from polyester film or mica, both of which resist water and chlorine exposure, making this design practical for pool and ocean swimming.
**Difficulty:** Beginner | **Time:** 20-30 minutes | **Durability:** 6-9 days

## Watercolor Beach Scene
Diluted polish applied in loose, flowing shapes creates a soft watercolor effect that suggests beach scenery without literal depiction. This abstract approach removes the pressure of perfect execution — the imperfect blending is part of the aesthetic. The technique takes forty to fifty minutes and works best on longer nails where the watercolor shapes have adequate space.
Mix regular polish with clear top coat or polish thinner (two parts color to one part thinner) to create the semi-transparent consistency needed for watercolor effects. Apply this diluted polish to the nail in loose brush strokes, allowing colors to overlap and blend naturally. Use ocean blues, sandy tans, and sky grays for a cohesive beach palette. Work quickly while polish remains wet to encourage blending, or deliberately let each color dry before adding the next for more defined color blocks.
The technique that most tutorials skip: use a small brush dampened with acetone to encourage colors to bloom and spread into each other while wet. This creates the diffused edges characteristic of watercolor. Sally Hansen X-treme Wear polishes thin well without becoming too runny, maintaining workable consistency for this technique. Seal with gel top coat if possible — the multiple thin layers of diluted polish remain somewhat fragile until reinforced with a hard top coat layer. Standard top coats work but may slightly dissolve the watercolor layers underneath; gel top coats cure without solvent interaction.
**Difficulty:** Intermediate | **Time:** 40-50 minutes | **Durability:** 4-7 days
## Palm Tree Silhouette
Black palm tree silhouettes painted over sunset gradients or solid sunset colors create instantly recognizable beach imagery. This design combines multiple techniques — gradient or solid color base plus detail painting — making it a time investment at sixty to seventy minutes. The palm trees themselves require only basic painting skills since silhouettes eliminate the need for shading or dimensional detail.
Create your base using either a sunset gradient (see Ombre Sunset Beach above) or a solid sunset color like coral, peach, or orange. Once dried completely, use a thin detail brush (0.5mm or smaller) and black polish to paint simplified palm tree shapes: a thin trunk that curves slightly, then three to four fronds spreading from the top in a fan shape. The fronds don't need individual leaf details — the black silhouette reads clearly without them.
For consistent palm trees across all nails, create a practice sheet first. Paint your chosen palm tree design five times on paper or a practice nail wheel until you've developed muscle memory for the shape. This reduces frustration and wasted polish from repeatedly removing unsatisfactory attempts. China Glaze "Liquid Leather" and Sally Hansen Insta-Dri in "Black to Black" both provide opaque black in one coat, which matters when painting over bright sunset colors. Two coats of black create muddy, raised details; one opaque coat maintains the silhouette's crispness.
**Difficulty:** Intermediate-Advanced | **Time:** 60-70 minutes | **Durability:** 5-8 days
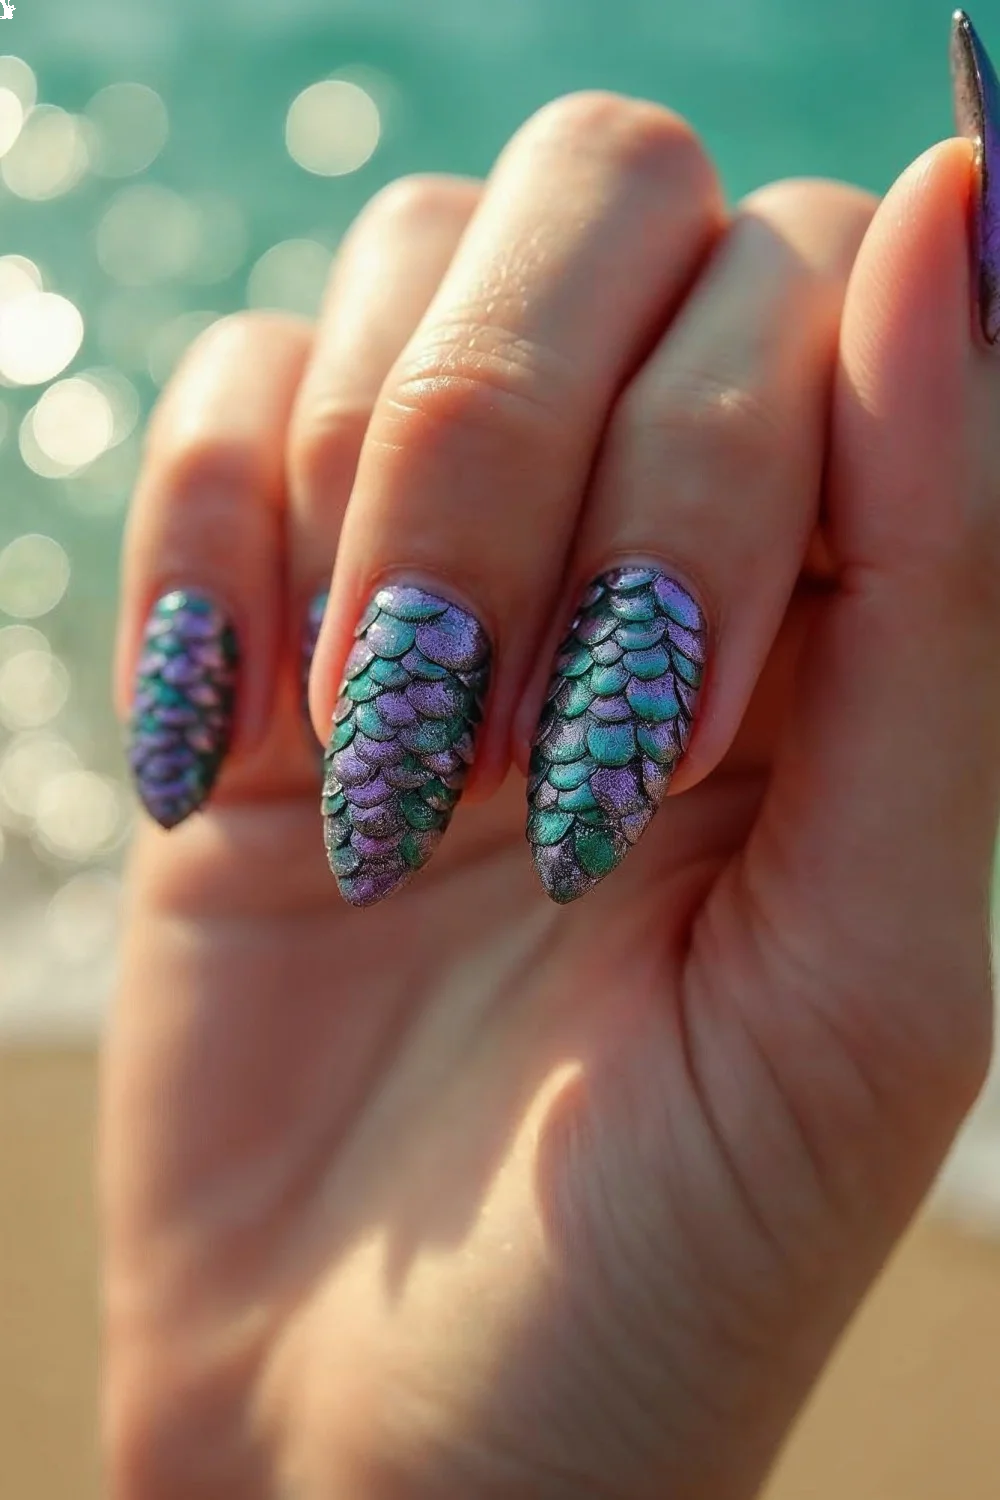
## Mermaid Scale Stencils
Adhesive stencils create repeating scale patterns that suggest mermaid tails when applied in iridescent or metallic blues and greens. This technique delivers complex-looking results with minimal skill requirements, making it ideal for beginners who want impressive designs without freehand painting. The stencil application takes thirty to forty minutes including base, stencil, and seal time.
Apply two coats of base color (typically white, silver, or pale blue), let dry until completely hard, then apply the scale stencil sheet. Use a makeup sponge to dab contrasting color over the stencil — sponging prevents polish from seeping under the stencil edges, which happens with brush application. Remove the stencil immediately while polish is still wet, then seal with top coat once the scaled section has dried completely.
Whimsy Nails and Twinkled T both sell reusable nail stencils in mermaid scale patterns for six to ten dollars per sheet; each sheet handles twenty-plus uses with careful cleaning between applications. The color combinations determine how effectively the scales photograph: high contrast color pairs (like navy over white, or teal over silver) show scale definition more clearly than similar-tone combinations. Layer different colored metallics for dimensional color shift — apply copper scales first, let dry, then apply a second stencil layer in teal offset slightly from the first layer. This creates intersecting scale colors that shift based on viewing angle.
**Difficulty:** Beginner | **Time:** 30-40 minutes | **Durability:** 6-9 days
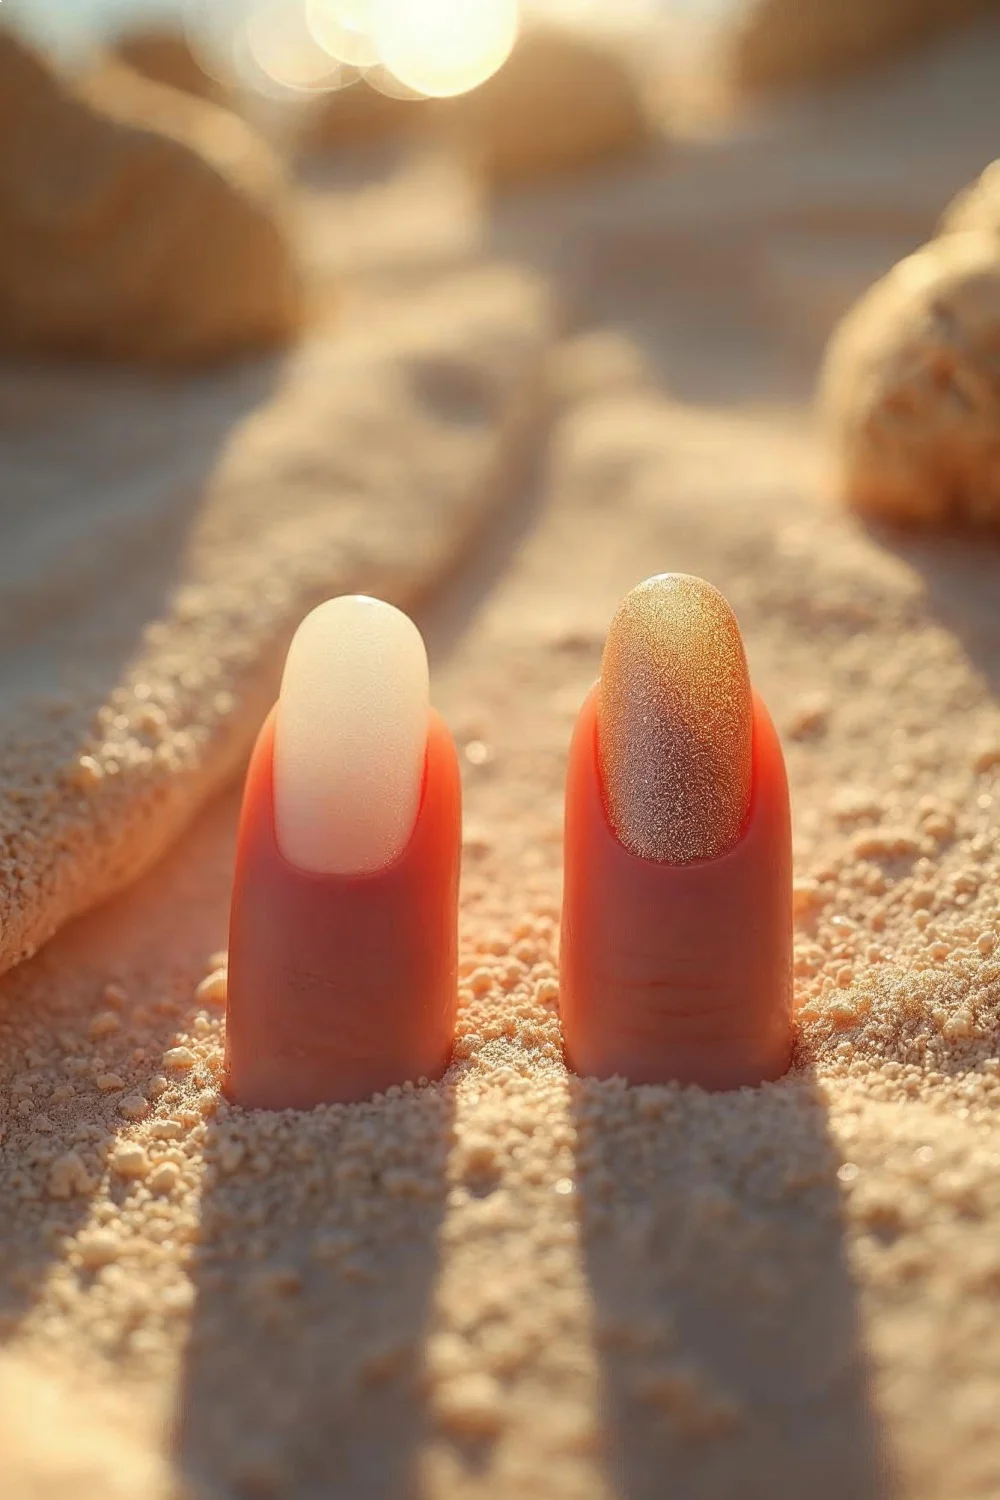
## Sandy Textured Neutrals
Textured polish in sandy beige, taupe, or tan tones mimics actual beach sand through matte grit embedded in the formula. This understated design suits conservative environments while maintaining beach thematics, making it practical for those who need workplace-appropriate nails during summer. The application takes just fifteen to twenty minutes — it's the quickest option in this collection.
Textured polishes apply like regular polish but dry to a gritty, matte surface without requiring top coat. In fact, top coat eliminates the texture by filling in the grit, so skip it entirely. Zoya PixieDust line and OPI Liquid Sand line both offer sandy neutral shades; expect seven to nine dollars per bottle. Apply two medium coats for optimal texture — thick coats create uneven grit distribution, while thin coats don't deposit enough texture particles.
The practical consideration: textured polish catches lint, hair, and fabric more readily than smooth polish. Avoid this design if you work extensively with your hands or wear delicate fabrics. The grit texture photographs well and creates visual interest without color or design complexity. Removal requires standard polish remover but takes slightly longer than smooth polish — the texture particles don't dissolve, they need to be physically wiped away. For those seeking resilient nails that withstand textured polish application and removal, review strengthening protocols in [How to Strengthen Weak Nails: 10 Proven Methods](/strengthen-weak-nails).
**Difficulty:** Beginner | **Time:** 15-20 minutes | **Durability:** 4-6 days
## Anchor and Rope Accent
Nautical symbols like anchors, rope knots, or ship wheels painted or stamped on one or two accent nails add thematic specificity without full-hand complexity. This design balances blank space with focal detail, preventing visual overwhelm while maintaining clear beach associations. The accent-nail approach takes twenty-five to thirty minutes total.
Apply solid color (navy, white, red, or traditional nautical stripes) to all nails, then add anchor or rope details to accent nails using one of three methods: freehand painting with a detail brush, stamping with nautical-themed plates, or applying anchor nail decals. Water-slide decals (thin printed designs that adhere when wet) offer the easiest route for detailed images and cost three to six dollars for sheets containing multiple anchor and rope designs.
For decal application: apply base color, let dry completely, cut out desired decal, soak in water for ten to fifteen seconds until it slides from the backing paper, position on nail, press gently to remove water and air bubbles, let dry five minutes, then seal with two coats of top coat. The top coat is mandatory — unsealed decals peel at edges within hours. For painted anchors, use this simplified shape: a single vertical line (the shank), a triangle at bottom (the arms), and two curved lines at the top of the triangle (the flukes). This minimal anchor reads clearly without requiring shading or dimensional detail.
**Difficulty:** Beginner (decals), Intermediate (painting) | **Time:** 25-30 minutes | **Durability:** 5-8 days
## Beach Nail Design Comparison
| Design | Difficulty | Time Required | Durability | Best For | Approximate Cost |
|--------|-----------|---------------|------------|----------|------------------|
| Ocean Wave Gradient | Intermediate | 45-60 min | 2-3 weeks (gel) | Long nails, gel users | $35-50 (gel kit) |
| Wave Line Art | Beginner-Intermediate | 20-30 min | 7-10 days | Professional settings, quick application | $8-12 (detail brush + polish) |
| Seashell Accent | Intermediate (3D), Beginner (painted) | 30-45 min | 2-3 weeks (gel encapsulated) | Dimensional interest | $15-25 |
| Coral Reef Abstract | Beginner | 30-40 min | 5-8 days | Beginners, forgiving technique | $25-35 (3 colors + base/top) |
| Nautical French | Intermediate | 35-45 min | 7-10 days | Versatile settings | $20-30 |
| Sunset Ombre | Advanced | 50-70 min | 4-6 days regular, 2-3 weeks gel | Long nails, weekend project | $30-45 |
| Starfish Stamping | Beginner-Intermediate | 40-50 min | Matches base polish | Detailed designs without painting skill | $30-45 (starter kit) |
| Seafoam Chrome | Intermediate | 30-40 min | 2-3 weeks | Iridescent effects, gel users | $45-65 (gel kit + powder) |
| Negative Space Waves | Beginner-Intermediate | 25-35 min | 5-8 days | Nail health conscious, minimalists | $15-25 |
| Pearl Flakes | Beginner | 20-30 min | 6-9 days | Quick sparkle, no skill needed | $10-18 |
| Watercolor Scene | Intermediate | 40-50 min | 4-7 days | Abstract aesthetic | $20-30 |
| Palm Silhouette | Intermediate-Advanced | 60-70 min | 5-8 days | Iconic beach imagery | $25-35 |
| Mermaid Scales | Beginner | 30-40 min | 6-9 days | Complex look, simple execution | $25-35 (stencils + polish) |
| Sandy Textured | Beginner | 15-20 min | 4-6 days | Understated, fastest option | $7-9 per bottle |
| Anchor Accent | Beginner (decals), Intermediate (painted) | 25-30 min | 5-8 days | Nautical theme, focal point | $10-20 |
## Maximizing Beach Nail Longevity
Even the most beautifully executed beach nail design fails if it chips by day two of vacation. The durability factors that matter in coastal environments differ from everyday wear — saltwater, sand abrasion, sunscreen oils, and chlorine exposure all accelerate polish breakdown. According to [OPI's manicure longevity research](https://www.opi.com/blog/how-to-make-your-manicure-last-longer), nail preparation accounts for more durability variation than polish quality in most cases.
Start with proper nail preparation outlined by [Essie's nail prep guide](https://www.essie.com/articles/nail-care/the-ultimate-guide-to-nail-prep): push back cuticles (don't cut them), lightly buff the nail surface to remove shine, wipe with alcohol or acetone to dehydrate the nail plate, then immediately apply base coat. That dehydration step is critical — oils and moisture on the nail surface prevent polish adhesion at the molecular level. Most manicure failures at the beach trace back to skipping this dehydration step.
Choose base coats formulated for your specific nail type. Oily nails (those that show shine within hours of buffing) need rubberized base coats like Orly Bonder, which create flexible polymer layers that move with the nail. Dry, brittle nails need ridge-filling bases that smooth surface irregularities. For comprehensive base coat guidance, reference [Best Base Coat for Nails 2026: Top 7 Tested](/best-base-coat-nails) for formulation breakdowns.
> **Key Finding:** Free edge capping — painting the polish across the nail tip edge — is the single most effective technique for preventing premature tip chipping in beach conditions — Professional Nail Educators
Top coat selection matters equally. Standard top coats soften in hot weather and break down when exposed to oils from sunscreen and tanning products. [Cosmopolitan's professional top coat recommendations](https://www.cosmopolitan.com/style-beauty/beauty/a32431610/best-nail-top-coat/) emphasize quick-dry formulas with hard finishes. Seche Vite, Sally Hansen Insta-Dri Anti-Chip Top Coat, and Essie Gel Couture Top Coat all create noticeably harder surfaces than standard top coats. Apply top coat to the entire nail including the free edge (capping) on day one, then reapply a fresh top coat layer every two to three days during beach vacations.
For gel systems, the durability advantage comes from the cured polymer network that resists water and chemical penetration. Gel manicures typically last two to three weeks before lifting at the cuticle or chipping at the free edge. The application protocols for gel differ substantially from regular polish — review [Gel vs Acrylic Nails: Complete 2026 Guide + Costs](/gel-acrylic-nails-2) for detailed system comparisons and home application requirements.
## Choosing Your Beach Nail Design
Selection depends on three practical factors: your available time, your skill level, and your durability requirements. If you're leaving for vacation in three days and have never attempted nail art, choose beginner-rated designs like textured neutrals, pearl flakes, or coral abstract rather than challenging techniques like sunset ombre or palm silhouettes. Frustration with complicated techniques often leads to rushing and poor execution, which defeats the purpose.
Consider your vacation activities when selecting designs. Snorkeling, paddleboarding, and beach volleyball create significantly more wear than resort lounging and photography. For active beach vacations, prioritize gel-based designs or stamped patterns over hand-painted details. Dimensional embellishments like shell appliques can catch on wetsuits and life jackets — skip them if you're engaging in water sports.
Nail length influences design visibility. Gradients, ombre effects, and watercolor techniques need adequate canvas to display properly; they look muddy and crowded on short nails. Conversely, simple designs like wave lines, anchors, and textured polish work on any nail length. If you're unsure about your nail length, reference [Round Nail Shape: Complete Filing & Styling Guide](/round-nail-shape) and [Almond Nail Shape: Filing Guide & Maintenance Tips](/almond-nail-shape) for shape-specific design recommendations.