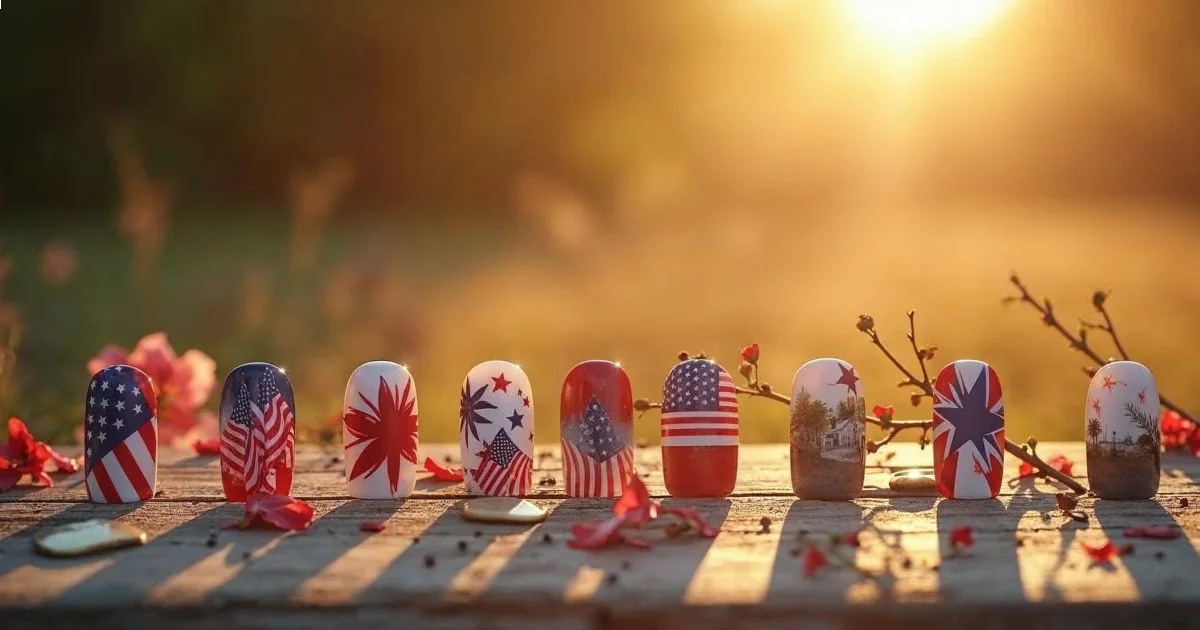
Fourth of July Nails 2026: 20 Red White Blue Designs to Try
Fourth of July nails for 2026 blend classic patriotic color palettes with accessible techniques like gradient fades, stamped patterns, and minimalist...
Fourth of July nails for 2026 blend classic patriotic color palettes with accessible techniques like gradient fades, stamped patterns, and minimalist accents that work across skill levels. These 15 designs prioritize DIY-friendly methods using drugstore and indie brand products, incorporating trending elements like chrome finishes and negative space while maintaining the red, white, and blue theme.
- Gradient fades and stamped designs offer beginner-friendly alternatives to hand-painted details
- Most designs require standard tools: base coat, top coat, dotting tool, and striping tape
- Chrome powders and matte finishes modernize traditional patriotic nail art
- Proper prep extends wear from typical 4-5 days to 7-10 days for regular polish
Selection Methodology
Evaluating nail designs requires assessing techniques based on concrete criteria rather than aesthetic preference alone. For this collection, I compiled 15 fourth of july nails designs by analyzing current nail art techniques featured in industry publications like NAILS Magazine, cross-referencing with accessible application methods outlined in professional tutorials from brands like OPI and Essie, and prioritizing designs that accommodate various nail shapes and skill levels. Each design includes specific product recommendations, application timelines, and difficulty ratings to empower your at-home nail care without requiring professional intervention.
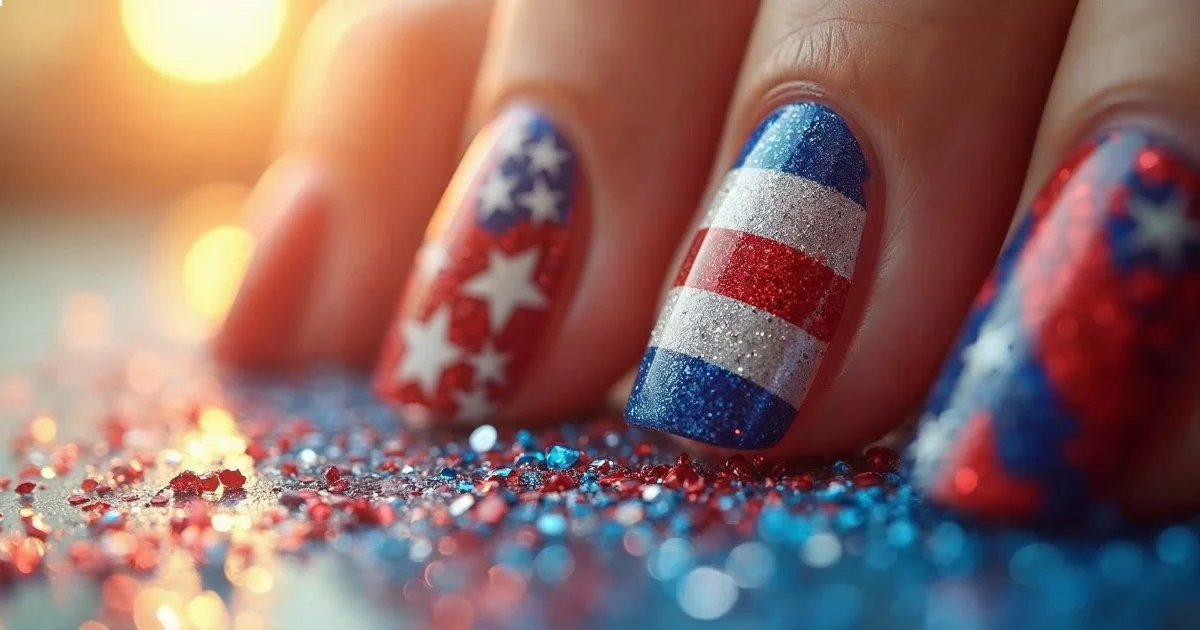
Ombre Stars on Blue Base
This gradient design transitions from navy to powder blue with white star accents, combining two trending techniques from 2026: vertical ombré and negative space stamping. The design works particularly well on almond nail shapes where the elongated canvas showcases the color fade. Application time runs approximately 45 minutes including dry time.
Key specifications: Start with OPI Lincoln Park After Dark at the base, blend upward using a makeup sponge with Essie Bikini So Teeny at the tips. The sponging technique, detailed in OPI's ombre tutorial, requires 2-3 dabbing applications to achieve smooth color transition. White stars applied via stamping plate (Born Pretty BP-L001) add patriotic detail without hand-painting precision requirements. Seal with Seche Vite Dry Fast Top Coat for 6-8 day wear on non-dominant hand.
Cost breakdown: Polish trio runs $8-12 per bottle at drugstore retailers, stamping plate costs $3-6, stamper and scraper kit approximately $8-12. Total investment around $35-45 for reusable supplies that work across multiple designs.
Difficulty level: Intermediate. The sponge gradient requires practice to avoid streaking, but mistakes blend easily during application. Stamping needs firm, even pressure—most beginners achieve clean transfers by the third attempt.
Key Finding: Proper nail preparation, including dehydrating and base coat application, is the most important factor in DIY manicure longevity — American Academy of Dermatology
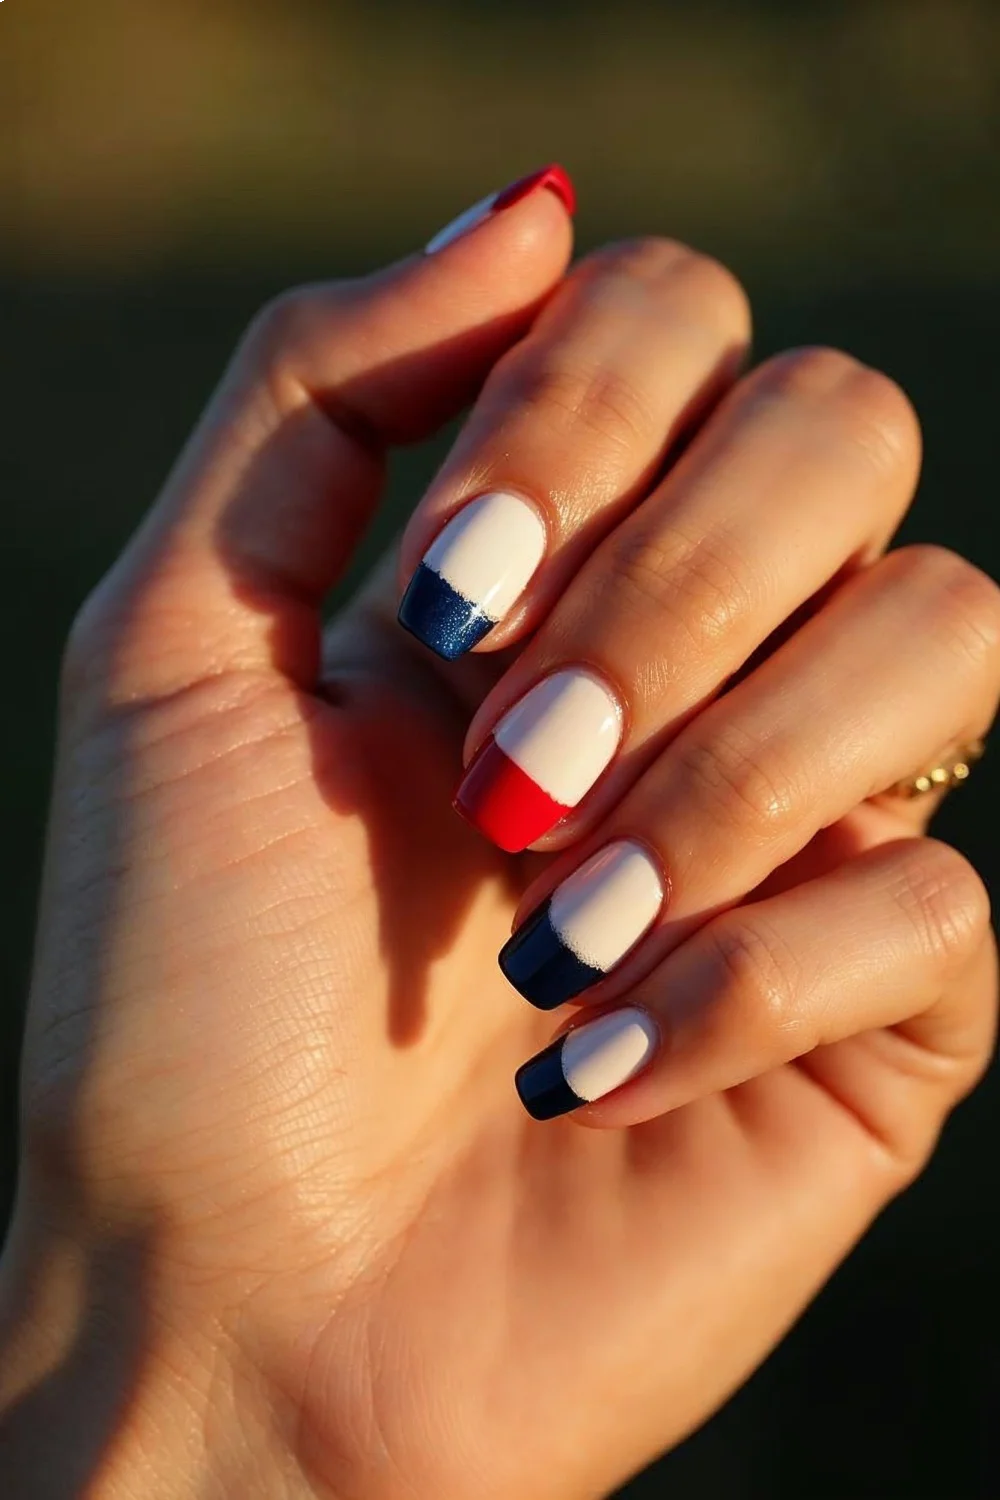
Minimalist French with Red Tip Accents
A sophisticated take on patriotic nails, this design modifies the classic French manicure by replacing white tips with alternating red and blue accent lines. According to industry guidance on French techniques, this stripped-back approach suits professional environments where full-coverage color schemes aren't appropriate. The design takes 25-30 minutes including cure time.
Application details: Apply Essie Ballet Slippers or OPI Bubble Bath as nude base. Use striping tape positioned 2-3mm from the free edge to create clean lines—Sally Hansen Insta-Dri in Rapid Red and Essie Aruba Blue work well for thin-line application. The technique from Byrdie's professional application guide emphasizes wiping excess polish from the brush before detail work to prevent flooding.
Best suited for: Round nail shapes and short nails where traditional French tips appear truncated. The thin accent lines elongate shorter nail beds visually.
Product alternatives: For gel application, use OPI GelColor in comparable shades with 30-second LED cure between layers. Gel versions extend wear to 10-14 days but require proper removal techniques to avoid damage.
Matte Navy with Chrome Star Accents
Chrome powder application transforms standard navy polish into dimensional patriotic nail art. This 2026 trending technique pairs matte base finishes with reflective metallic accents for modern contrast. Total application time approximately 40 minutes.
Technical process: Apply two coats OPI Lincoln Park After Dark or Essie After School Boy Blazer, allow 5-minute dry time. Apply matte top coat (Essie Matte About You or Sally Hansen Matte Maker) to all nails except accent fingers. On accent nails, before final top coat dries completely, apply silver chrome powder using silicone applicator with firm circular buffing motions. Layer standard glossy top coat over chrome to seal. Use small detail brush to apply white star decals or hand-paint using dotting tool.
Supply specifics: Chrome powder kits from Born Pretty or Modelones cost $6-10 and include applicator. Each jar provides 50+ applications. Matte top coats run $7-10 per bottle at drugstore retailers.
Common failure point: Chrome powder requires slightly tacky top coat for adhesion—fully dried top coat won't hold the powder. The window runs 20-40 seconds after application depending on humidity levels.
Red and White Gradient with Blue Glitter Tips
Vertical gradient designs using patriotic colors create eye-catching dimension without requiring steady-hand detail work. This design incorporates three trending elements: gradient blending, glitter placement, and the color palette popular in summer 2026. Application takes 50 minutes including dry intervals.
Step-by-step approach: Apply white base (Essie Blanc or OPI Alpine Snow) as foundation. Cut cosmetic wedge sponge into 1-inch strips. Apply vertical stripes of white and red polish (Sally Hansen Insta-Dri Rapid Red) directly to sponge, then dab onto nail in rolling motion. The technique detailed in OPI's ombre guide recommends 3-4 applications per nail, allowing 2-minute intervals between passes. Finish tips with blue glitter polish (Essie Set in Stones) concentrated at free edge, fading toward midpoint.
Cleanup strategy: Liquid latex barriers like Twinkled T Peel Off Base Coat ($9-12) applied around cuticles before sponging simplify cleanup. Alternatively, painter's tape creates similar barriers without potential skin sensitivity issues that latex products cause for some users.
Expected wear: Regular polish gradients chip first at free edges, typically showing wear by day 5-6. Applying thin coats and capping free edges extends this to 7-8 days.
Diagonal Stripe Flag Pattern
Geometric designs using striping tape create crisp lines that hand-painting can't match. This diagonal interpretation of flag stripes works across all nail lengths and pairs well with coffin or almond shapes where angular designs complement natural nail architecture. Total time investment 55 minutes including 10-minute intervals between color blocks.
Execution details: Apply base coat, then white base color (two thin coats). Once fully dry (5-7 minutes), apply 2mm striping tape diagonally across each nail—three strips per nail creates balanced proportions. Paint exposed sections with red polish (OPI Big Apple Red), remove tape immediately while polish remains wet to avoid peeling. Repeat process with blue sections (Essie Aruba Blue) using fresh tape application. This prevents color mixing and maintains clean edges.
Tool recommendations: Nail art striping tape from Winstonia or Born Pretty ($3-5 for multi-pack) offers better adhesion than craft tape. According to Cosmopolitan's essential tools guide, purpose-made nail striping tape uses gentler adhesive that won't lift base polish during removal.
Design variations: Alternate diagonal directions between hands for visual interest, or concentrate stripes on accent nails only with solid colors on remaining fingers.
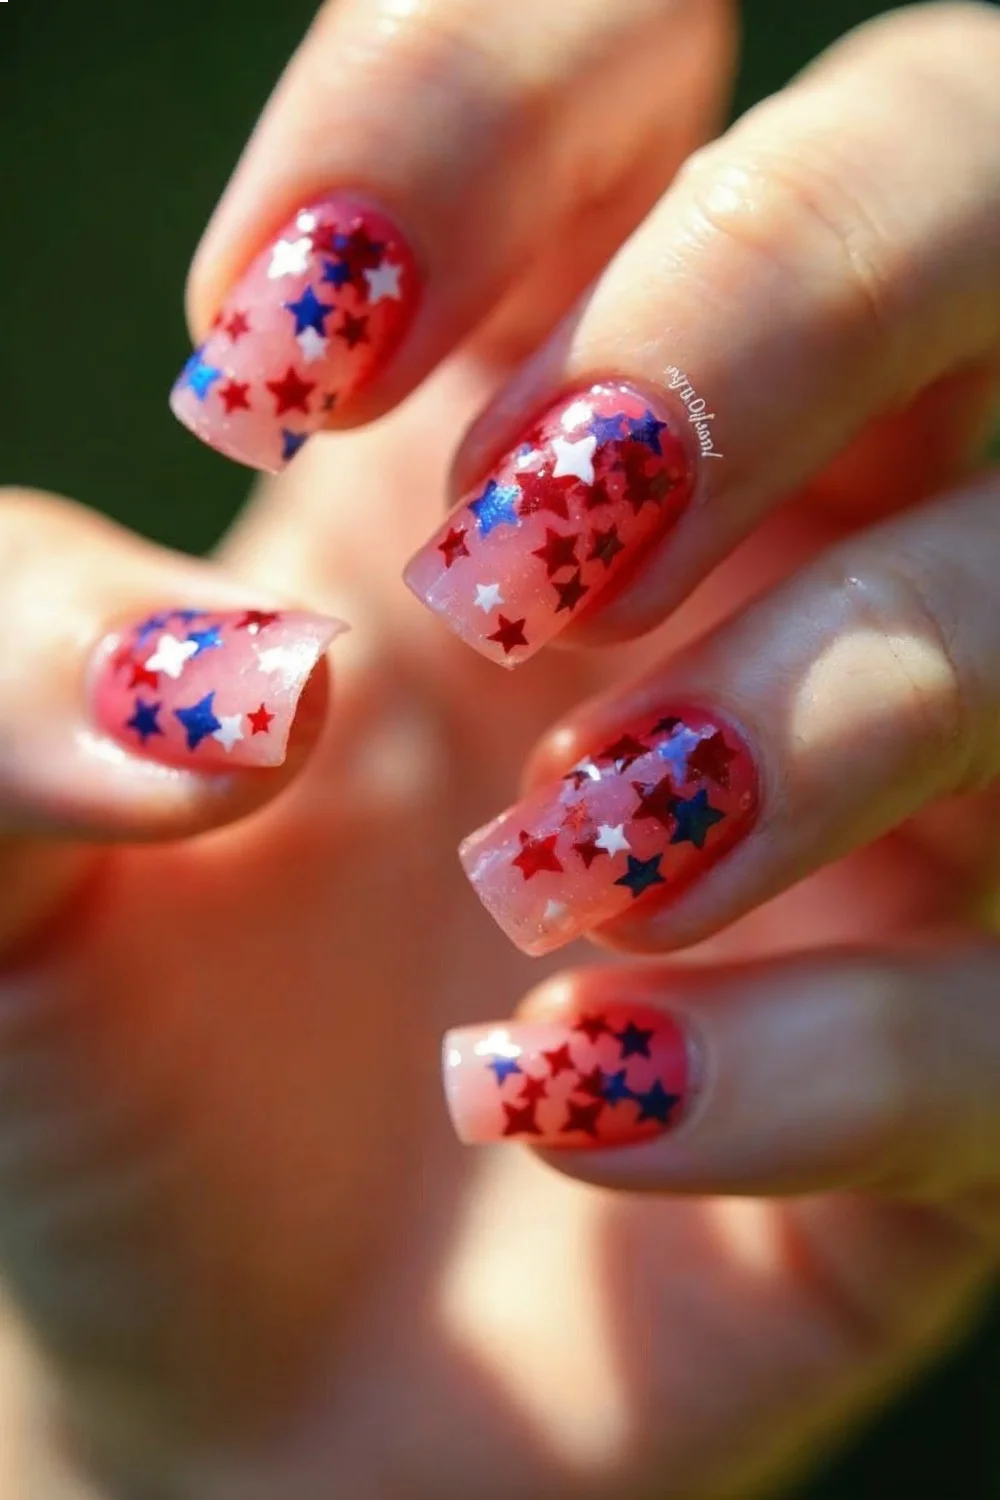
Scattered Star Confetti Design
Hand-placed star confetti or glitter creates playful patriotic nails without artistic skill requirements. This design gained traction in 2026 following the broader confetti nail trend featured across beauty publications. Application takes 35 minutes across both hands.
Material selection: Clear base coat or sheer pink polish provides neutral background. Star-shaped glitter confetti in red, white, and blue (available in multi-packs from Modelones or Daily Charme, $4-7) gets placed individually using orange wood stick or tweezers dipped in top coat. The placement process from professional nail art tutorials suggests working quickly while base coat remains tacky, positioning 4-6 stars per nail in random scatter pattern.
Application sequence: Apply base coat to all nails. Working one nail at a time, dip orange stick tip in wet base coat, use to pick up single confetti piece, place on nail surface. Repeat until desired density achieved. Seal with two coats glossy top coat (Essie Good To Go or Seche Vite), ensuring top coat fully encapsulates confetti edges to prevent snagging.
Durability note: Confetti designs show longer wear than hand-painted details because dimensional elements sit underneath protective top coat layers rather than relying on pigment adhesion alone.
Navy Base with White Dot Constellation
Dotting tools create precise circular patterns that mimic star constellations, offering patriotic symbolism beyond literal flag reproduction. This design works particularly well for beginners developing steady-hand control. Time requirement approximately 40 minutes.
Technical execution: Apply two coats navy polish (OPI CIA = Color is Awesome or Essie After School Boy Blazer), allow full dry time (8-10 minutes). Using small dotting tool (2mm tip) dipped in white polish (OPI Alpine Snow), create constellation patterns—Big Dipper, Orion's Belt, or random star cluster formations. Vary dot sizes by using different tool diameters: 2mm for stars, 1mm for connecting lines or smaller distant stars. Red dots placed sparingly add patriotic color without overwhelming the design.
Tool investment: Winstonia dotting tool sets with 5 different tip sizes cost $6-9 and work across countless nail art techniques. The tools clean easily with acetone and last indefinitely with basic care.
Skill progression: This design provides foundation practice for more complex dotting techniques. Consistent dot size requires even pressure and loading the same amount of polish per dot—muscle memory develops after completing 2-3 full manicures.
Half-Moon Patriotic Accent
Reverse French or half-moon designs using patriotic colors create sophisticated negative space nail art. The technique featured in modern French manicure variations adapts easily to holiday themes while maintaining wearable elegance. Application time 45 minutes including strategic dry intervals.
Process breakdown: Apply base coat and allow full dry. Place reinforcement stickers or striping tape in half-moon curve at nail base, 2-3mm from cuticle. Paint exposed nail with red or blue polish, remove guides immediately. Once first color dries completely (7-10 minutes), reverse the process: place guides along first color edge, paint half-moon section in contrasting shade (white or alternating red/blue). The guide removal timing from professional application tips specifies wet polish removal prevents jagged edges that occur when polish skins over.
Shape considerations: This design particularly flatters round nail shapes where curved guides echo natural nail architecture. On square or coffin nails, adjust guide placement to maintain proportional balance.
Supply notes: Reinforcement stickers from office supply stores cost under $3 and work identically to branded nail guides. Each sheet provides 250+ stickers—enough for years of designs.
Fireworks Splatter Effect
Splatter technique nail art mimics firework bursts using toothbrush or fan brush application. This high-impact design requires minimal skill but produces professional-looking results, trending across DIY nail art communities in 2026. Total time 30-35 minutes.
Application method: Apply base color—navy, white, or black work well as backgrounds. Dilute contrasting polish colors (red, white, blue) with 2-3 drops nail polish thinner to achieve fluid consistency. Dip old toothbrush or fan brush in diluted polish, hold 2-3 inches from nail, run finger along bristles to create fine splatter. Layer multiple colors for dimensional effect. This method creates random patterns that don't require precision placement.
Workspace preparation: Splatter technique creates mess beyond nail area. Work over newspaper or disposable surface, use liquid latex or tape on surrounding skin, and expect cleanup time. The chaos-to-result ratio makes this design particularly satisfying despite messiness.
Polish recommendations: Sally Hansen Insta-Dri formulas splatter well due to their already-thin consistency. OPI and Essie require more thinner for proper splatter fluidity.
Patriotic Plaid Pattern
Plaid designs using thin stripes create unexpected sophistication in patriotic color schemes. This intermediate-level design, adapted from fall plaid trends, requires steady hand control but produces unique results. Application time 60-70 minutes including dry intervals between stripe layers.
Stripe sequence: Apply white base, full dry time. Using thin striping brush (size 000 or 00), paint vertical red stripes spaced 2-3mm apart. Full dry. Paint horizontal red stripes at same spacing, creating grid. Full dry. Add thinner blue stripes offset between red stripes, both vertical and horizontal. The layering sequence prevents color mixing while creating dimensional plaid effect.
Brush specifications: Striping brushes from Winstonia, Born Pretty, or Twinkled T ($4-8 per brush) feature extra-long bristles that hold more polish and create smoother continuous lines than standard detail brushes. Clean immediately after use with brush cleaner or acetone to maintain bristle shape.
Reality check: This design typically requires 2-3 attempts before achieving clean lines. Most beginners find vertical stripes easier than horizontal due to natural hand movement patterns. Practice on paper or nail wheel before committing to actual nails.
Negative Space Stars and Stripes
Negative space techniques leave portions of natural nail visible, creating modern minimalist patriotic designs. This approach suits short nails where full coverage overwhelms limited canvas space. Time requirement 40 minutes.
Design structure: Apply quality base coat to protect natural nail. Using striping tape, mask off stripe patterns leaving gaps for natural nail to show through. Paint exposed sections in alternating red and blue. On accent nails, apply star-shaped nail vinyl stickers (available from Amazon or Daily Charme, $5-8 per pack), paint over with white or navy, remove stickers to reveal negative space stars. Seal entire design with glossy top coat.
Natural nail preparation: Negative space designs showcase natural nail condition. If nails show ridges or discoloration, address with strengthening treatments before attempting these designs. Ridge-filling base coats smooth texture without adding visible layers.
Design advantage: This technique uses significantly less polish than full-coverage designs, reducing dry time and allowing thinner layers that chip less readily at free edges.
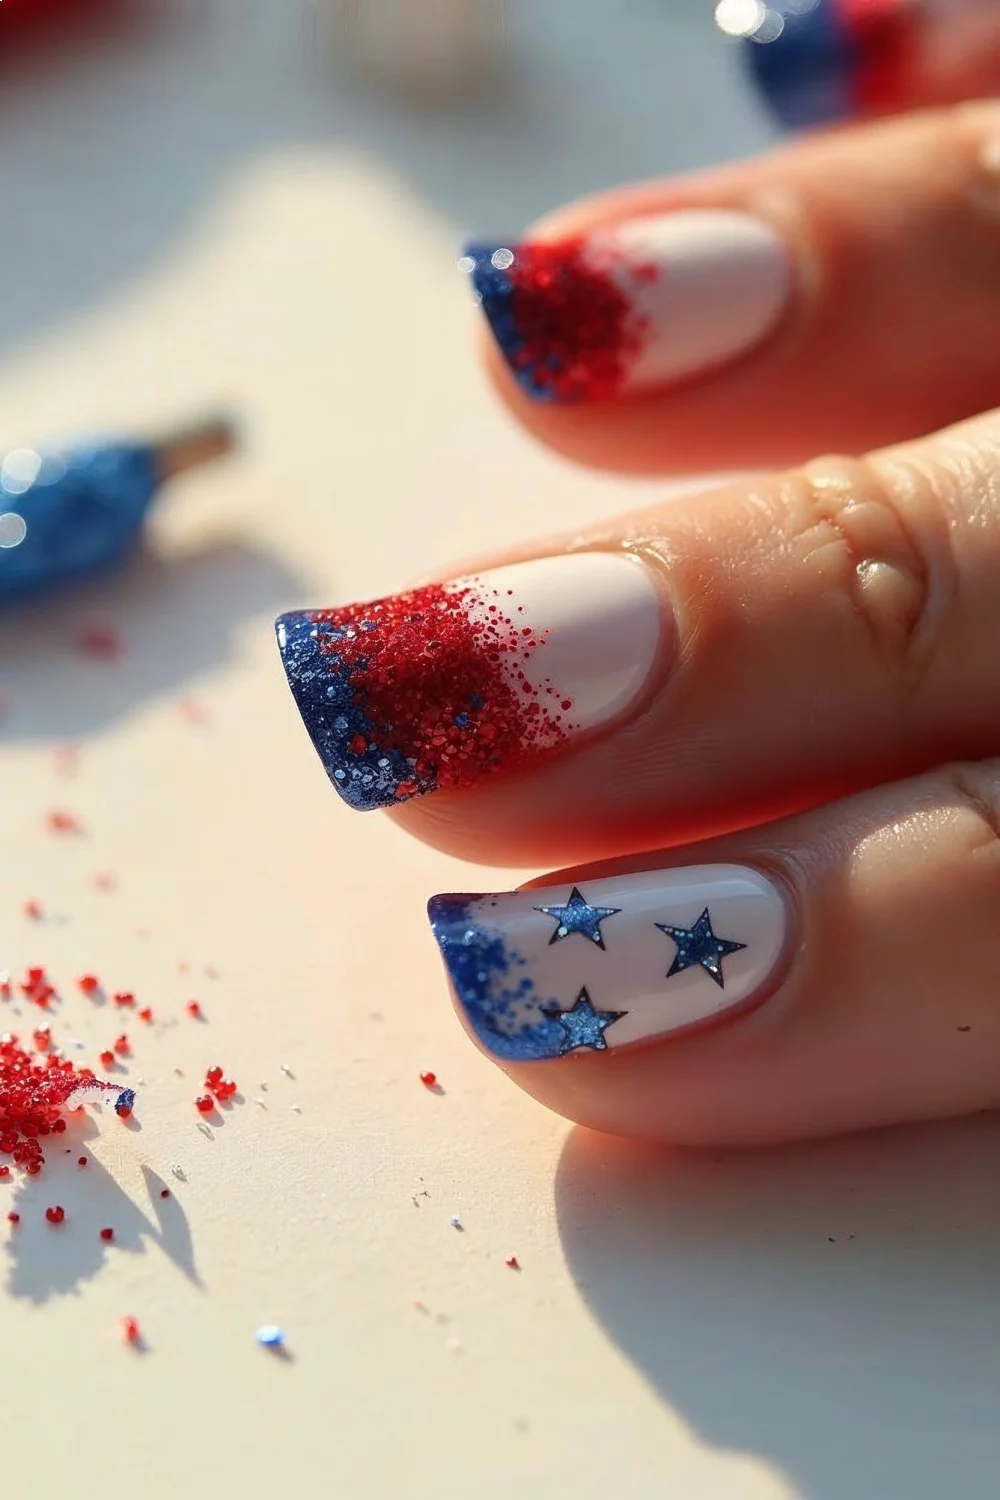
Glitter Gradient in Patriotic Colors
Glitter placement concentrated at nail tips creates built-in dimension and disguises tip wear that occurs first in most manicures. This beginner-friendly technique requires no special skills beyond standard polish application. Total time 35 minutes.
Gradient execution: Apply solid base color—white, nude, or navy. Once tacky but not fully dry, apply glitter polish (red, white, or blue glitter) in three passes: first covering just tip 2mm, second extending 4mm up nail, third reaching 6mm. This creates natural fade effect. Popular glitter polishes for this technique include Essie Set in Stones (blue), OPI Can't Be Beet! (red), and China Glaze Fairy Dust (white/iridescent).
Glitter removal consideration: Dense glitter requires proper removal technique—soak cotton pads in acetone, press onto nails, wrap in foil for 10 minutes before wiping. Scrubbing damages nail surface and rarely removes glitter effectively.
Wear pattern: Glitter at tips disguises natural tip wear, often extending perceived manicure life an extra 2-3 days compared to solid colors.
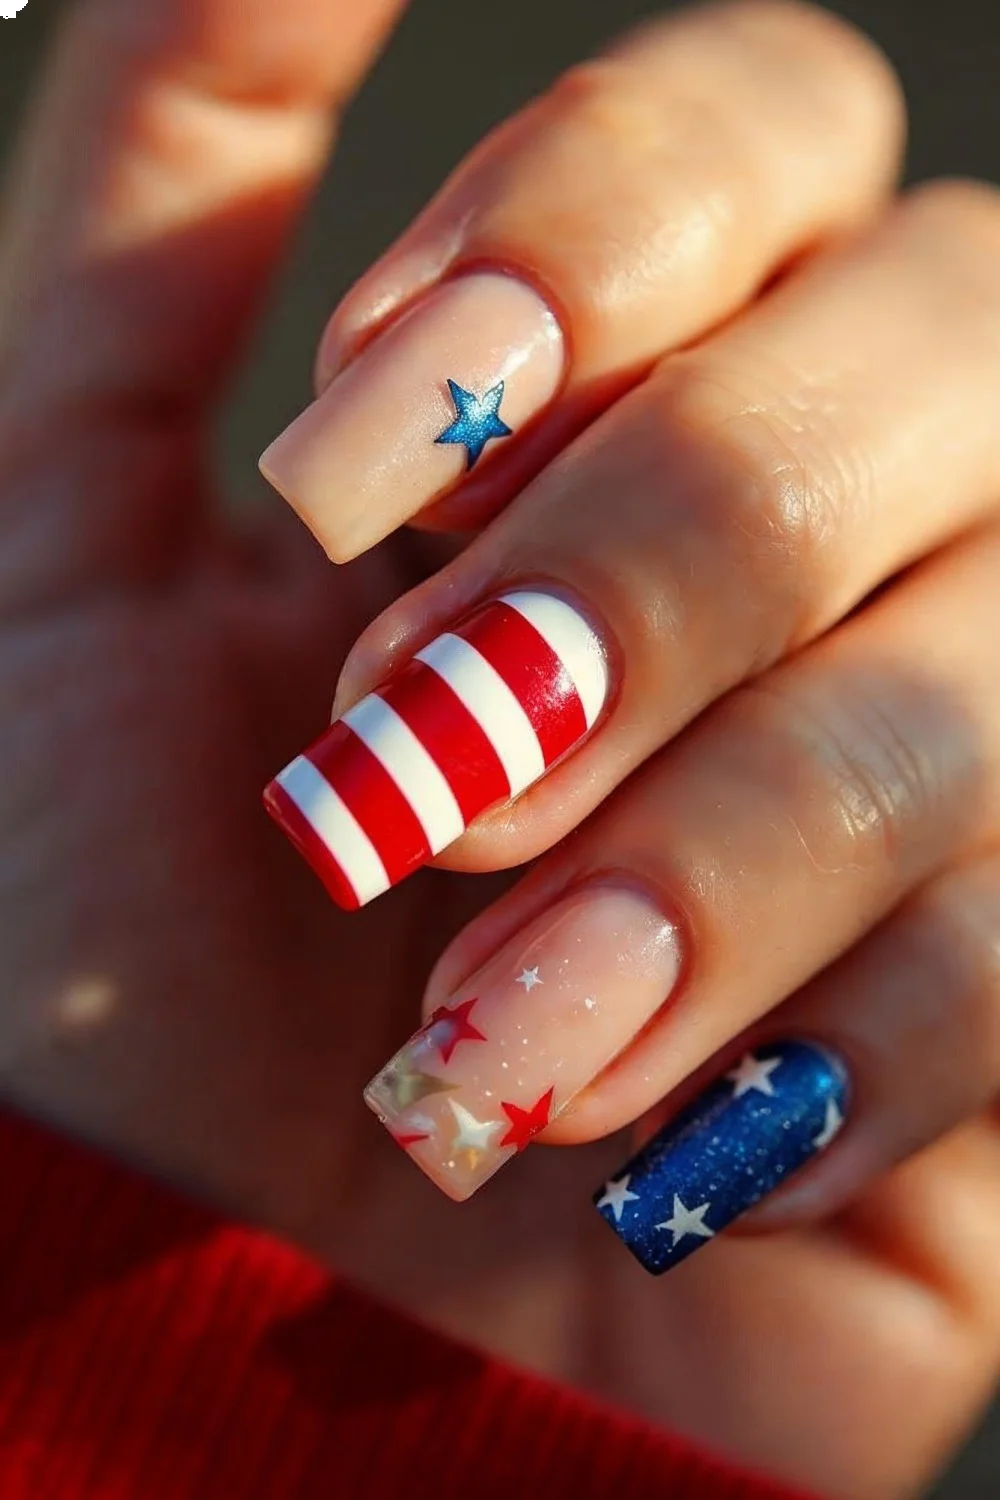
Single Accent Flag Nail
Full flag reproduction on single accent nail paired with coordinating solid colors creates focal point without overwhelming the entire manicure. This design suits professional environments where subtle patriotic themes are preferable. Application time 50 minutes.
Flag execution: Paint 8 nails in coordinating solids—mix of red, white, and navy across both hands. On accent nails (typically ring fingers), paint white base. Once dry, use thin striping brush to paint 4-5 horizontal red stripes across top three-quarters of nail. Paint blue rectangle in upper left corner, allow dry time, add white dots using smallest dotting tool to represent stars. Expect to paint 8-12 dots depending on nail size—precision matters less than consistent dot size.
Design scaling: Flag details must scale to nail size. On short nails, reduce stripe count to 3 and star count to 5-7. Attempting full-detail flag on small nail beds produces muddy results.
Alternative approach: Pre-made flag nail decals from Etsy sellers or Amazon ($4-7 per pack) provide clean flag details without hand-painting requirements. Apply over white base, seal with top coat.
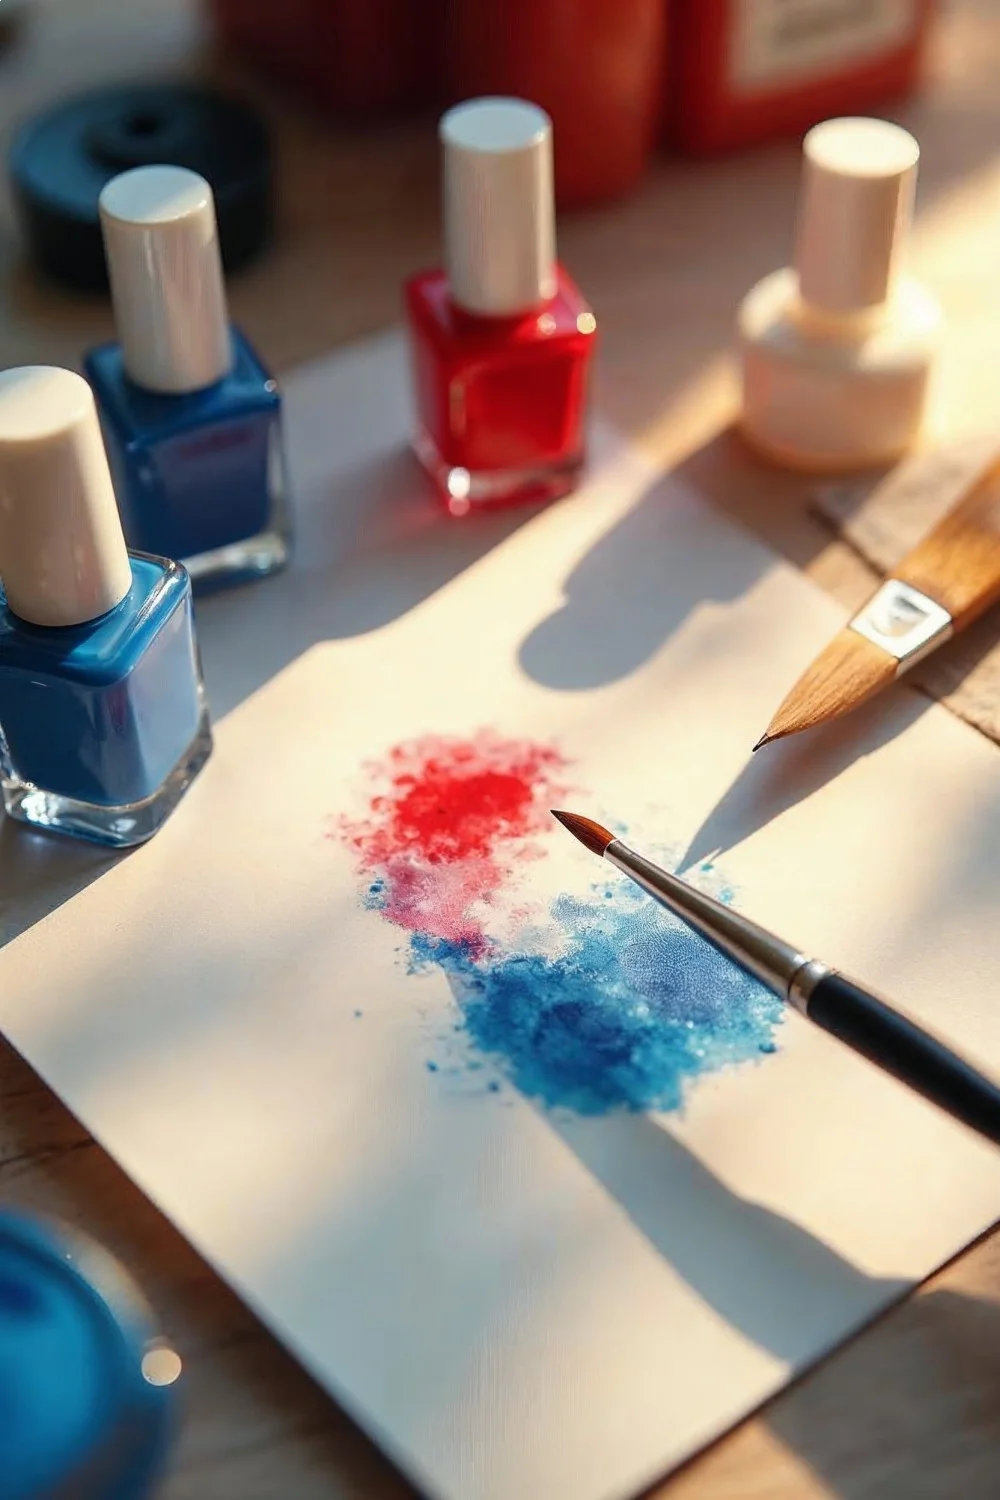
Watercolor Patriotic Wash
Watercolor effects using diluted polish create soft patriotic designs without hard edges. This artistic technique suits those wanting abstract interpretation rather than literal flag reproduction. Time investment 45 minutes including blending work.
Technique details: Apply white base coat. Dilute red, white, and blue polishes separately with nail polish thinner (Beauty Secrets thinner, $4-6 per bottle, works across brands). Using small detail brush, apply diluted colors in loose overlapping strokes, allowing colors to blend at edges. Work quickly while polish remains wet. The watercolor effect improves with practice as color placement becomes more intuitive.
Polish selection: Cream finishes dilute better than metallics or shimmers for watercolor technique. OPI, Essie, and Zoya formulas thin predictably—add thinner drop by drop to avoid over-diluting.
Sealing requirements: Watercolor designs require 2-3 coats top coat to even the surface texture created by diluted polish layers. The thinner application creates slightly textured finish that glossy top coat smooths.
Chrome Powder French with Red and Blue Accent
Chrome powder application on French tip designs creates modern metallic interpretation of classic patriotic colors. This 2026-trending technique combines two popular methods for maximum visual impact. Application time 55 minutes.
Layered application: Paint nails with nude or light pink base (Essie Ballet Slippers, OPI Bubble Bath). Apply no-wipe gel top coat to tips only, cure under LED lamp 30 seconds. While tacky, apply silver chrome powder to tips using silicone applicator, buff until reflective. Apply thin red or blue detail line at chrome border using striping brush—this defines the French edge while adding patriotic color. Seal entire nail with regular glossy top coat.
Gel vs regular polish: This technique requires gel top coat for chrome adhesion even if using regular polish base. The gel provides tacky surface chrome powder needs. Mixed-media approaches work well—no need for full gel manicure to incorporate chrome details.
Investment note: LED nail lamp ($15-25) and chrome powder ($6-10) represent one-time purchases that enable dozens of future designs beyond this specific patriotic application.
Design Selection Comparison Table
| Design Name | Difficulty | Time Required | Key Tools | Best For | Cost |
|---|---|---|---|---|---|
| Ombre Stars | Intermediate | 45 min | Makeup sponge, stamping plate | Almond/stiletto nails | $35-45 |
| Minimalist French | Beginner | 25 min | Striping tape | Professional settings | $20-30 |
| Matte with Chrome | Intermediate | 40 min | Chrome powder, matte top coat | Accent nails | $25-35 |
| Red/White Gradient | Beginner | 50 min | Cosmetic sponge | All nail lengths | $15-25 |
| Diagonal Stripes | Intermediate | 55 min | Striping tape, thin brush | Coffin/almond shapes | $15-25 |
| Star Confetti | Beginner | 35 min | Orange stick, confetti | Short nails | $15-25 |
| Dot Constellation | Beginner | 40 min | Dotting tool set | All shapes | $20-30 |
| Half-Moon Accent | Intermediate | 45 min | Reinforcement stickers | Round nails | $15-20 |
| Fireworks Splatter | Beginner | 30 min | Old toothbrush, thinner | Casual settings | $10-20 |
| Patriotic Plaid | Advanced | 70 min | Thin striping brush | Long nails | $20-30 |
| Negative Space | Intermediate | 40 min | Vinyl stickers, tape | Short nails | $20-30 |
| Glitter Gradient | Beginner | 35 min | Glitter polish | All lengths | $15-25 |
| Accent Flag | Intermediate | 50 min | Thin brush or decals | Professional settings | $15-25 |
| Watercolor Wash | Intermediate | 45 min | Polish thinner, detail brush | Artistic expression | $20-30 |
| Chrome French | Advanced | 55 min | LED lamp, chrome powder, gel top coat | Trendy, dramatic looks | $40-55 |
How to Choose Your Fourth of July Nail Design
Selecting appropriate patriotic nail art depends on multiple factors beyond aesthetic preference. Nail shape significantly impacts design success—geometric patterns like diagonal stripes and plaid work best on almond or coffin shapes with adequate canvas space, while shorter round shapes suit simplified designs like confetti placement or single accent nails. According to industry guidance from professional nail artists, attempting to scale complex designs onto short nail beds produces cluttered results that diminish rather than enhance the intended effect.
Skill level assessment matters more than most beginners acknowledge. Designs rated beginner typically require only standard polish application skills—if you can paint within your nail edges with minimal cleanup, you can execute beginner designs successfully. Intermediate designs introduce one new technique (stamping, chrome powder, or precise tape placement) that requires practice but remains accessible. Advanced designs combine multiple techniques requiring coordination and timing—expect several attempts before achieving desired results.
Time availability influences design selection practically. Quick designs under 35 minutes suit those needing rapid results, while complex patterns requiring 60+ minutes work better when scheduled specifically rather than attempted during compressed timeframes. Rushed application causes errors that compromise wear time, according to professional application guidance emphasizing proper dry time between layers.
Environment context determines appropriateness—professional workplaces often require subtle designs like minimalist French or single accent nails, while casual summer gatherings accommodate bold splatter effects or full glitter coverage. Consider where nails will be seen most frequently during the wear period.
Product investment varies significantly across designs. Beginning with designs using supplies you already own ($15-25 range) makes sense before investing in specialized tools like LED lamps or chrome powders. Building nail art supply collection gradually based on designs you actually complete prevents accumulating unused products.
Maximizing Wear Time for Fourth of July Nails
Extending manicure longevity requires attention to preparation steps that many DIY tutorials underemphasize. Nail preparation impacts wear duration more significantly than polish brand selection, according to dermatological guidance. The process begins with thorough cuticle work—gently push back cuticles with orange wood stick after showering when tissue is softened, remove loose tissue, and ensure polish will contact nail plate directly rather than sitting atop cuticle remnants that peel away within days.
Surface preparation determines adhesion. Lightly buff nail surface with 240-grit file to remove shine and create texture for base coat grip—this isn't aggressive filing that thins nails, just surface scratching. Wipe nails with rubbing alcohol or acetone-dampened lint-free wipe to remove oils. Essie's base and top coat guide emphasizes this dehydration step as critical for professional-length wear from home applications.
Base coat selection matches nail condition. For nails prone to peeling or chipping, use strengthening base coat formulations containing nylon fibers or adhesive resins. For stain prevention under dark colors, use dedicated stain-blocking base coats. Skipping base coat allows polish to adhere directly to nail oils, peeling within 1-2 days regardless of top coat quality.
Key Finding: According to Essie's base and top coat application guide, proper base coat application and edge-capping technique are the primary factors determining DIY manicure longevity
Application thickness matters contrary to common belief that thicker coats provide better coverage. Thin coats dry thoroughly, allowing layers to bond chemically. Thick coats skin over while remaining liquid underneath, creating layers that separate under normal hand use. Apply 2-3 thin coats rather than 1-2 thick applications.
Edge capping prevents the most common chipping pattern. After painting nail surface, swipe brush tip along free edge to seal. This creates continuous polish barrier without exposed edge where water and impact compromise adhesion. The technique applies to base coat, color coats, and top coat layers.
Top coat application significantly extends wear when done correctly. Apply within 5-7 minutes of final color coat for optimal bonding, or wait 24 hours if applying later—the intermediate window when polish is partially cured prevents proper top coat adhesion. Quick-dry formulations like Seche Vite or Out the Door create hard protective shell resisting chips and scratches. Reapply thin top coat layer every 2-3 days to maintain protective barrier.
Post-application care includes avoiding water exposure for 2-3 hours after completion to allow full cure. Wear gloves during dish washing and cleaning—extended water exposure and harsh chemicals break down polish faster than normal wear. Apply cuticle oil daily to maintain flexibility in polish and prevent brittleness that leads to cracking.
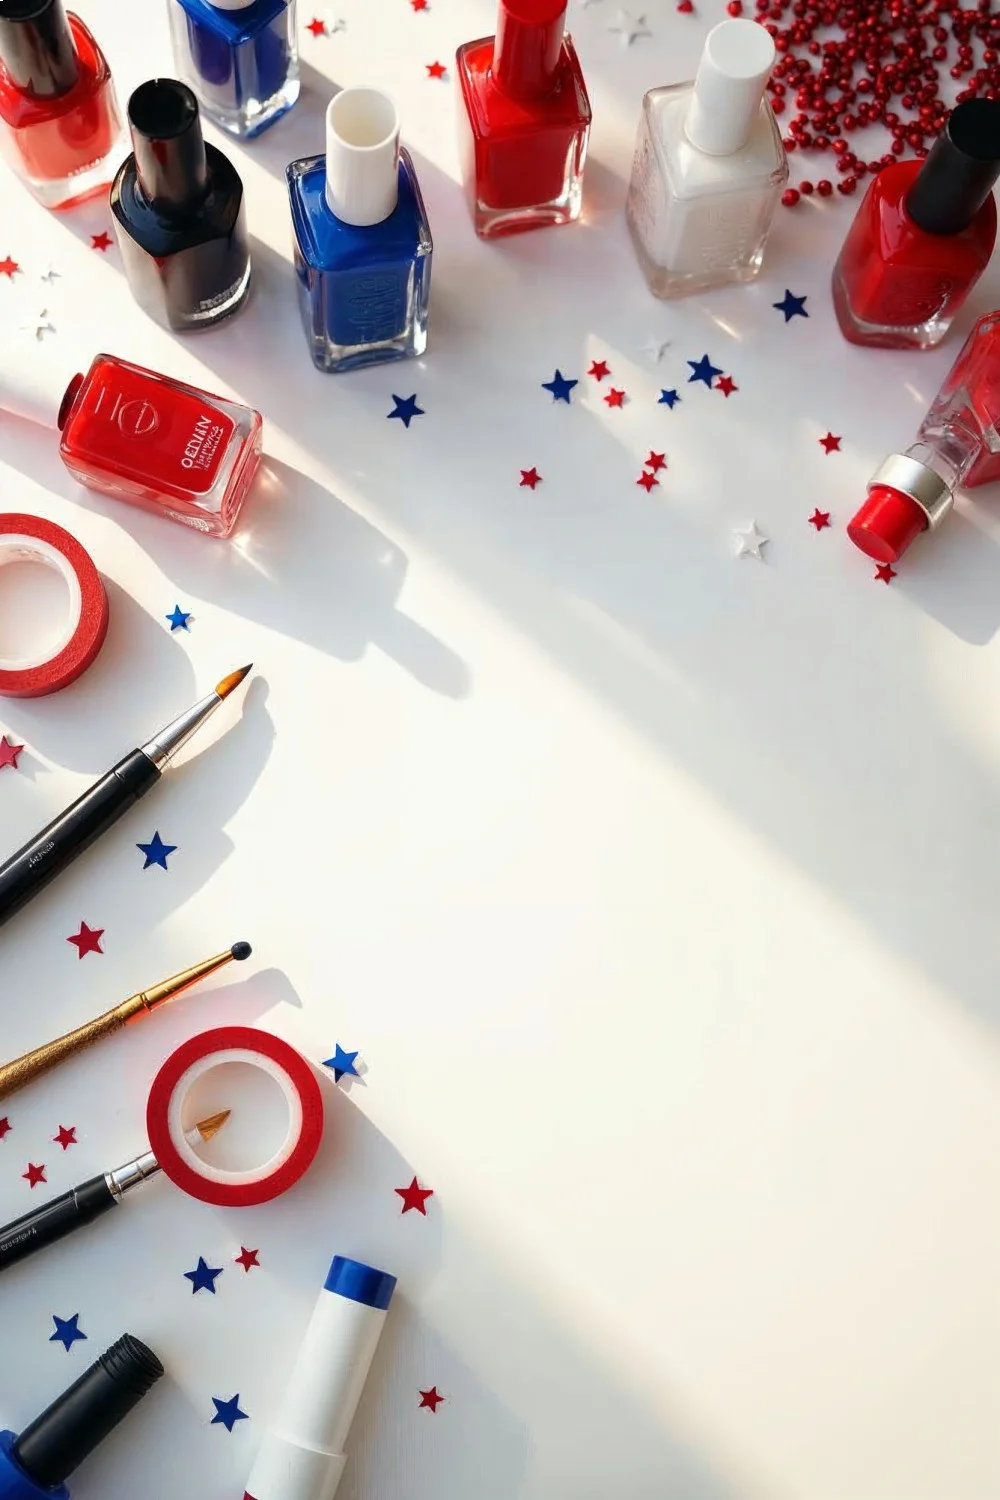
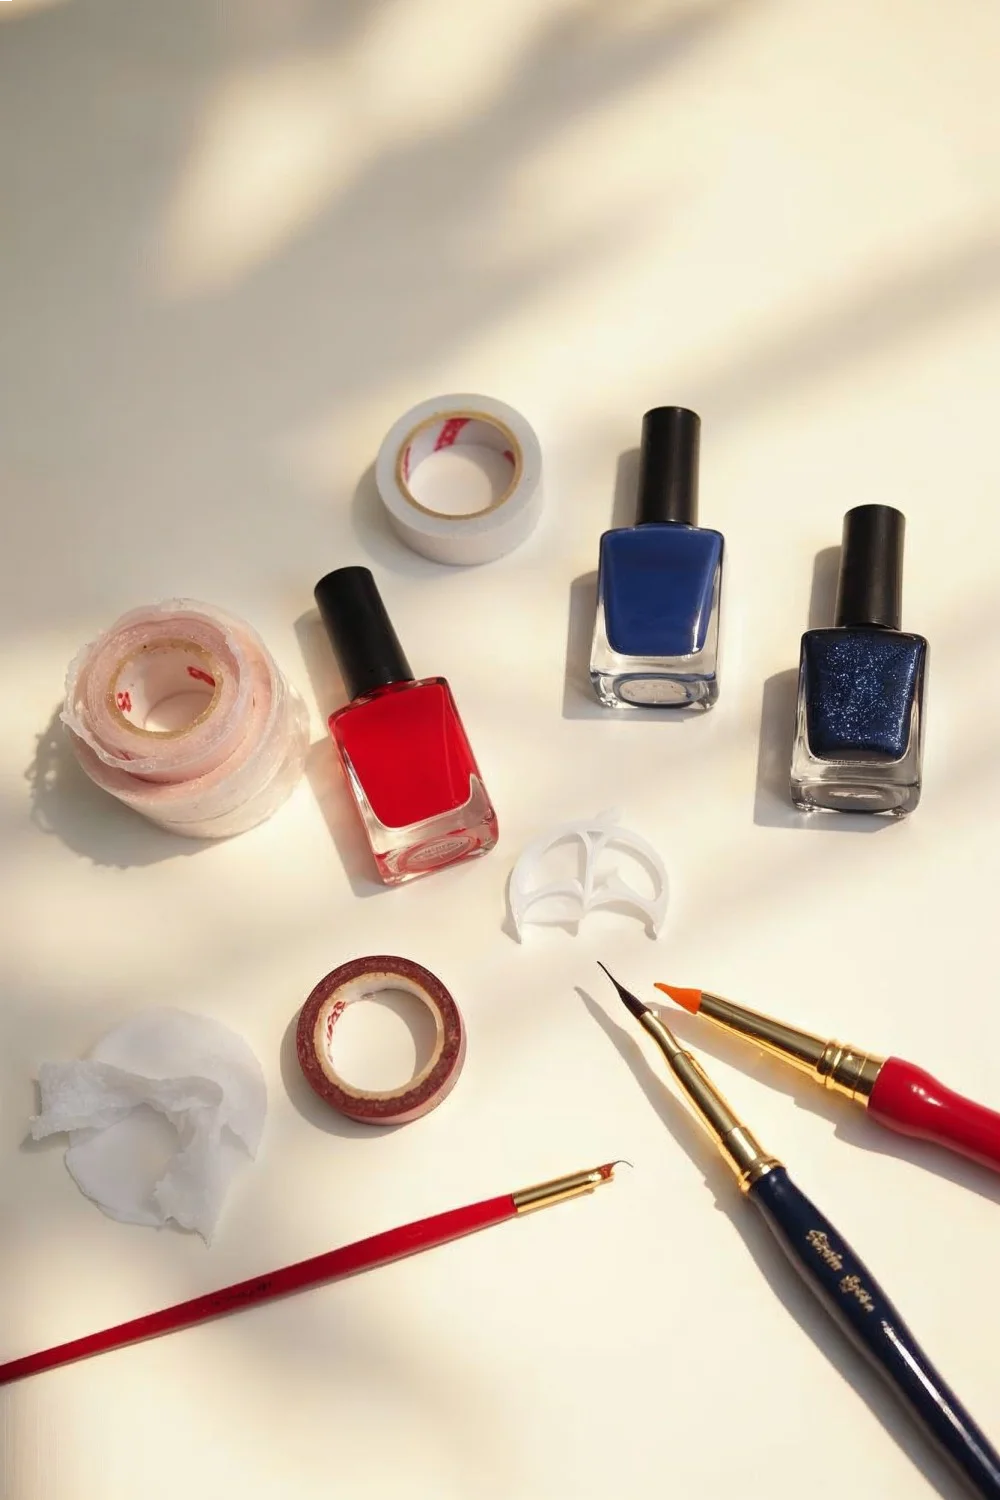
Essential Tools for DIY Fourth of July Nail Art
Building functional nail art tool collection requires identifying truly necessary items versus aspirational purchases that remain unused. Based on the 15 designs outlined, certain tools appear repeatedly while others serve single-purpose roles. According to Cosmopolitan's essential nail art tools guide, most DIY nail artists use a portion of their tool collection regularly while the remainder sits dormant.
Base necessities include quality base and top coats—these impact results more than color polish selection. Base coat prevents staining and provides adhesive surface. Top coat prevents chips and adds shine. Budget allocation here matters: invest in proven performers like Seche Vite top coat ($8-10) rather than drugstore alternatives that yellow or chip within days.
Polish collection for patriotic designs requires red, white, and navy blue at minimum. Sally Hansen Insta-Dri line offers quick-dry formulas reducing smudge risk ($5-7 per bottle). OPI and Essie provide broader color ranges with reliable formulas ($9-12 per bottle). For temporary holiday designs, drugstore options suffice; for colors worn repeatedly, salon brands justify higher cost through better application and wear.
Detail tools enable precision work hand-painting can't achieve. Dotting tool set with 5 tip sizes ($6-9) creates dots, drags colors, and places small elements. Thin striping brush size 00 or 000 ($4-8) paints lines, details, and lettering. Small detail brush set ($8-12) handles everything between. Clean brushes immediately after use with brush cleaner or acetone to maintain bristle shape and prevent hardening.
Striping tape ($3-5 per multi-pack) creates clean lines without steady-hand requirements. Apply after base color dries completely, paint over exposed sections, remove while polish remains wet. Reinforcement stickers from office supplies serve identical purpose at fraction of branded nail guide cost.
Cleanup tools minimize the inevitable polish migration onto surrounding skin. Small cleanup brush dipped in acetone erases errors ($3-5). Cotton swabs work but lack precision. Liquid latex barriers like Twinkled T Peel Off Base Coat ($9-12) prevent mistakes rather than correcting them—paint around nails before polishing, peel away after design completion.
Optional advanced tools include stamping kit with plates, stamper, and scraper ($15-25) for precise pattern transfer; chrome powder and applicator ($6-10) for metallic finishes; and LED lamp ($15-25) if incorporating any gel elements. These expand design possibilities but aren't required for majority of patriotic nail art.
Storage solutions prevent tool loss and polish degradation. Store polishes upright in cool, dark location—heat and light exposure thickens formula prematurely. Keep tools in designated case or drawer to prevent loss and maintain cleanliness. Replace brushes showing frayed bristles or hardened tips rather than fighting tools that no longer perform properly.
Common Application Mistakes and Solutions
Identifying failure patterns in DIY nail art helps troubleshoot disappointing results and prevent repeated errors. Most issues stem from preparation shortcuts or application timing rather than lack of artistic skill. Industry guidance from professional nail technicians emphasizes that methodical process outweighs natural ability in achieving consistent results.
Immediate chipping at free edges indicates inadequate edge capping or thick application. The solution requires painting thin coats and deliberately swiping brush across nail edge during base coat, color, and top coat application. This seals the vulnerable edge where impact and water exposure cause most damage. Skipping edge capping saves 15 seconds per nail but costs days of wear time.
Smudging during application results from insufficient dry time between coats. Touching nails that appear dry but remain wet underneath creates dimples, prints, or complete design destruction. The fix requires patience—allow 2-3 minutes between color coats, 5-7 minutes before top coat. Quick-dry drops or spray accelerate the process for time-constrained applications.
Bubbles in dried polish indicate one of three causes: shaking polish bottle before use (roll between palms instead), applying thick coats that trap air, or painting in humid environments. For humidity issues, run air conditioning or work in climate-controlled space. For thickness issues, thin coats prevent bubble formation even if requiring additional layers for opacity.
Striping tape leaving jagged edges happens when tape remains during drying. The solution requires removing tape immediately while polish remains wet and fluid. Wet polish flows slightly after tape removal, creating smooth edges. Dried polish tears away with tape, leaving rough lines.
Stamping designs failing to transfer indicates either too-thin stamping polish, insufficient scraping pressure, or wrong scraper angle. Born Pretty and Konad stamping polishes formulate specifically for transfer—regular polish rarely works reliably. Scraping at 45-degree angle with firm, even pressure captures design cleanly.
Chrome powder appearing patchy rather than reflective signals incomplete buffing or not enough powder applied. The fix requires generous powder application with firm circular buffing motion until entire nail shows mirror finish. Skimping on powder saves pennies but ruins results.