Round Nail Shape: Complete Filing & Styling Guide
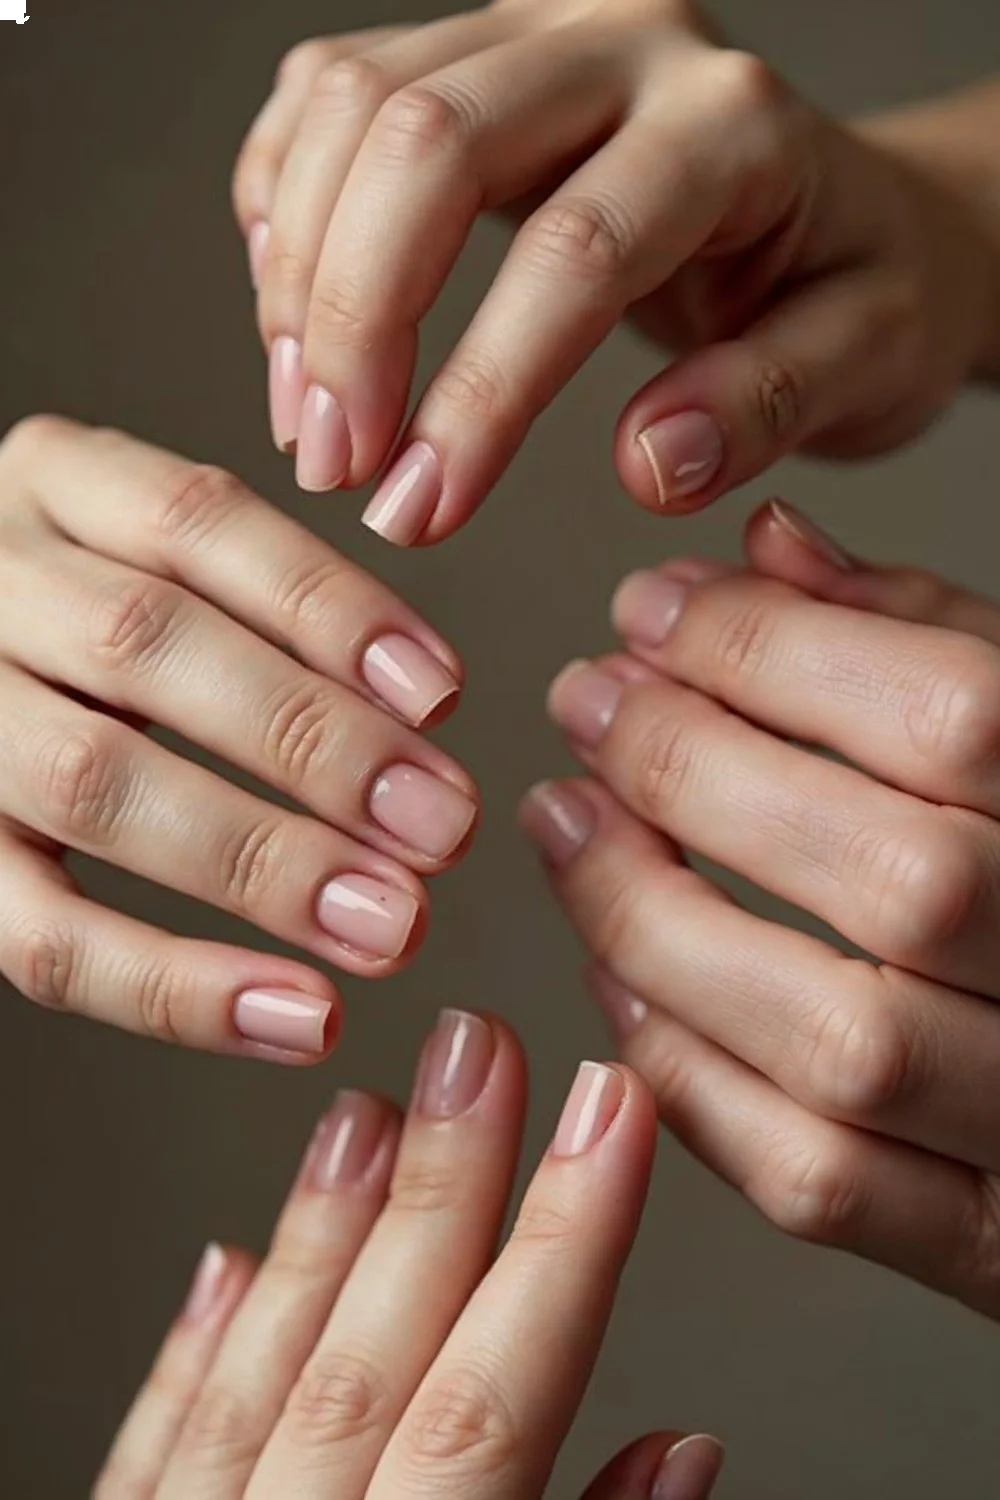
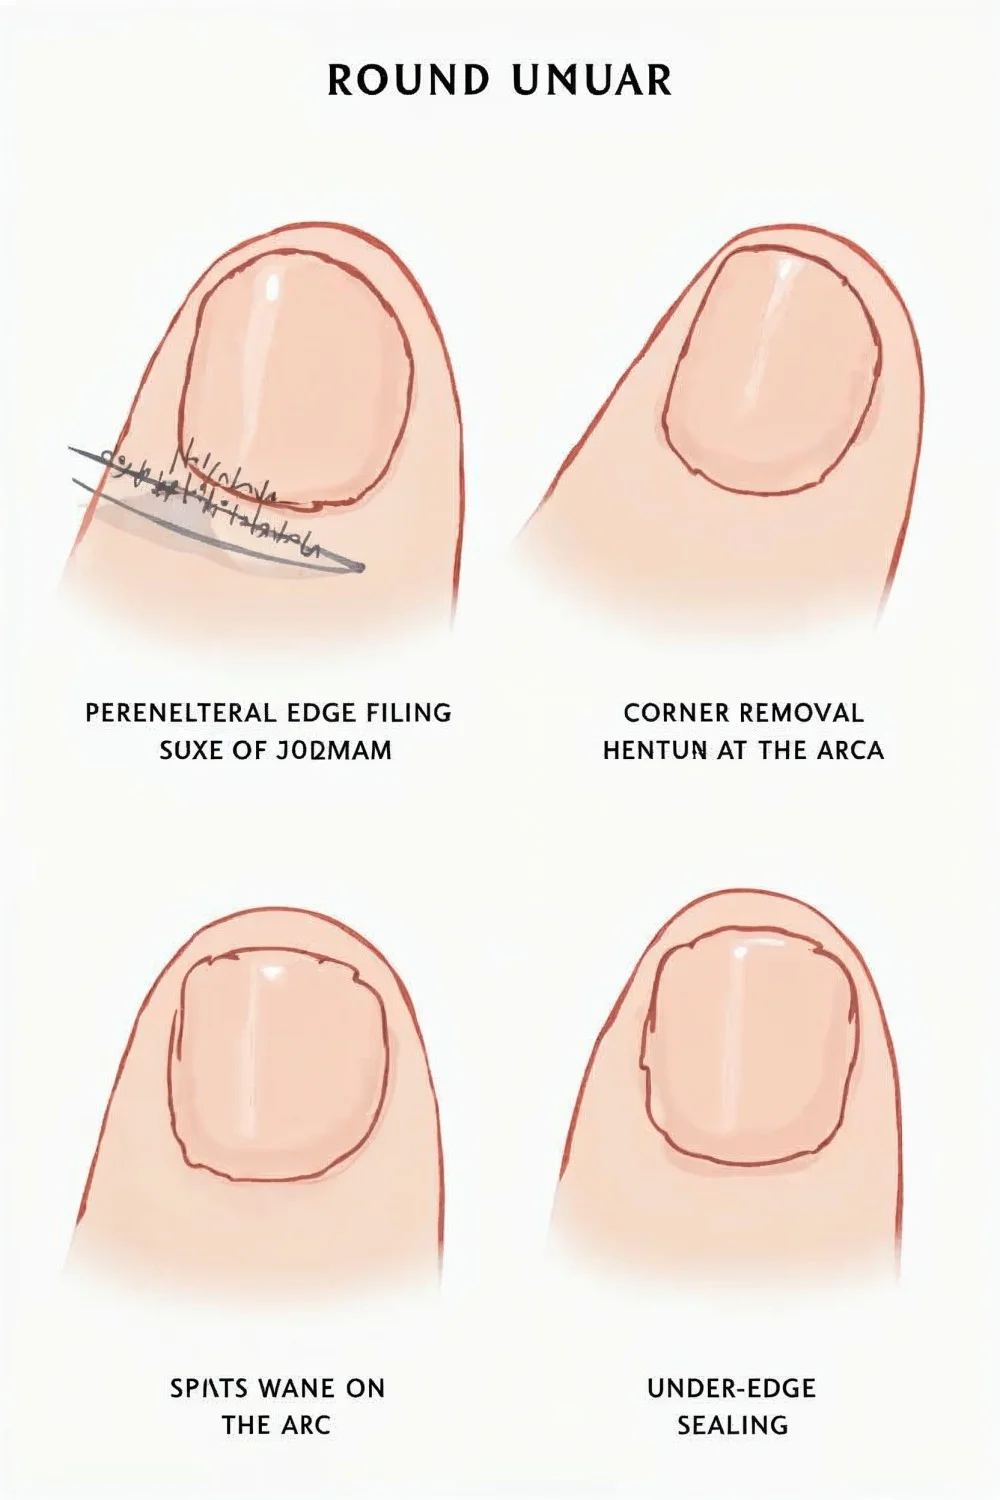
The round nail shape is achieved by filing the nail straight across, then gently rounding the corners to mirror the natural curve of your cuticle.

The round nail shape is achieved by filing the nail straight across, then gently rounding the corners to mirror the natural curve of your cuticle. It sits flush with or slightly past the fingertip, making it the most low-maintenance shape for everyday wear and hands-on work.
- Round nails suit shorter nail beds and wider fingers by creating visual balance without harsh angles
- A 180-240 grit glass or crystal file prevents splitting better than emery boards for curved edges
- Filing in one direction from sidewall to center prevents layering separation and micro-tears
- This shape requires the least reinforcement for natural nails prone to breakage
- Round shapes work universally with gel, acrylic, and natural nails without length requirements
Round nails have remained relevant across decades because they prioritize nail health over fleeting aesthetics. According to the American Academy of Dermatology's nail care guidance, following the natural contour of your nail reduces stress points that lead to breakage—making round the default recommendation for anyone rebuilding nail strength. Unlike almond nail shape or coffin nails, which demand specific length and structural integrity, the round shape works at any length and flatters hand types that struggle with more dramatic silhouettes.
Key Finding: Proper filing technique that follows the natural nail curve minimizes stress fractures and splitting, making round nails the most structurally sound shape for natural nails—American Academy of Dermatology
1. Understanding Round vs. Rounded Square: The Geometry Matters
The round nail shape follows a continuous arc from sidewall to sidewall, eliminating all sharp corners and creating a dome-like profile when viewed from above. This differs fundamentally from rounded square (or "squoval"), which retains a flat free edge with softened corners rather than a true curve.
The structural difference impacts durability. Sharp transitions—even softly rounded ones—create stress concentration points where the nail plate changes direction. Physics dictates that force distributes evenly across curves but concentrates at angles. When you type, grip objects, or apply pressure to nail tips, rounded squares experience concentrated stress at the corner-to-edge transition. Pure round nails disperse that force across the entire curved surface.
Sally Hansen's nail shape guide notes that round nails suit "active lifestyles" specifically because this geometry resists chipping from repeated impact. If you work with your hands—typing, healthcare, childcare, food prep—the absence of corner points means fewer snag opportunities.
Visually, round nails read as shorter even at identical free-edge length compared to square shapes. The continuous curve draws the eye inward rather than emphasizing width. For wide nail beds or shorter fingers, this creates perceived length without actual millimeters. Conversely, very narrow nail beds can look overly feminine or childlike with round tips—in those cases, a soft square may provide better visual balance.
2. Required Tools: Grit Numbers and Material Science
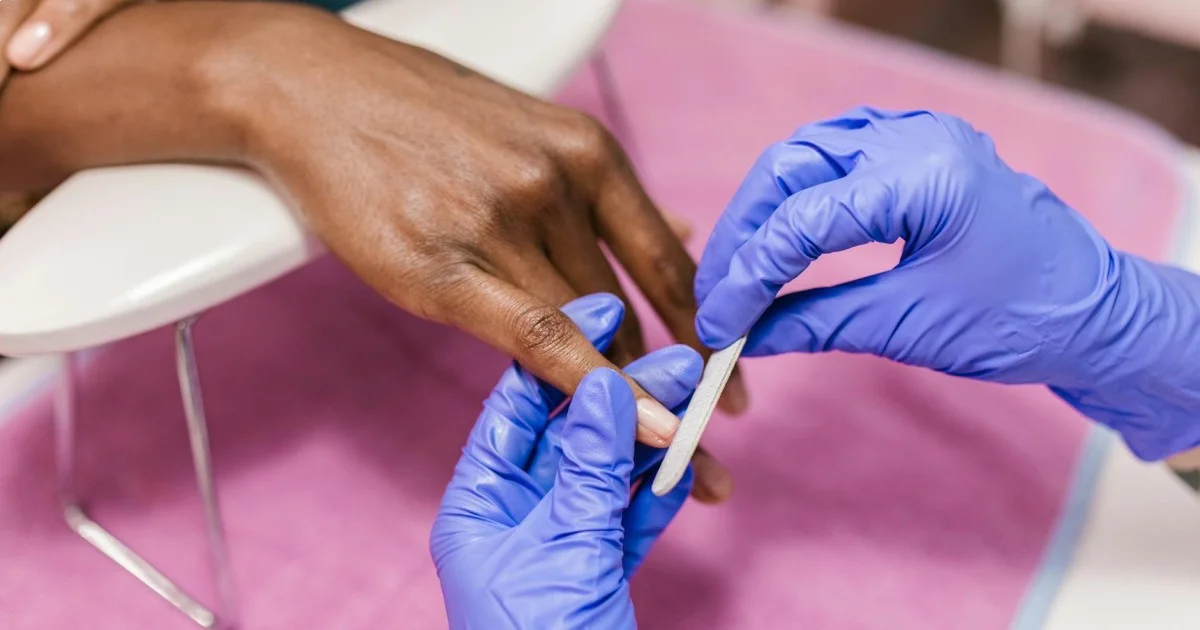
Achieving a clean round shape requires the right file grit and material composition. Glass and crystal files in the 180-240 grit range work best for shaping natural nails, while emery boards—though cheaper—create microscopic tears that weaken the nail plate over time.
Grit numbers indicate abrasive particle density per square inch. Lower numbers (80-100) are coarser and used for acrylic reduction; higher numbers (180-240) smooth natural nails without excessive friction. According to Allure's guide to nail files, glass files maintain consistent grit because the abrasive is etched into the surface rather than glued particles that wear down.
Essential filing tools:
| Tool | Grit Range | Best For | Typical Cost |
|---|---|---|---|
| Glass nail file | 180-240 | Natural nail shaping, smooth curves | $6-12 |
| Crystal nail file | 240 | Finishing edges, sensitive nails | $8-15 |
| Ceramic file | 180 | Gel polish removal, gentle shaping | $10-18 |
| Metal emery board | 100-180 | Emergency filing (not ideal) | $2-4 |
| Buffer block (4-sided) | 400-4000 | Smoothing ridges, shine | $3-6 |
Glass files work bidirectionally without damage because the etched surface seals the nail edge with each stroke. Emery boards require unidirectional filing—always sidewall to center—to prevent layering separation. The glued abrasive particles on emery boards lift nail layers when dragged backward, creating the white flaking you see after aggressive filing.
For gel or acrylic nails, you'll need a 100-150 grit file for initial shaping, then graduate to 180-240 for smoothing. The thicker product layer tolerates coarser abrasion than natural nails. If you're working with gel vs acrylic nails, the filing approach differs slightly—gel requires more pressure due to flexibility, while acrylic files faster but generates more heat.
3. Pre-Filing Nail Preparation: Why Hydration Levels Matter
Filing on dry nails versus freshly washed nails produces different results due to keratin's hygroscopic nature. Nail plates absorb water quickly, swelling the keratin structure and making edges more prone to tearing when filed. Always file nails completely dry—ideally 2-3 hours after handwashing or showering.
The American Academy of Dermatology recommends removing all polish before shaping because you cannot accurately assess nail thickness and structural weak points through colored layers. Acetone-based removers dehydrate nails temporarily, which actually creates ideal filing conditions—the rigid, dry plate files cleanly without splitting.
If you've just completed gel nail removal at home, wait 24 hours before aggressive filing. The acetone soaking process temporarily weakens the nail plate's intercellular bonds. Filing immediately afterward can cause excessive thinning, particularly at the stress points near sidewalls.
Pre-filing checklist:
- Remove all polish, gel, or enhancements completely
- Wash hands and let nails air-dry for 2+ hours
- Push back cuticles gently (never cut—increases infection risk)
- Check for splits, cracks, or weak points that need reinforcement
- Wipe nails with rubbing alcohol to remove oils
Oily nail beds resist polish adhesion but don't significantly impact filing. However, hand lotion or cuticle oil makes the file slip rather than grip, requiring more passes and increasing heat friction. Save moisturizing for after shaping. For more comprehensive preparation guidance, reference healthy nail care tips that address systemic nail health beyond just filing technique.
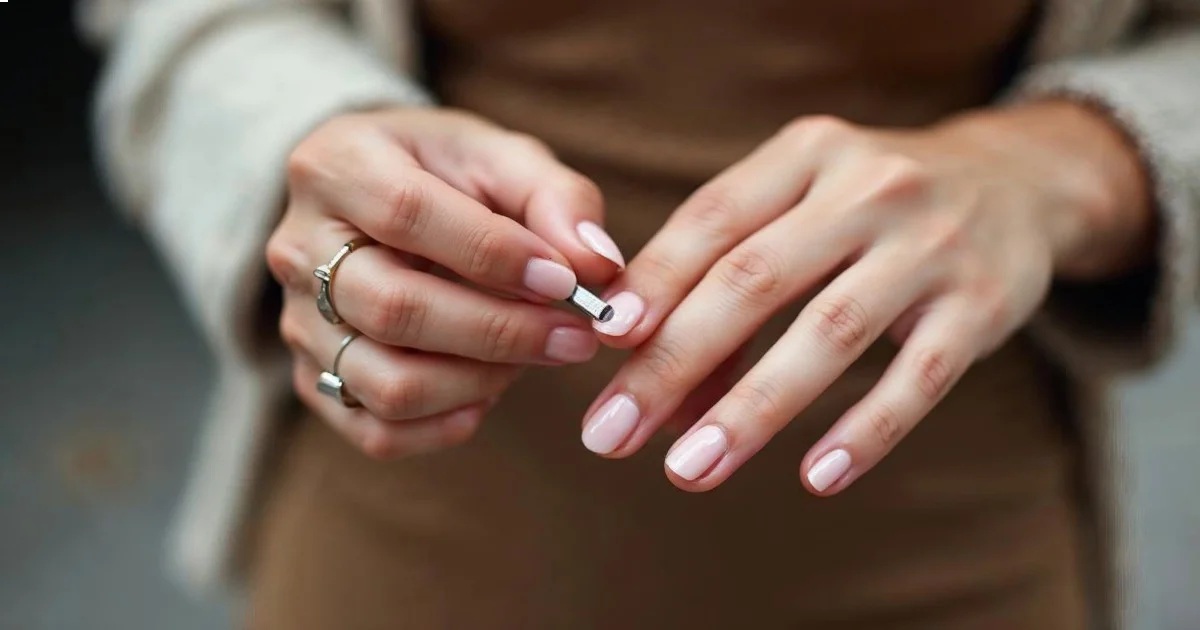
4. The Filing Motion: Directional Technique Breakdown
The correct filing motion for round nails moves in one direction—from the outer sidewall toward the center apex—on each side, never sawing back and forth. This unidirectional approach seals the keratin layers rather than lifting them, preventing the white split-looking edges that indicate structural damage.
Start with the file perpendicular to the nail edge, not angled upward. Tilting the file up creates a beveled edge that looks thinner but weakens structural integrity. Hold the file parallel to your work surface and make contact with the entire edge simultaneously. According to Byrdie's professional filing tutorial, most filing mistakes stem from incorrect angle rather than motion speed.
Step-by-step filing sequence:
- Rough length reduction: If cutting length first, use nail clippers and leave 2mm more than your target length. Clipping creates micro-cracks that need filing away. Cut straight across—you'll create the curve through filing.
- Establish the curve starting point: File straight down on each outer corner at a 45° angle to the sidewall. Make 3-4 strokes on each side until you've removed the sharp corner. This creates your curve's beginning.
- Create the arc: File from the corner point toward the center apex in smooth, even strokes. Flip to the opposite side and repeat, matching the stroke count (if you make 6 passes on the right, make 6 on the left). This maintains symmetry.
- Apex refinement: The center point should align with your nail bed's natural high point—usually slightly off-center toward the thumb side. Make lighter passes across the apex to smooth the transition between sides.
- Seal the edge: Finish with the file held at a 45° angle underneath the free edge, making one continuous pass from sidewall to sidewall. This caps the layers and prevents snagging.
The entire process should take 2-3 minutes per nail. Rushing causes uneven pressure and asymmetry. If you feel heat building, you're pressing too hard or using too coarse a grit. Proper filing technique creates microscopic smoothness that reflects light uniformly, giving nails a natural luster before any polish application.
5. Symmetry Check: The Visual Assessment Method
Achieving identical curves on all ten nails requires systematic comparison rather than isolated shaping. Your dominant hand naturally applies more pressure and works faster, creating asymmetry between hands and even between fingers on the same hand.
The best assessment method: place both hands palm-down on a flat surface with fingers spread. Look straight down from above. The free-edge curves should mirror each other across the center line of your body. Any nail that extends visibly farther or shows a flatter curve needs additional filing.
Common symmetry failures include:
- Pointer finger bias: These nails often end up shorter because they're easiest to reach while filing
- Dominant-hand longer nails: You have better angle control when filing your non-dominant hand
- Pinky finger flat spots: The narrow nail bed makes it tempting to file straight across rather than creating a true curve
To correct asymmetry, identify your shortest nail and use it as the template. File all others to match that length and curve radius before adding any length back. Most beginners resist this approach because it means sacrificing length, but uniform shape always looks more polished than uneven length.
OPI's nail shape guide notes that round nails should follow the natural smile line of your cuticle. Hold your hand up and look at your cuticle curves—that's the arc your free edge should mirror. If your cuticles are very flat (common on thumbs), a softly rounded square may suit better than a full round.
6. Hand Type Suitability: When Round Works Best
Round nail shapes universally flatter shorter nail beds, wider fingers, and hands where nails naturally grow parallel to the fingertip rather than extending past it. The curved silhouette creates vertical emphasis without requiring length, making fingers appear longer through optical illusion rather than actual millimeters.
Ideal candidates for round nails:
- Nail beds wider than 10mm (measured sidewall to sidewall)
- Fingers where the nail bed occupies more than half the visible fingertip
- Anyone whose nails break frequently at the corners
- Professions requiring glove use (healthcare, food service)—round edges don't puncture gloves
- Naturally short nails that won't grow past 3-4mm free edge
When to consider alternative shapes:
- Very narrow nail beds (under 8mm) can look disproportionately round—soft square adds width
- Long, slender fingers with extended nail beds—almond or oval elongates further
- If you prefer dramatic, editorial looks—round reads as practical rather than fashion-forward
The round shape also suits specific nail conditions better than alternatives. Weak, peeling nails lack the structural integrity for pointed shapes that concentrate stress at the tip. Ridged or uneven nail surfaces benefit from round shaping because the curve disguises texture variations—straight edges highlight every bump and wave.
For those managing nail recovery after acrylics or following the gel nail removal process, round shapes provide maximum strength during the rebuilding phase. You can always transition to almond or square once your natural nails regain thickness.
7. Length Recommendations: The Functional Sweet Spot
Round nails work at any length but perform best with 2-4mm of free edge—roughly the thickness of a nickel standing on edge. This range provides enough curve to establish the round shape without excessive length that compromises durability.
At 0-1mm free edge (nails flush with fingertip), you cannot create a true curve—the shape reads as "trimmed" rather than "round." At 5mm+ free edge, the round shape requires more sidewall length to maintain the arc, which increases breakage risk at the stress points where nail meets skin.
The optimal length also depends on your daily activities:
| Activity Level | Recommended Free Edge | Reasoning |
|---|---|---|
| High-impact (typing, childcare) | 1-2mm | Minimal snag exposure, maximum durability |
| Moderate (office work, general tasks) | 2-3mm | Balance of aesthetics and function |
| Low-impact (primarily visible/presentation) | 3-4mm | Full curve development, elegant look |
| Enhancement-supported (gel/acrylic) | 4-6mm | Product reinforcement allows extra length |
If you're working with gel or acrylic extensions, you can maintain round shapes at longer lengths because the enhancement provides structural support natural nails lack. However, the same geometric principles apply—longer rounds need proportionally more sidewall curve to avoid looking oval.
For natural nails, measure your free edge weekly during growth periods. Round nails require more frequent maintenance than square because growth disrupts the arc symmetry. A square nail growing 2mm still looks intentional; a round nail growing 2mm starts reading oval or misshapen.
8. Common Filing Mistakes and Corrections
Even experienced nail enthusiasts make systematic filing errors that compromise shape or nail health. Recognizing these patterns allows you to self-correct before permanent damage occurs.
Mistake #1: Sawing back and forth
This motion lifts keratin layers, creating white, frayed edges that split easily. Emery boards particularly show this damage—the glued abrasive particles grab layers and pull them apart when dragged backward.
Correction: Commit to one-directional filing. If the motion feels inefficient, you're likely using too fine a grit. Switch to 180 for shaping, then graduate to 240 for finishing.
Mistake #2: Filing into the sidewalls
Attempting to narrow wide nail beds by filing the sides thins the structural support and creates parallel edges rather than curves. The nail plate extends beneath the skin—you cannot meaningfully reduce width through filing.
Correction: File only the free edge. If your nails look too wide, the issue is shape choice rather than technique. Consider rounded square for better proportion.
Mistake #3: Creating a point instead of a curve
Many beginners over-file the center apex, creating an oval or almond-like point rather than a true arc. This happens when you make more passes at the center than the sides.
Correction: Count your strokes. If you make 5 passes from right corner to center, make exactly 5 from left corner to center. The apex receives zero additional filing—it's where the two sides meet.
Mistake #4: Filing too aggressively after polish removal
The nail plate temporarily softens during polish removal, particularly with acetone soaking. Filing immediately can remove excessive nail thickness.
Correction: Wait 2-4 hours after gel removal or polish removal before shaping. If you must shape immediately, use 240 grit and minimal pressure.
Mistake #5: Neglecting the underseal
Failing to file the underside of the free edge leaves rough keratin layers exposed, which catch on fabric and peel backward.
Correction: Final step always involves angling the file 45° under the nail tip and making one smooth pass sidewall-to-sidewall. This seals layers and prevents snags.
Key Finding: Filing toward the nail center in a single direction reduces splitting and peeling by sealing keratin layers rather than lifting them—professional nail filing guidance compiled from industry publications
9. Polish Application for Round Nails: Brush Technique Adjustments
Round nails require modified brush strokes compared to square shapes because the curved free edge creates a smaller target area. Standard polish application—one center stripe flanked by two side strokes—doesn't adapt well to curves where the "sides" are continuously transitioning.
The three-stroke method fails on round nails because the side strokes either miss the curve (leaving bare spots at corners) or overlap excessively (creating thick, uneven coverage). Instead, use a five-stroke modification:
- Thin center stripe from cuticle to apex (not all the way to the edge)
- Right arc following the curve from sidewall to center
- Left arc mirroring the right side
- Free edge cap with the brush parallel to the curve, painting the entire tip in one motion
- Cleanup pass if needed, thinning any thick spots
The edge-capping stroke matters more on round nails than square because the curve catches wear at multiple angles rather than one straight line. According to Byrdie's filing and shaping guide, sealing the free edge with polish extends wear time because it prevents moisture infiltration at the most vulnerable point.
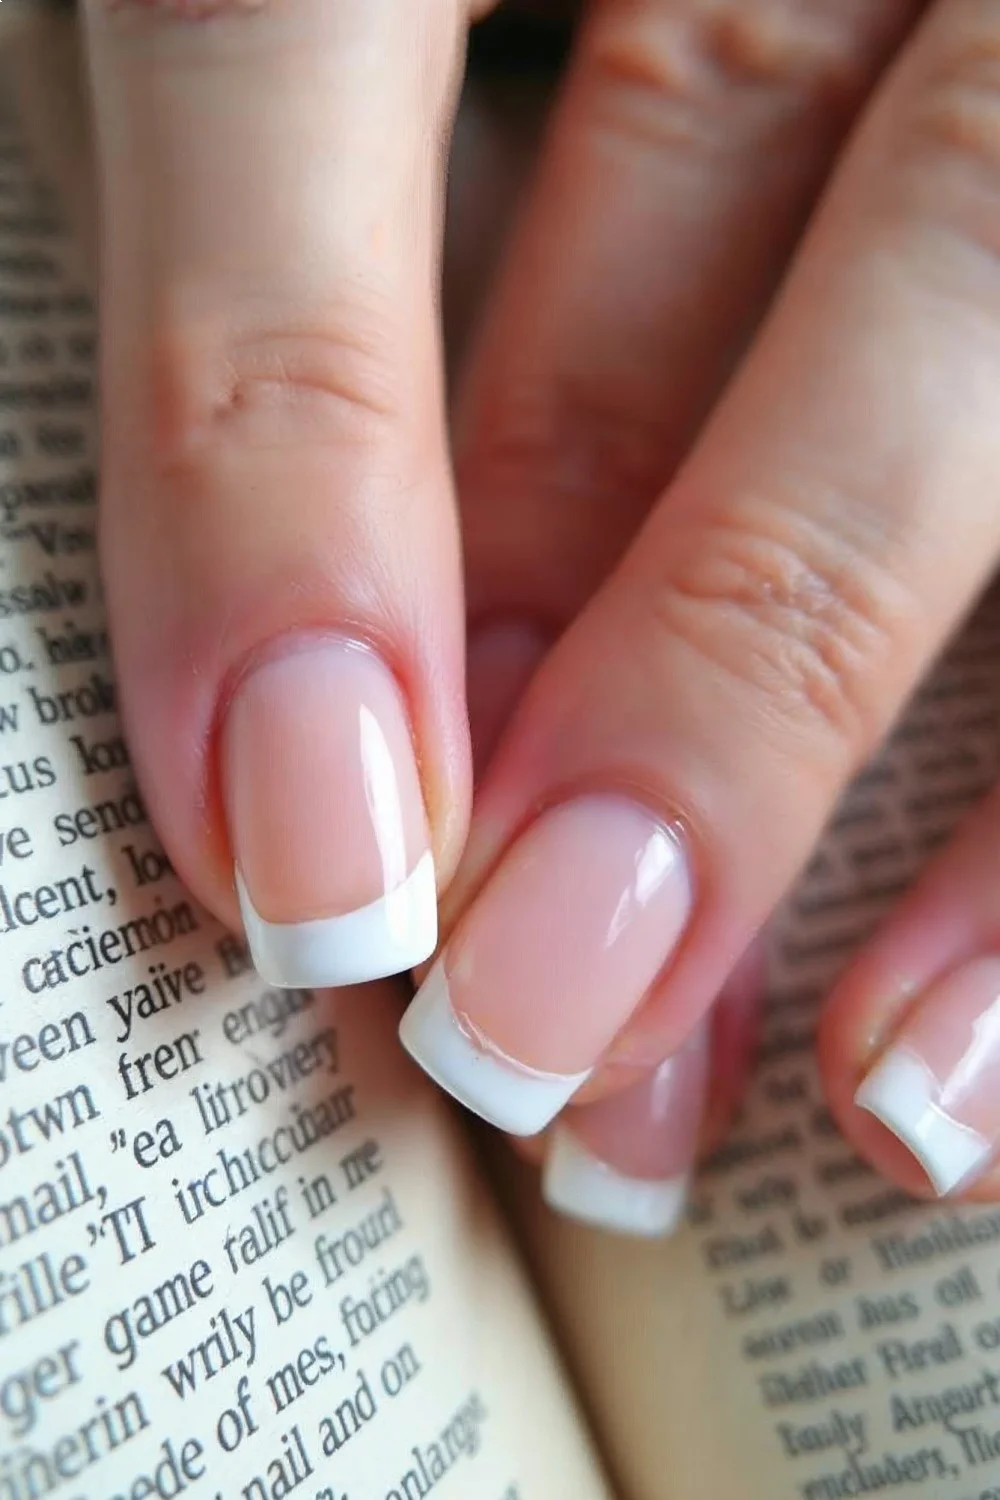
For gel polish, cure between coats as usual but pay attention to cap quality. Uncured gel at the free edge causes premature lifting as the curve flexes during hand use. If you're working with modern French manicure designs, round nails limit your smile line curve—the nail's natural arc and the French tip arc compete visually. A thin, subtle smile line works better than dramatic whites on round shapes.
Polish application tips specific to round nails:
- Use older, slightly thickened polish—too-thin formulas run toward the curve and pool at the apex
- Wipe one side of the brush before application—less product gives better control on small curved surfaces
- Apply thinner coats than you would on square nails (two thin beats one thick)
- Cure gel polish with the nail parallel to the lamp, not angled—curved surfaces need even UV exposure
For a protective foundation before color, use a quality base coat formulated for your nail type. Ridged or peeling nails benefit from rubberized bases that fill imperfections; oily nails need bonding bases with better adhesion.
10. Maintenance Schedule: When to Re-File
Natural nail growth disrupts round shape symmetry faster than square shapes because any length addition changes the arc's radius. A 2mm growth on a square nail maintains the straight edge; the same growth on a round nail creates an oval point.
Most wearers need to re-file round nails every 7-10 days to maintain the intended curve. This doesn't mean removing length—just reshaping the free edge to restore the arc as growth extends past the original curve.
Weekly maintenance routine:
- Remove any polish or gel
- Assess growth pattern—pointer and middle fingers usually grow fastest
- File the fastest-growing nails to match your slowest (typically pinkies)
- Reshape the curve on all nails even if length matches
- Buff any rough spots created during wear
- Apply cuticle oil and massage into nail beds
- Wait 2 hours, then reapply polish
For gel manicures lasting 2-3 weeks, accept that your shape will shift slightly during wear. The alternative—filing through gel—damages the seal and causes premature lifting. If shape maintenance is critical, choose regular polish over gel, or plan gel applications around important events rather than continuous wear.
If you experience frequent breakage at a consistent point in the growth cycle—usually around 3mm free edge—that indicates your natural nail's structural limit for the round shape. Either maintain shorter length permanently or consider switching to gel overlays that reinforce the nail plate without adding significant length.
Seasonal changes also impact maintenance needs. Winter air and indoor heating dehydrate nails, making them more brittle and prone to corner chips. Summer humidity can make nails more flexible but also increases swelling and shrinking cycles that stress the sidewall attachments. Adjust your filing schedule based on observed breakage patterns rather than arbitrary timing.
11. Styling Versatility: Design Considerations for Round Nails
Round nails read as practical and classic, which means certain nail art styles complement the shape better than others. Busy patterns, multiple accent nails, or geometric designs can overwhelm the small canvas and visual simplicity that makes round shapes appealing.
Design styles that enhance round nails:
- Negative space designs: The curved edge becomes part of the design rather than competing with it
- Single accent nail: One detailed nail (typically ring finger) balances 4-9 simpler nails
- Minimalist line art: Thin strokes follow the nail's curve rather than fighting against it
- French manicure: Classic white tips suit round shapes, though keep the smile line subtle
- Gradient/ombré: Color transitions work across curves without hard edges to align
Design challenges on round nails:
- Geometric patterns: Squares, triangles, and straight lines look distorted on curved surfaces
- Detailed florals: Limited space makes intricate floral nail art difficult without magnification
- Negative space French: The curved free edge makes crisp lines harder to achieve than on square nails
- Heavy embellishments: Gems and 3D elements add weight that curved tips support less effectively than flat edges
For seasonal inspiration, summer nail colors and spring designs often feature lighter, simpler motifs that suit round nails well. The shape naturally complements beachy, casual, or understated aesthetics rather than dramatic editorial looks.
When planning gradient nails or ombré effects on round shapes, work the sponge in a curved motion that follows the free edge rather than straight horizontal dabs. This prevents harsh lines that emphasize the curve in unflattering ways.
12. Strengthening Round Nails: Product and Technique Integration
Round nails already provide maximum structural integrity for natural nails, but additional strengthening makes sense if you're recovering from damage or pushing length boundaries. The key is choosing products that reinforce without adding excessive rigidity that causes different breakage patterns.
Effective strengthening approaches:
Hardeners work for soft, bendy nails but make brittle nails worse. If your nails bend before breaking, formaldehyde-free hardeners (like OPI Nail Envy Original) add rigidity. If they snap without bending, skip hardeners entirely—they'll make the brittleness worse.
Gel overlays provide reinforcement without length. A thin layer of builder gel or hard gel (not gel polish) cured over the natural nail adds 0.2-0.3mm thickness that significantly improves durability. This works particularly well during transition periods after gel removal when natural nails are temporarily thin.
Peel-off base coats seem protective but actually weaken nails. The constant peeling motion stresses the nail plate and teaches users to peel polish rather than properly remove it—a habit that damages healthy nails.
Biotin supplements show mixed results in research. The AAD notes that biotin deficiency is rare and supplementation only helps if you're actually deficient. Most nail brittleness stems from external damage (harsh chemicals, excessive water exposure) rather than nutritional gaps.
Strengthening routine for round nails:
- Apply quality base coat appropriate for your nail type
- Use rubber or vitamin-enriched formulas, not just clear polish
- Reapply base coat every 3 days if wearing nails bare
- Wear gloves during water exposure (dishes, cleaning)
- Apply cuticle oil twice daily to maintain flexibility
- Avoid using nails as tools—this causes micro-fractures that propagate into breaks
If you're experiencing consistent breakage despite proper shape and care, the issue may be systemic rather than cosmetic. Thyroid disorders, iron deficiency, and some medications affect nail strength. Consult a dermatologist if brittleness appears suddenly or doesn't improve with external interventions.
For emergency repairs when breaks do occur, reference how to fix broken nails for silk wrap and glue techniques that work on round shapes without requiring length addition.
Verdict: Choosing Round Nails for Your Situation
The round nail shape suits specific situations better than others. Understanding when to choose round versus alternative shapes prevents frustration from working against your natural nail structure or lifestyle demands.
Choose round nails if you:
- Work in healthcare, food service, childcare, or other hands-on professions
- Have nail beds wider than 10mm or fingers where nails dominate the fingertip visually
- Experience frequent corner breakage with square or almond shapes
- Prefer low-maintenance manicures that tolerate growth without immediate reshaping needs
- Are rebuilding nail health after damage from acrylics, gel, or picking
- Want a classic look that works across professional and casual settings
Consider alternatives if you:
- Have very narrow nail beds (under 8mm)—soft square adds visual width
- Prefer dramatic, editorial aesthetics—almond or stiletto provides more impact
- Have long, slender fingers that round nails would make look disproportionately short
- Want maximum canvas space for detailed nail art
- Can maintain longer lengths without breakage—oval or almond elongates more
The hybrid approach:
Many wearers use different shapes seasonally or situationally. Round for winter when hands are dry and breakage-prone, transitioning to almond shape in summer when humidity makes nails more flexible. Round during busy work periods, square during vacation when maintenance is easier.
Every detail matters—and shape choice is the foundational detail that determines whether your manicure functions as intended or fights against your daily reality. Round nails succeed because they work with nail biology rather than imposing an artificial structure that requires constant intervention.
For most wearers pursuing healthy nail care alongside aesthetic goals, round represents the optimal balance. It looks intentional rather than accidental (unlike barely-shaped natural growth), maintains durability for active lifestyles, and requires minimal special tools or advanced technique. The shape's longevity across decades of nail trends proves its fundamental functionality—fashion cycles come and go, but well-executed round nails remain universally appropriate.