DIY Pastel Ombre Nails: Easy Spring Tutorial for Beginners
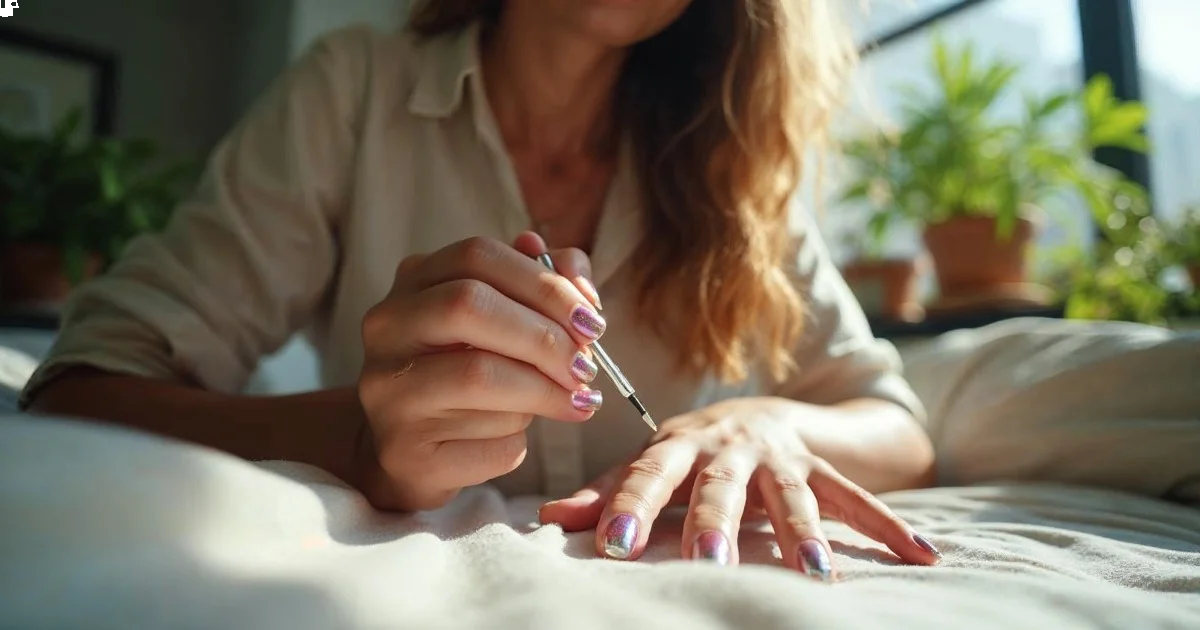
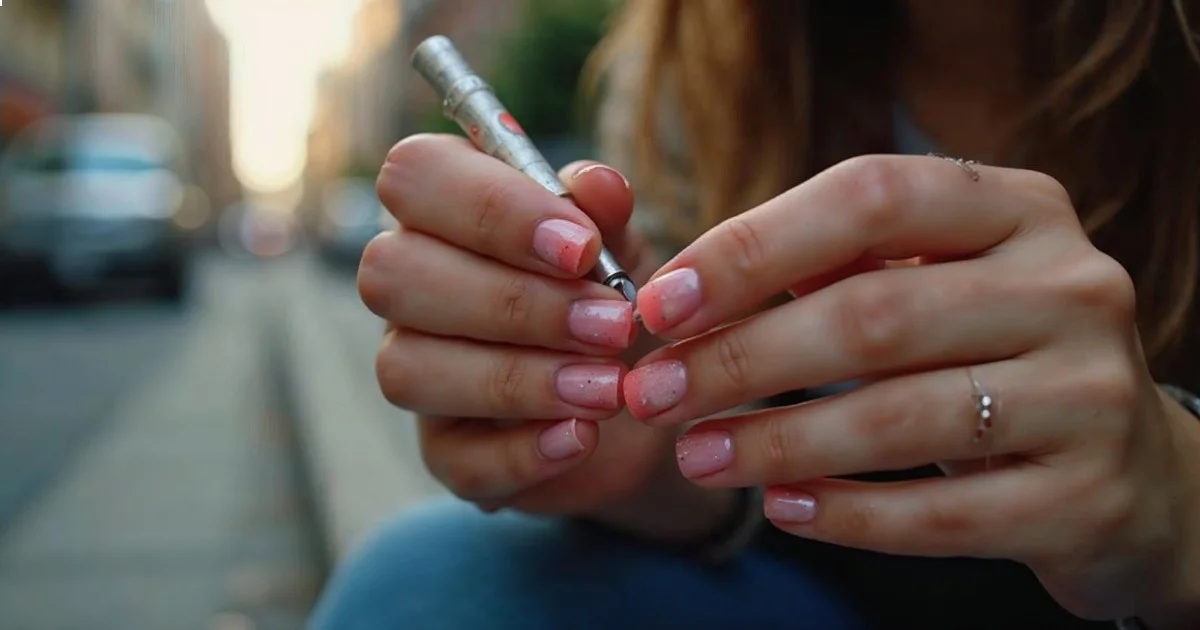
DIY pastel ombre nails create a soft gradient effect using 2-3 light colors blended with a makeup sponge.

DIY pastel ombre nails create a soft gradient effect using 2-3 light colors blended with a makeup sponge. The technique takes 45 minutes and lasts 4-5 days on natural nails with proper base and top coat application.
- Makeup sponges work better than nail art sponges for smooth blending
- Start with similar pastel shades to avoid muddy colors when blending
- Apply base coat and let dry completely before starting the ombre technique
- Liquid latex around nails saves 15 minutes of cleanup time
- Two thin ombre coats look better than one thick application
I've been perfecting this technique in my kitchen for months, and I can tell you that pastel ombre nails are more forgiving than the dramatic dark gradients you see on Instagram. The soft colors hide imperfections, and even a slightly uneven blend looks intentional with pastels.
Spring is a good time to try this technique because pastel shades work well with the season. Unlike bold summer colors that demand precision, pastels give you room to experiment without looking overdone.
What You Need for DIY Pastel Ombre Nails
You probably have most of these items at home already. I spent about $25 total when I started, buying only the polishes and liquid latex.
Essential Supplies:
- Base coat (I use Orly Bonder - $9)
- 2-3 pastel nail polishes in similar color families
- Fast-drying top coat (Seche Vite - $10)
- Makeup sponges (not nail art sponges - they're too dense)
- Liquid latex or tape for cleanup (UNT Ready for Takeoff - $12)
- Small paper plate or aluminum foil
- Cotton swabs
- Acetone or nail polish remover
- Cuticle oil
Color Combinations That Work:
| Primary Color | Secondary Color | Third Color (Optional) | Skill Level |
|---|---|---|---|
| Baby pink | Lavender | White | Beginner |
| Mint green | Sky blue | - | Beginner |
| Peach | Coral pink | Cream | Intermediate |
| Butter yellow | Pink | Lavender | Intermediate |
I learned the hard way that cool and warm pastels don't blend well together. Stick to colors from the same temperature family.
Key Finding: Proper nail preparation, including dehydrating and base coat application, is the most important factor in DIY manicure longevity — American Academy of Dermatology
How Do You Prep Your Nails for Ombre?
Proper prep makes the difference between a 2-day manicure and a week-long one. I skip this step when I'm rushed, and I always regret it.
Push back your cuticles and file nails into your preferred shape. I find that shorter nails (just past the fingertip) work better for beginners because there's less surface area to blend.
Wipe nails with rubbing alcohol or acetone to remove oils. This step is crucial—any residue will cause the base coat to lift.
Apply a thin layer of base coat and let it dry completely. With Orly Bonder, this takes exactly 3 minutes. Don't rush this part.
If you're using liquid latex, apply it around the nail bed now, leaving about 1mm of space from the nail edge. This saves so much cleanup time, but it can be tricky to remove if it touches the nail polish.
Step 1: Create Your Color Palette
Squirt small amounts of your chosen polishes onto a paper plate or aluminum foil. You need enough to cover the sponge multiple times, but don't go overboard—polish dries quickly once exposed to air.
I use about the size of a pea for each color. If you're doing all ten nails, double this amount.
Place the colors close together on your palette, but not touching. You'll be picking up multiple shades at once with your sponge.
What can go wrong: Using too much polish on your palette. It dries out before you finish, and you waste product. Start small and add more as needed.
Step 2: Load Your Sponge
This is where most tutorials get it wrong. You don't want a soaking wet sponge—you want it just barely damp with polish.
Dab the sponge lightly into your first color, then immediately into the second color so they touch on the sponge. The colors should overlap slightly in the middle.
Press the loaded sponge onto a piece of paper first. This removes excess polish and shows you how the gradient will look.
Expected result: You should see a soft transition between colors on the paper. If it's too stark, blend the colors more on your palette before the next application.
Step 3: Apply the First Ombre Layer
Press the sponge onto your nail using a gentle dabbing motion. Don't drag or swipe—this creates streaks instead of a smooth gradient.
Start at the tip and work toward the cuticle, overlapping your dabs slightly. The key is light pressure and multiple thin layers rather than trying to get full coverage in one go.
The first layer will look patchy and uneven. This is completely normal and exactly what should happen.
Timing: Each nail takes about 30 seconds for the first layer. Work on all five nails of one hand before going back to add the second layer.
Step 4: Build Up the Gradient
Reload your sponge with fresh polish—the first application will have used up most of the color. This time, focus on areas that need more coverage.
Apply the second layer using the same dabbing technique. You should start to see a smoother transition between colors.
Most nails need 2-3 thin layers to achieve full opacity. I rarely need more than three layers with good quality pastels.
What can go wrong: Applying subsequent layers before the previous one is dry enough. This creates a gummy mess that peels off in sheets. Wait 60 seconds between layers.
How Long Should Each Step Take?
Timing is crucial for DIY pastel ombre nails, especially when working alone. Here's my tested timeline:
- Nail prep and base coat: 10 minutes
- Setting up palette and supplies: 5 minutes
- First ombre layer (both hands): 15 minutes
- Dry time between layers: 2 minutes per hand
- Second ombre layer: 10 minutes
- Final cleanup: 8 minutes
- Top coat application: 5 minutes
Total time: 45-50 minutes from start to finish.
I used to rush through this process in 30 minutes, but the results looked amateur. Taking the full 45 minutes makes a noticeable difference in the final look.
Key Finding: Allowing adequate drying time between coats prevents the tacky, gummy texture that causes premature chipping in DIY manicures — OPI Blog
What About Cleanup?
If you used liquid latex, peel it off now while the ombre layers are still slightly tacky. It removes cleanly and takes most of the excess polish with it.
For traditional cleanup, dip a small brush or cotton swab in acetone and carefully clean around the nail beds. Work slowly—acetone can dissolve your fresh polish if you're not careful.
I keep a small angled brush (like the ones used for eyebrows) just for nail cleanup. It's more precise than cotton swabs and doesn't leave fibers behind.
Pro tip: Clean up before applying top coat. Any acetone residue will prevent the top coat from adhering properly.
Step 5: Seal with Top Coat
Apply one thin layer of fast-drying top coat over the entire nail. I use Seche Vite because it levels out any texture from the sponging technique and adds shine.
Cap the free edge by running the brush along the nail tip. This step doubles the wear time of your manicure.
Let the top coat dry for at least 5 minutes before touching anything. Seche Vite feels dry in 30 seconds, but it's not fully cured until 5 minutes have passed.
Expected result: Nails should look glossy and feel completely smooth. Any remaining texture means you need better sponging technique or a more leveling top coat.
What Colors Work Best for Spring?
I've tested dozens of pastel combinations, and some definitely work better than others for beginners. Here are my most successful spring palettes:
Foolproof combinations:
- Essie Mint Candy Apple + Bikini So Teeny (mint to soft blue)
- OPI Bubble Bath + Lucky Lucky Lavender (neutral pink to purple)
- Sally Hansen Peach of Cake + Coral Reef (warm peach gradient)
Advanced combinations:
- Three-color sunset: yellow to peach to coral
- Rainbow pastel: each nail a different pastel shade
- Reverse ombre: dark pastel at cuticle, light at tip
For your first attempt, stick to two colors maximum. Three-color gradients require more skill and definitely more patience.
Speaking of spring nail art designs, pastels pair well with simple accent techniques like single rhinestones or thin gold striping tape.
Common Mistakes and How to Fix Them
I've made every possible mistake with this technique, so learn from my failures:
Muddy colors in the middle: This happens when you blend colors that are too different or when you over-work the sponge. Fix it by choosing colors closer in tone or adding a white polish between them.
Streaky application: You're dragging the sponge instead of dabbing. Keep the motion perpendicular to the nail surface and lift straight up.
Polish drying too fast: Work in a slightly humid environment (bathroom after a shower works) or add a drop of nail thinner to your palette.
Bumpy texture: Either your base coat wasn't completely dry, or you applied the ombre layers too thickly. Sand lightly with a fine buffer and start over.
Chipping within 24 hours: Usually means oil residue on the nail or skipping the base coat. Proper prep prevents most early chipping.
The most common issue I see in the DIY nail art community is rushing the drying time between steps. Patience really pays off with this technique.
How Long Do DIY Pastel Ombre Nails Last?
With proper application, expect 4-5 days of good wear on natural nails. The tips usually show minor wear first, especially if you type a lot or do dishes without gloves.
I get about 7 days when I apply this technique over gel base and top coats, but that requires UV curing equipment.
Factors that affect longevity:
- Nail prep quality (biggest factor)
- Base coat adhesion
- Top coat durability
- Daily hand activities
- Natural nail oil production
To extend wear time, apply a fresh layer of top coat every 2-3 days. This refreshes the shine and seals any minor chips.
Key Finding: Regular moisturizing of cuticles and nail beds improves polish adhesion and prevents premature lifting — Essie How-To
Troubleshooting Guide
Q: My gradient looks too harsh between colors. Reload your sponge and dab over the harsh line repeatedly until it softens. You can also add a tiny amount of white polish to the sponge to help blend.
Q: The polish is too sheer even after three coats. Some pastels are naturally sheer. Try applying a white base coat first, or choose more pigmented formulas. Zoya and Essie pastels tend to have better coverage than drugstore brands.
Q: My sponge keeps sticking to the nail. The previous layer isn't dry enough, or you're using too much pressure. Wait longer between coats and use lighter dabbing motions.
Q: Can I do this with gel polish? Yes, but you'll need to cure each layer under UV light. The technique is identical, just add 60 seconds of curing time between each step.
For more advanced techniques once you master this basic ombre, check out these creative nail art ideas that build on gradient skills.
What's Next After Mastering Basic Ombre?
Once you're comfortable with two-color pastels, try these progressions:
- Three-color gradients: Add a third pastel between your original two colors
- Glitter ombre: Blend a glitter polish into one of your pastel shades
- Reverse ombre: Start with the darker color at the cuticle
- Accent nails: Do ombre on just the ring fingers, solid pastels on the others
The sponging technique you've learned transfers to other seasonal nail designs too. Try it with coral and orange for summer, or deep jewel tones for fall.
Most importantly, keep practicing. My first attempts looked nothing like the Pinterest photos, but by the fifth try, I was getting compliments from strangers. The muscle memory for proper sponge pressure and timing only comes with repetition.
Start with one accent nail if you're nervous about committing to a full set. Perfect the technique on your non-dominant hand first, then tackle the full manicure when you feel confident.
Frequently Asked Questions
How Do You Prep Your Nails for Ombre?
Proper prep makes the difference between a 2-day manicure and a week-long one. I skip this step when I'm rushed, and I always regret it. Push back your cuticles and file nails into your preferred shape.
How Long Should Each Step Take?
Timing is crucial for DIY pastel ombre nails, especially when working alone. Here's my tested timeline: Nail prep and base coat: 10 minutes Setting up palette and supplies: 5 minutes First ombre layer (both hands): 15 minutes Dry time between layers: 2 minutes per hand
What About Cleanup?
If you used liquid latex, peel it off now while the ombre layers are still slightly tacky. It removes cleanly and takes most of the excess polish with it. For traditional cleanup, dip a small brush or cotton swab in acetone and carefully clean around the nail beds.
What Colors Work Best for Spring?
I've tested dozens of pastel combinations, and some definitely work better than others for beginners. Here are my most successful spring palettes: Foolproof combinations: Essie Mint Candy Apple + Bikini So Teeny (mint to soft blue) OPI Bubble Bath + Lucky Lucky Lavender (neutral pink to purple)
How Long Do DIY Pastel Ombre Nails Last?
With proper application, expect 4-5 days of good wear on natural nails. The tips usually show minor wear first, especially if you type a lot or do dishes without gloves. I get about 7 days when I apply this technique over gel base and top coats, but that requires UV curing equipment.