How to Remove Gel Nails at Home Safely (2026 Guide)
Removing gel nails at home safely requires acetone-soaking with cotton and foil wraps for 10-15 minutes, followed by gentle pushing—never peeling or...
Removing gel nails at home safely requires acetone-soaking with cotton and foil wraps for 10-15 minutes, followed by gentle pushing—never peeling or scraping force. According to the American Academy of Dermatology, improper removal causes more nail damage than the gel polish itself, making technique critical for maintaining healthy nails.
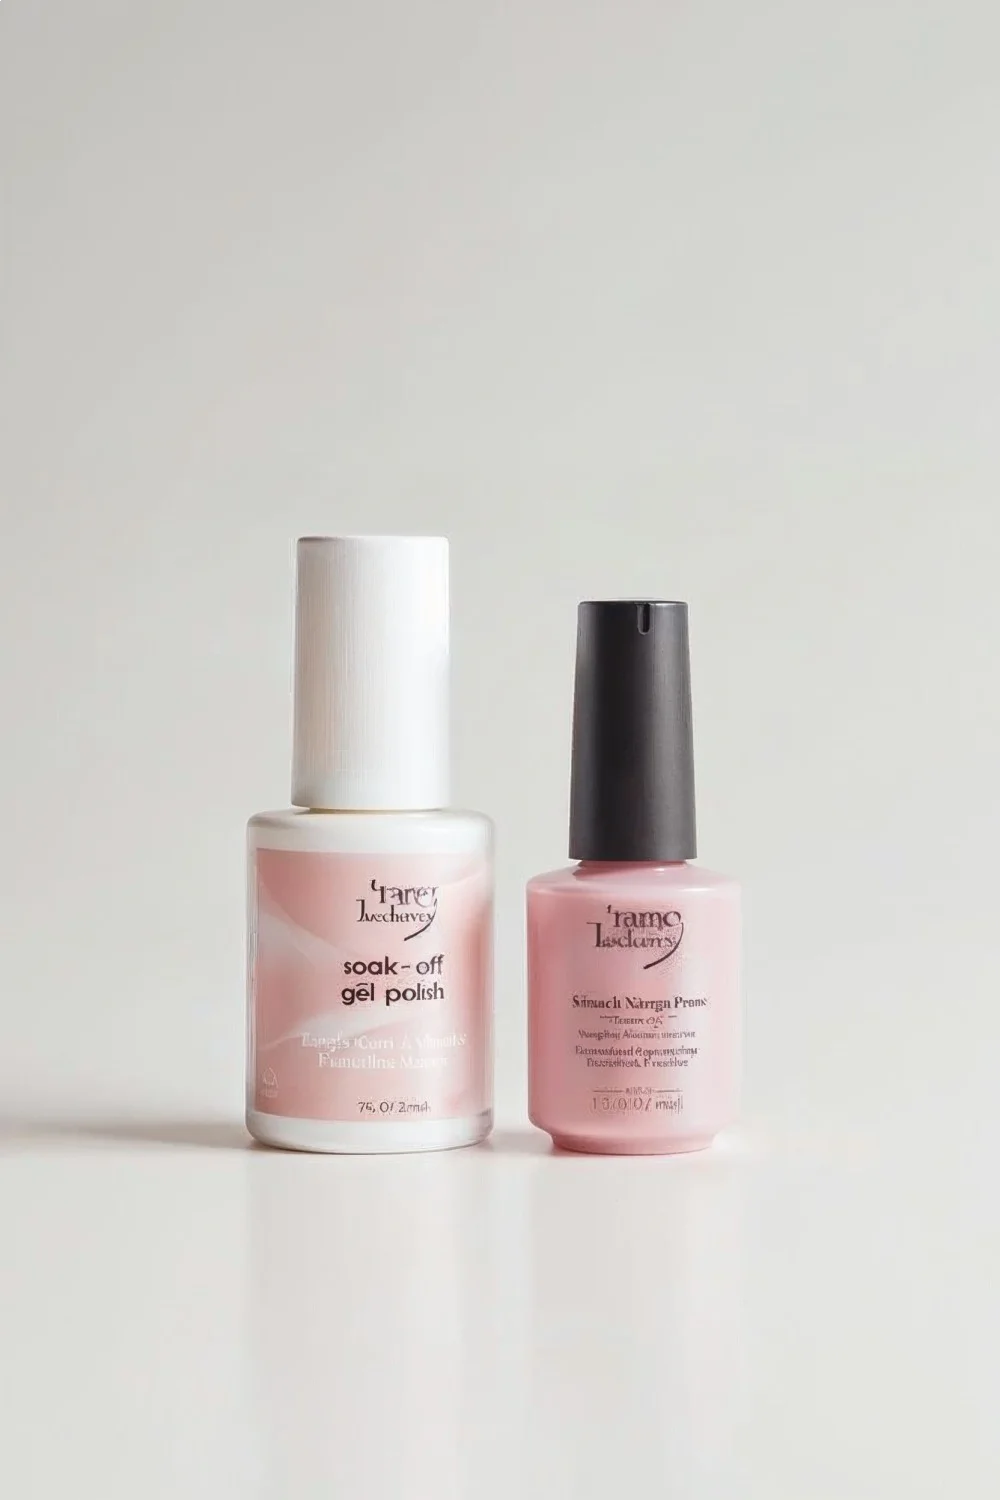
- Soak-off gel polish and hard gel require different removal methods—only soak-off formulas dissolve with acetone
- Cotton and foil wrapping holds acetone against the nail surface for optimal penetration and lifting
- Forcing gel off before it fully softens causes nail plate damage and weakening
- Cuticle oil and moisturizer immediately after removal prevent dehydration and brittleness
- Professional removal tools like e-files should be avoided at home without proper training
Understanding Gel Nail Types and Removal Compatibility
Soak-off gel polish dissolves in acetone within 10-15 minutes, while hard gel requires filing down and cannot be chemically removed. This distinction matters because attempting to soak off hard gel—common in extensions and sculpted nails—wastes time and damages surrounding skin without breaking down the product. Most at-home gel manicures use soak-off formulas like OPI GelColor, Essie Gel Couture, or Sally Hansen Miracle Gel, which are designed for acetone removal. Hard gels contain different polymer structures that withstand acetone, requiring mechanical removal through filing or drilling.
The confusion between these categories leads to the most common removal mistake: aggressive scraping when gel won't budge. If you're unsure which type you have, check the product label—soak-off formulas explicitly state "acetone removal" or "soak-off," while hard gels mention "file-off" or "non-soak." CND Shellac, for example, is a soak-off hybrid, while Gelish Structure and builder gels are hard formulas. Across professional nail technician forums and manufacturer guidelines, the type identification step appears in every professional protocol but is missing from most DIY tutorials.
For hard gel removal at home, the safest approach involves filing the bulk of the product down with a 180-grit file, then finishing with a buffer block. This takes 15-20 minutes per hand and requires patience. Attempting to force it off risks separating nail layers—a condition called onycholysis that takes months to grow out. If you're dealing with gel extensions or thick builder gel, consider professional removal for the first time to observe the proper filing angle and pressure.
Key Finding: Improper nail polish removal causes more damage to nails than the polish itself, making proper technique essential for nail health — American Academy of Dermatology
Essential Tools and Materials for Safe Gel Removal
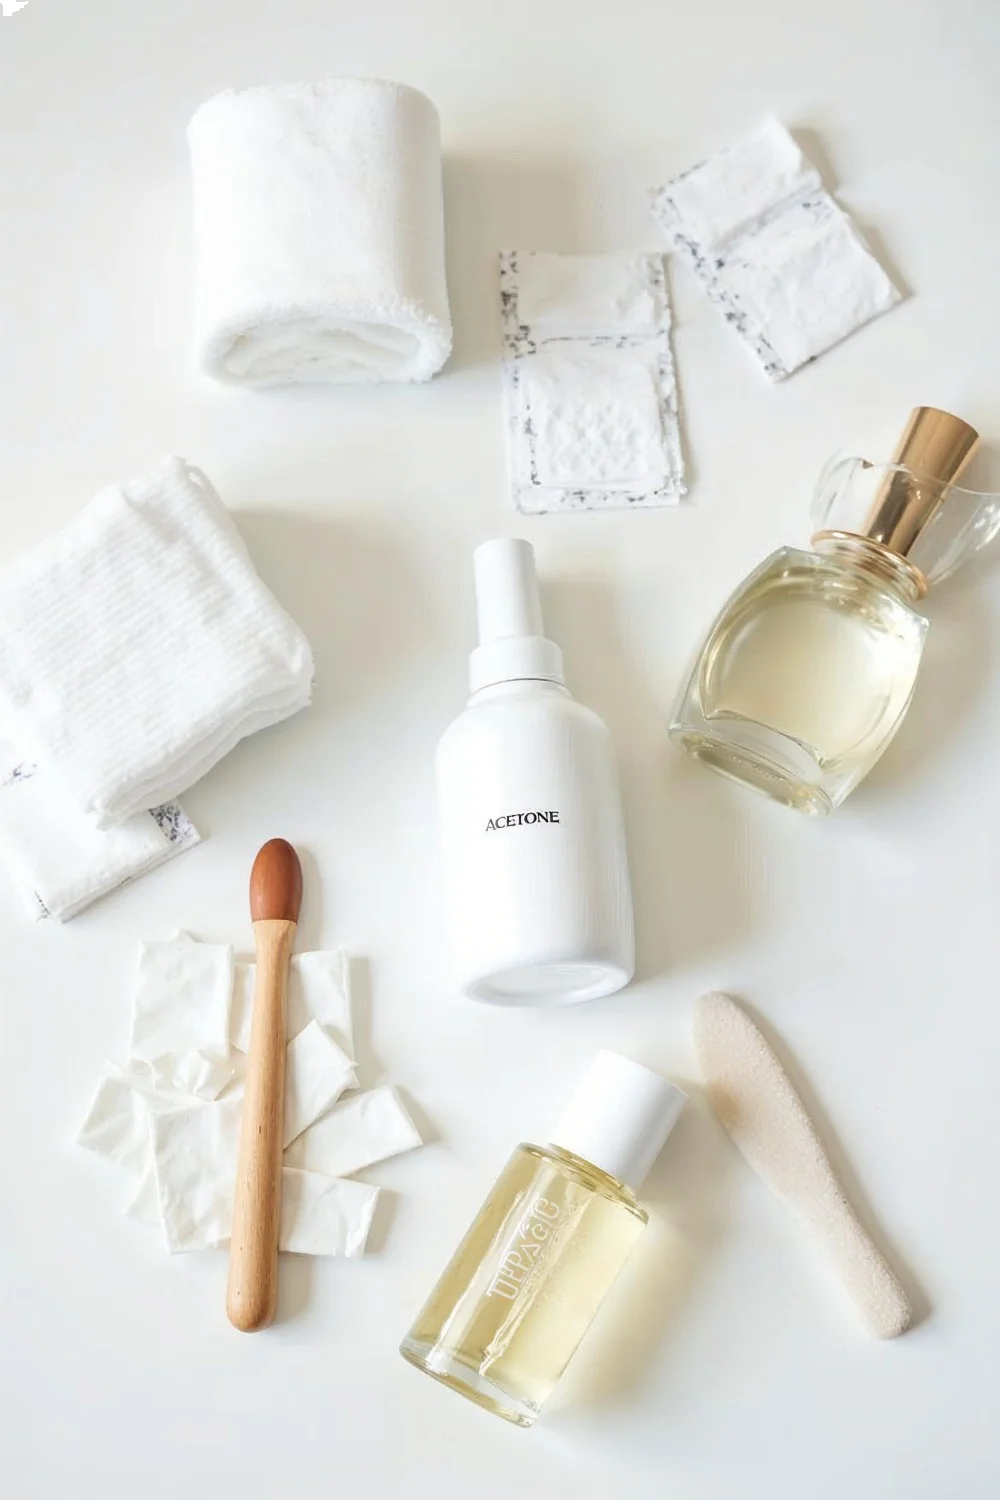
You need pure acetone (not nail polish remover), cotton rounds or pads, aluminum foil cut into 3x3-inch squares, a wooden cuticle pusher, nail buffer, and cuticle oil for safe gel removal. The acetone percentage matters—pure acetone (99-100%) works in 10-15 minutes, while standard nail polish remover with 30-60% acetone can take 30+ minutes and may not fully break down the gel. Beauty supply stores stock pure acetone for $4-8 per bottle, typically in the nail care aisle near acrylic liquid.
| Tool | Purpose | Cost Range | Where to Buy |
|---|---|---|---|
| Pure acetone | Dissolves gel polymer | $4-8 per 8oz | Sally Beauty, Walmart |
| Cotton rounds | Holds acetone against nail | $2-4 per 100 | Drugstores, Target |
| Aluminum foil | Seals in acetone vapor | $3-5 per roll | Grocery stores |
| Wooden cuticle pusher | Lifts softened gel | $1-3 each | Sally Beauty, Amazon |
| Nail buffer | Smooths residue | $2-5 | Beauty supply stores |
| Cuticle oil | Rehydrates after removal | $5-12 | OPI, CND, Essie |
Avoid substituting regular nail polish remover for pure acetone. Based on removal times across different acetone concentrations from OPI's gel removal guide, the time difference is significant—weak acetone leaves you soaking for 45 minutes with incomplete gel breakdown. The extended exposure to diluted acetone dehydrates skin and nails more than a shorter soak with pure acetone.
Cotton rounds work better than cotton balls because they provide even contact without gaps. Cut them in half to fit nail size—this reduces acetone waste and prevents dripping. Some removal kits include pre-cut cotton pads and foil wraps, which cost $8-12 but simplify the process. Sally Hansen Gel Polish Remover Wraps and Ella+Mila Soy Nail Polish Remover Wraps are popular options, though the DIY method with pure acetone is more economical for regular use.
Wooden or silicone cuticle pushers are essential—metal pushers slide too easily and encourage excessive pressure. The wooden texture provides better control and tactile feedback when gel starts releasing. Tweezerman and Revlon make reliable wooden pushers for $2-4 that last through dozens of removals.
Step-by-Step Safe Gel Removal Process
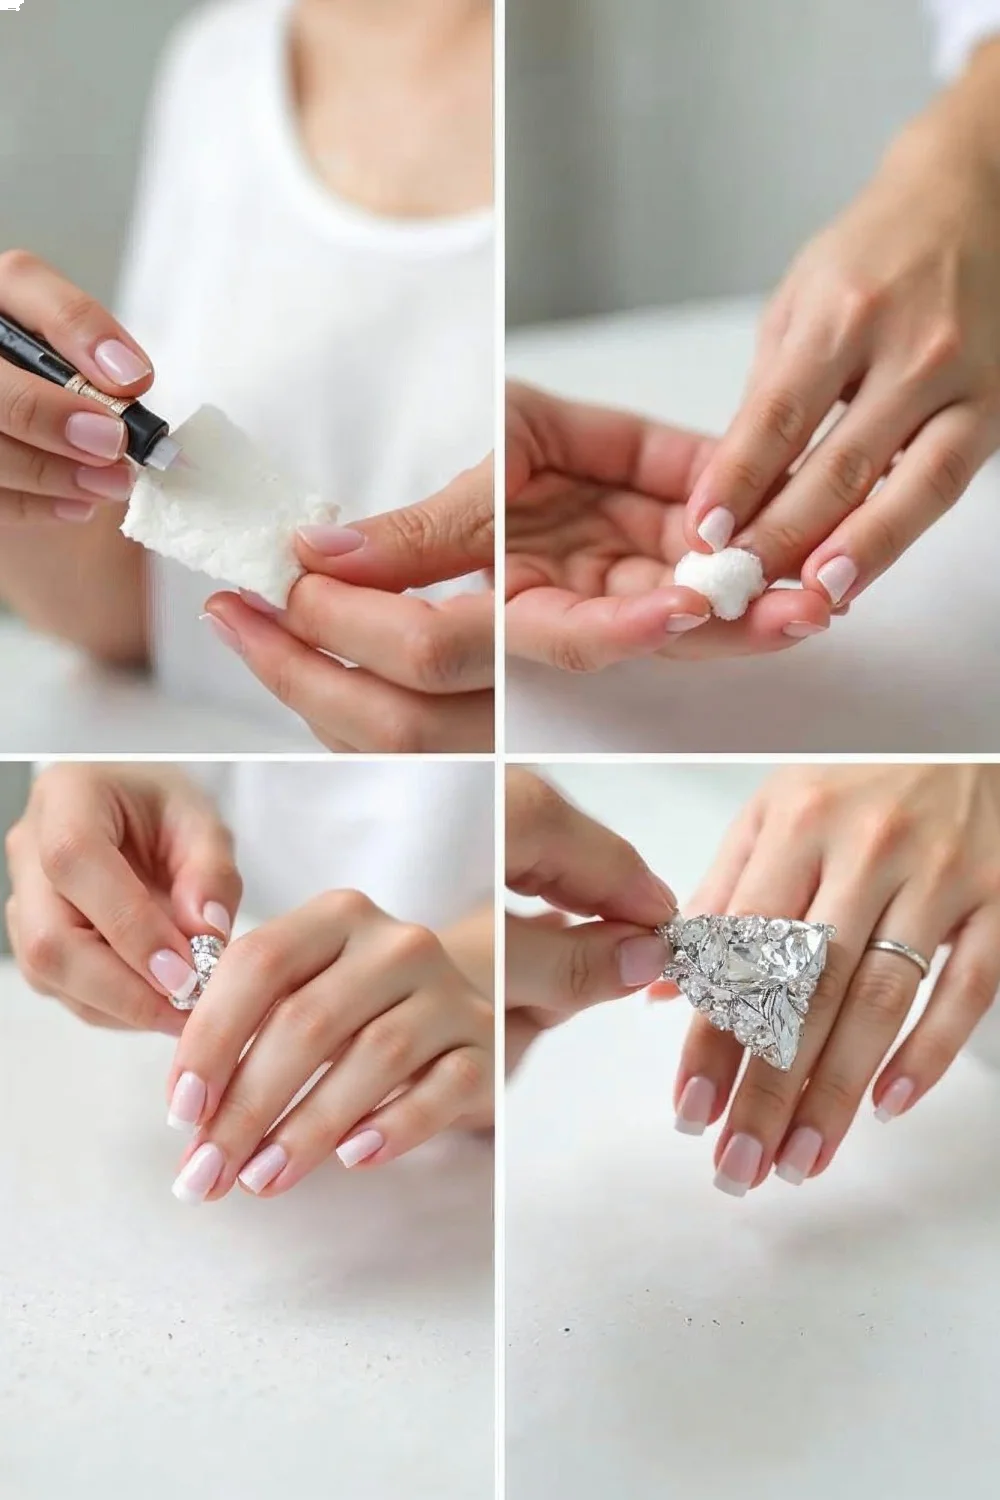
File the gel top coat shine away with a 180-grit file, soak cotton in pure acetone, press onto each nail, wrap tightly with foil, wait 10-15 minutes, then gently push softened gel away from the nail plate. The filing step breaks the sealed top coat that prevents acetone penetration—skipping this extends soaking time significantly and may result in incomplete removal. Use light pressure and file in one direction across the nail surface until you see the shine disappear and the gel appears matte or slightly rough.
Detailed removal sequence:
1. Prep your workspace. Work in a ventilated area—acetone fumes cause headaches in enclosed spaces. Set up near an open window or use a small fan. Lay down paper towels to catch drips and protect surfaces. Pure acetone can damage finished wood and some plastics.
2. File the top coat. Hold your 180-grit file flat against the nail and use back-and-forth strokes. You're not filing the natural nail, just removing the glossy seal. This takes 15-20 seconds per nail. The gel should look dull and slightly cloudy when you're done.
3. Saturate cotton pieces. Cut cotton rounds in half. Pour pure acetone into a small glass dish—this is easier than pouring directly from the bottle. Soak each cotton piece thoroughly until it's wet but not dripping excessively.
4. Apply cotton and wrap. Press the saturated cotton directly onto the nail surface, covering from cuticle to free edge. Wrap the foil square around the fingertip tightly, shiny side in, folding the ends to seal. The foil traps acetone vapor and heat, which accelerates gel breakdown. Make sure the cotton maintains contact with the nail—gaps slow the process.
5. Wait 10-15 minutes. Set a timer. Don't check early—breaking the seal releases acetone vapor and restarts the clock. If you're removing dark or glitter gel, add 2-3 minutes. Thick builder gel may need 15 minutes on the upper end.
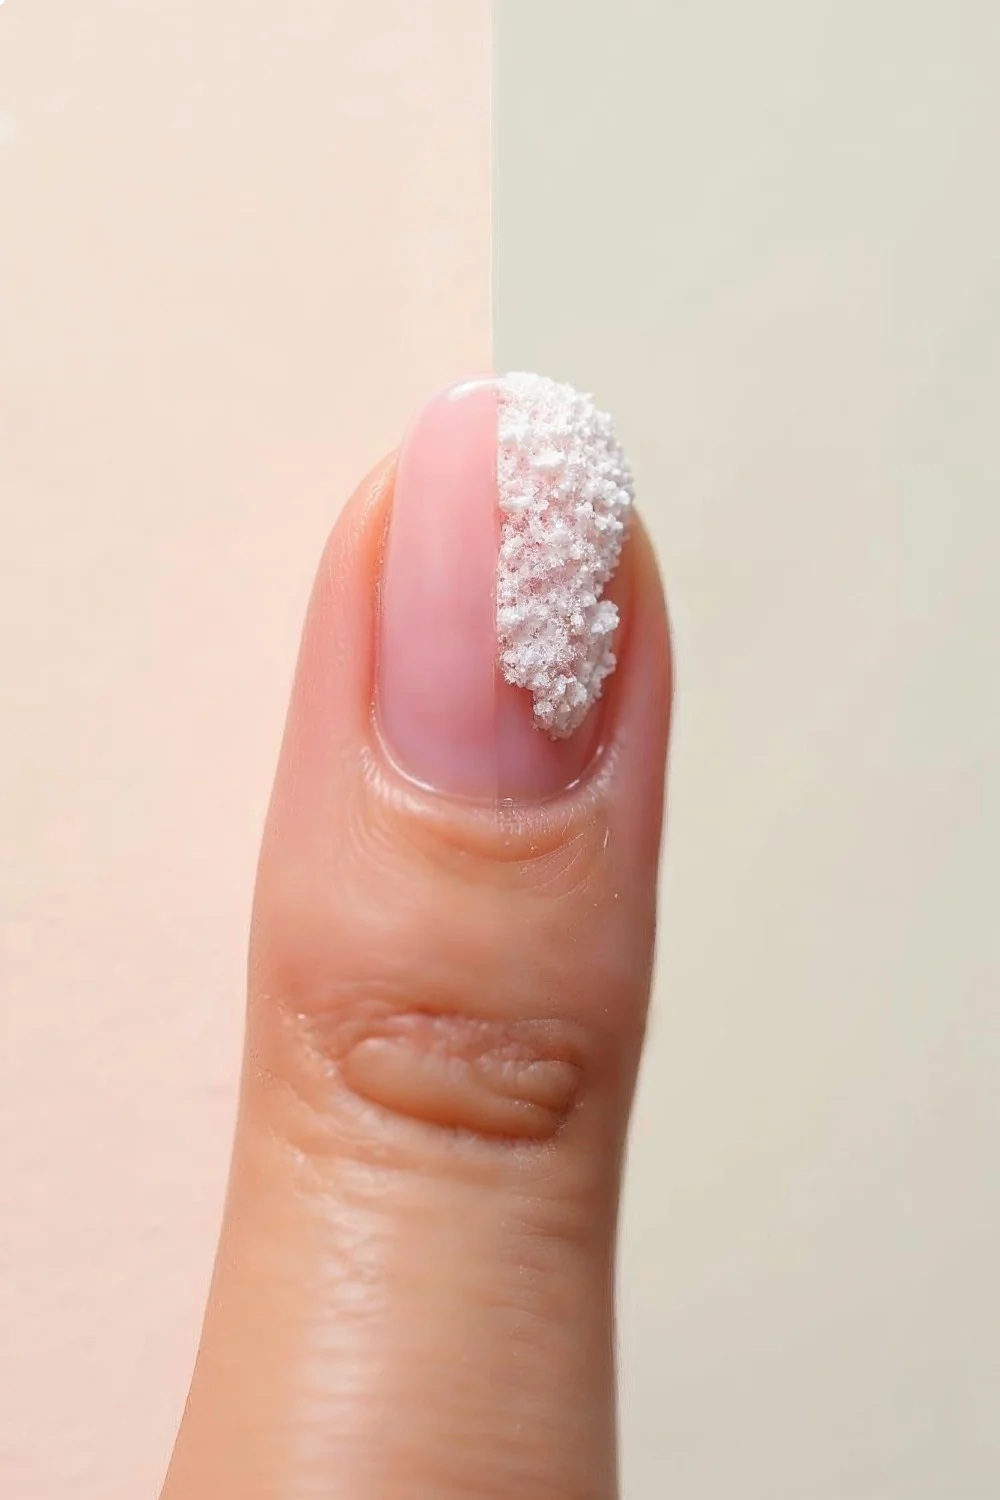
6. Test one nail. After time expires, unwrap one foil to check. The gel should look wrinkled, lifted, or bubbly. If it's still smooth and adhered, rewrap and wait 3-5 more minutes. Don't proceed if gel isn't visibly softened.
7. Gently push gel away. Place the flat edge of your wooden pusher at the cuticle line and push toward the free edge with light pressure. The gel should slide off in soft pieces. If you feel resistance, stop—it needs more soaking time. Never force it. Work from cuticle to tip, not side to side.
8. Remove residue. After the bulk gel is removed, some sticky residue usually remains. Wipe nails with a clean, acetone-dampened cotton pad. For stubborn spots, a gentle buff with a fine-grit buffer (220-240 grit) removes the last layer without damaging the natural nail.
According to Byrdie's professional nail technician sources, forcing gel off too early causes the most significant damage—it can remove layers of the nail plate along with the gel, leaving nails thin, weak, and prone to splitting. The patience to wait for full softening makes the difference between safe removal and damage.
Common Removal Mistakes That Damage Nails
Peeling gel off without soaking, using insufficient acetone exposure time, and scraping with metal tools cause nail plate damage, thinning, and weakness that persists for months. The peeling temptation is particularly strong when gel edges start lifting naturally after 2-3 weeks—but even loose edges are still bonded to parts of the nail plate. Forcing them off removes nail layers in an uneven pattern, creating weak spots.
The most frequent mistakes:
Skipping the filing step. The sealed top coat is designed to be impermeable. Without breaking that barrier, acetone can't reach the gel layers underneath. This mistake leads to incomplete softening, which then leads to forcing and scraping.
Using too little acetone. A damp cotton pad isn't enough—it needs to be saturated to maintain moisture throughout the soaking period. As acetone evaporates, the removal process stalls.
Breaking the foil seal early. Checking progress at 5 minutes releases all the acetone vapor and drops the temperature. Each time you rewrap, you're essentially starting over.
Applying excessive pushing pressure. If gel resists your pusher, more pressure isn't the solution—more soaking time is. Aggressive scraping with a metal tool can gouge the nail plate, causing permanent texture damage.
Using regular nail polish remover. The acetone concentration in standard remover (often 30-50%) won't fully break down gel polymer chains. You'll sit for 45 minutes and still have gel residue stuck to your nails.
Trying to remove hard gel with acetone. As mentioned earlier, hard gel and builder gel won't respond to acetone soaking. Sitting with wraps for 30 minutes accomplishes nothing except skin dehydration.
Every detail matters—and removal is where cutting corners shows up as visible damage. The nail plate is only 100 layers of keratin cells thick. Removing even 10-20 layers through aggressive scraping creates flexibility, peeling, and breakage that takes 3-4 months to grow out completely. Dermatologists consistently emphasize that mechanical damage from improper removal is the primary cause of post-gel nail problems, not the gel itself.
Alternative Removal Methods and When to Use Them
Acetone-free gel removal wraps containing plant-based solvents work for sensitive skin but require 25-30 minutes and don't fully dissolve all gel formulas. Brands like Ella+Mila market soy-based removers as gentler alternatives, which is true for skin contact—but the trade-off is significantly longer processing time and less complete gel breakdown. These work best for thin gel polish layers, not thick color applications or glitter gels.
E-files (electric nail files) offer professional-level removal speed but require training and carry high risk of nail damage in untrained hands. Nail technicians use e-files with specific bit grits and precise pressure to remove gel in 5-7 minutes per hand—but improper angle, excessive pressure, or too-coarse bits create heat friction that burns the nail bed and files through natural nail. If you're considering an e-file for home use, invest in professional training first. A single mistake can cause more damage than years of proper acetone removal.
Removal methods compared:
| Method | Time Required | Skill Level | Damage Risk | Best For |
|---|---|---|---|---|
| Acetone soak | 10-15 min | Beginner | Low (if patient) | Soak-off gel polish |
| Acetone-free wraps | 25-30 min | Beginner | Low | Sensitive skin |
| Manual filing | 15-20 min | Intermediate | Medium | Hard gel, extensions |
| E-file removal | 5-7 min | Advanced | High | Professional use |
| Peeling (never) | 30 seconds | N/A | Severe | Nothing—don't do this |
Some DIY tutorials suggest soaking fingers directly in an acetone bowl rather than using cotton wraps. This works but wastes acetone and exposes more skin to drying effects. The foil wrap method concentrates acetone exactly where needed and maintains temperature for optimal gel breakdown.
For those avoiding acetone entirely due to sensitivity, the safest option is gentle manual filing with progressively finer grits—start with 180-grit to remove bulk gel, then 220-grit to smooth, and finish with a 240-grit buffer. This takes 20-25 minutes per hand and requires careful attention to avoid filing into natural nail. Stop when you see the natural nail's texture appear—it has a slightly different sheen than gel.
Key Finding: Proper nail preparation, including gentle removal technique and avoiding mechanical damage, is critical for maintaining long-term nail health — American Academy of Dermatology
Essential Aftercare for Healthy Nails Post-Removal
Immediately after gel removal, apply cuticle oil to all nails and surrounding skin, then follow with hand cream to counteract acetone's dehydrating effects. Acetone strips natural oils from nails and skin—this isn't damage per se, but dehydration makes nails temporarily flexible and prone to breaking. Rehydration within the first hour after removal significantly improves nail resilience during the recovery period.
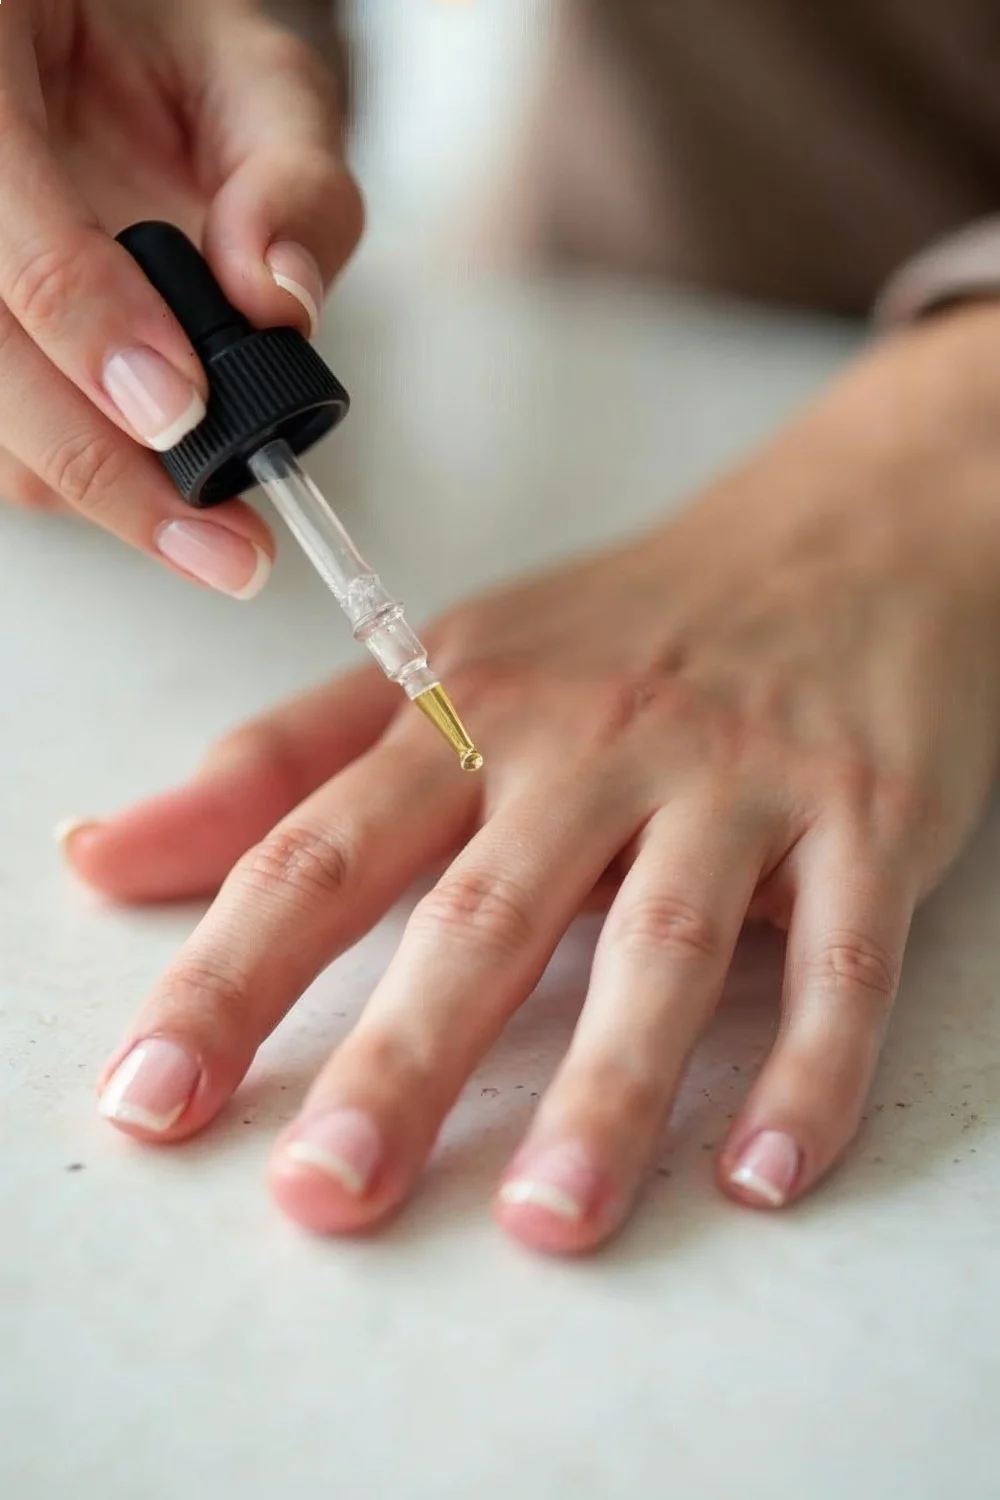
CND Solar Oil, OPI ProSpa Nail & Cuticle Oil, and Essie Apricot Cuticle Oil are formulated specifically for post-gel rehydration, with jojoba, vitamin E, and penetrating oils that absorb into the nail plate rather than sitting on the surface. Apply cuticle oil 2-3 times daily for the first week after removal—morning, midday, and before bed. Massage it into the nail plate, under the free edge, and around cuticles for 30 seconds per hand to encourage absorption and blood flow.
Post-removal nail care protocol:
Days 1-3: Apply cuticle oil three times daily. Avoid water exposure beyond normal washing—skip long baths or extended dishwashing. Water absorption causes nail expansion, and repeated wet-dry cycles while nails are dehydrated leads to peeling.
Days 4-7: Continue oil application twice daily. You can resume normal water exposure. This is an ideal time to apply a strengthening treatment like OPI Nail Envy or Essie Treat Love & Color if nails feel thin or flexible.
Week 2+: Reduce to once-daily oil application. Your nails should feel back to normal strength. If you're planning another gel manicure, wait at least 7-10 days between removal and reapplication to give nails a break from occlusion.
Some nail technicians recommend a full recovery week between gel manicures, while others say back-to-back applications are fine if removal was gentle. The truth depends on your nail condition—if they feel thin or look translucent after removal, they need recovery time. If they look and feel normal, you can reapply gel sooner. For detailed guidance on maintaining healthy nails between manicures, check out our Healthy Nail Care Tips: 12 Essential Practices.
Buffing nails immediately after removal isn't necessary and can cause additional thinning if you're too aggressive. Wait 2-3 days, then do a gentle buff with a fine-grit buffer if you want to smooth texture before your next manicure. One pass with a 240-grit buffer is sufficient—over-buffing removes nail plate layers.
Preventing Gel Damage During Regular Wear
Proper application technique, avoiding picking at lifted edges, and removing gel before excessive lifting occurs prevent the majority of gel-related nail damage. Most people blame gel for nail damage when the actual cause is removal technique or wearing gel past its viable lifespan. Gel polish typically maintains strong adhesion for 10-14 days, then begins lifting at the cuticle or free edge as natural nail grows and oils break down the bond.
Damage prevention strategies:
Apply thin coats. Thick gel layers are harder to remove—they require longer soaking time, which means more acetone exposure for skin and nails. Two thin color coats cure more completely than one thick coat and soak off more readily.
Cap the free edge. Running gel polish over the nail tip during application seals the edge where lifting typically starts. This simple step extends wear time and prevents the temptation to peel lifting gel.
Remove gel at 14 days maximum. Wearing gel for 3-4 weeks seems economical, but by week three, gel edges are usually lifting in multiple spots. Each lifted area is a peeling temptation. Plan removal before visible lifting occurs.
Use quality base coat. The base coat creates the bond between natural nail and color gel. OPI GelColor Base Coat and CND Shellac Base Coat contain adhesion promoters that bond reliably without over-gripping. Some cheap gel bases bond so aggressively that removal pulls nail layers even with proper soaking—that's over-adhesion, not good performance.
Avoid water before curing. If you wash hands immediately before gel application, wait 15 minutes for nails to fully dehydrate. Gel applied to water-swollen nails lifts prematurely as the nail contracts back to normal size.
For those interested in trying gel manicures at home, our comprehensive Gel vs Acrylic Nails: Complete 2026 Guide + Costs breaks down the differences between gel systems and helps you choose the right option for your needs.
Gel polish adhesion relies on mechanical grip—the base coat flows into microscopic nail plate texture and hardens into an interlocking bond. When you scrape gel off forcibly, you're not breaking that mechanical bond cleanly—you're fracturing nail plate layers at their weakest points. Acetone dissolves the polymer chains chemically, releasing the bond without mechanical stress.
Troubleshooting Stubborn Gel That Won't Remove
When gel remains firmly adhered after 15 minutes of acetone soaking, the likely causes are insufficient filing, weak acetone, foil seal leakage, or hard gel formula mistaken for soak-off. Before resorting to force, diagnose which factor is responsible—each has a different solution.
If gel looks unchanged after soaking: You probably didn't file enough. The top coat is still sealed. Remove the foils, file more aggressively until the gel is visibly matte and slightly rough, then re-soak with fresh cotton and acetone.
If gel is slightly soft but still grips: Your acetone concentration is too low, or the cotton dried out during soaking. Use pure acetone (verify the label says 99-100%), saturate cotton more thoroughly, and ensure foil wraps are tight with no gaps. Add 5 more minutes.
If gel feels rubbery but won't lift: This indicates partial polymer breakdown—you're close. Apply acetone-saturated cotton to remaining gel spots without foil and let it sit another 3-5 minutes. The foil isn't necessary at this stage since you're spot-treating.

If gel hasn't softened at all after 20+ minutes: You're dealing with hard gel or builder gel, not soak-off formula. Stop soaking—it won't work. Switch to manual filing with a 180-grit file. File gently in one direction, checking frequently to avoid filing into natural nail. This takes patience and practice.
For glitter gel: Glitter particles block acetone penetration. File more aggressively to break through the glitter layer, then soak. Glitter gel typically needs 15-18 minutes rather than the standard 10-12 minutes.
If you've tried everything and gel still won't budge, book a professional removal appointment. Nail salons charge $10-20 for removal service, which includes any necessary filing, proper technique, and experience with stubborn formulas. Paying for professional removal beats spending weeks regrowing damaged nails from aggressive DIY attempts.
When to Choose Professional Removal Instead
Hard gel extensions, gel sculptured nails, gel overlays on natural nails, and first-time removal attempts are situations where professional removal significantly reduces damage risk. Nail technicians have e-files, proper bits, and trained technique for removing products that don't respond to acetone soaking. They also have better visibility and angles for working on your dominant hand—removing gel from your dominant hand with your non-dominant hand is awkward and increases force application.
Professional removal costs $10-25 depending on location and whether you're getting a new service afterward (many salons discount removal when you're booking a new manicure). The time investment is 15-20 minutes compared to 30-45 minutes at home when you factor in setup, both hands, and cleanup. If your time is worth more than $20/hour, professional removal may be economical.
Choose professional removal when:
- You have gel extensions, tips, or sculptured nails (these are usually hard gel)
- Gel includes 3D elements, encapsulated designs, or thick builder layers
- You've never removed gel before and want to observe proper technique
- Previous DIY removal resulted in damage or pain
- You're short on time and have an event requiring bare or re-polished nails
- Your dominant hand has gel and you struggle with non-dominant hand dexterity
For regular soak-off gel polish that you apply at home, DIY removal is perfectly safe once you've mastered the technique. The first removal is the learning curve—after that, it's straightforward. If you enjoy doing your own gel manicures, learning proper removal is essential for making the practice sustainable. Damaging your nails every removal cycle will eventually make gel application impossible as nails become too weak to hold polish.
For readers exploring different nail styles and shapes, our guide on Almond Nail Shape: Filing Guide & Maintenance Tips covers how to maintain various nail shapes during the grow-out period between gel applications, and our French Manicure Tutorial: Modern DIY Guide (2026) demonstrates gel techniques that work well for beginners building their skills.
Building Your At-Home Gel Removal Routine
Mastering safe gel removal transforms gel manicures from a salon-dependent service into a fully manageable at-home nail care practice. The technique requires patience rather than strength—those 15 minutes of soaking time are non-negotiable, and gentle pushing beats aggressive scraping every time. Once you've completed several removals using proper technique, the process becomes routine and takes less than 30 minutes for both hands including cleanup and aftercare.
The broader skill here is understanding your nails as a living tissue that responds to how you treat it. Gel doesn't inherently damage nails—improper application and removal do. When you commit to patient removal technique, regular rehydration, and giving nails occasional breaks between applications, gel manicures become a sustainable part of your beauty routine rather than a damaging cycle. For continued nail health between gel applications, explore our Nail Care & Health category for evidence-based guidance on strengthening treatments, cuticle care, and addressing common nail concerns.
Your next step is gathering your removal supplies—pure acetone, cotton rounds, foil squares, and a wooden pusher—and scheduling your first controlled removal session. Give yourself extra time to work slowly and observe how gel responds to each step. That hands-on experience builds the tactile judgment that separates safe removal from nail damage.