Spring Nail Art Tutorial: Easy Step-by-Step Guide for Beginners
Creating beautiful spring nail art at home requires just basic polish, a few household items, and proper preparation.

Creating beautiful spring nail art at home requires just basic polish, a few household items, and proper preparation. Most beginner-friendly designs use simple techniques like dotting with bobby pins or creating stripes with tape, taking 15-30 minutes total with drying time.
- Proper nail prep with dehydrator and base coat prevents chipping within 24 hours
- Bobby pins, tape, and makeup sponges replace expensive nail art tools effectively
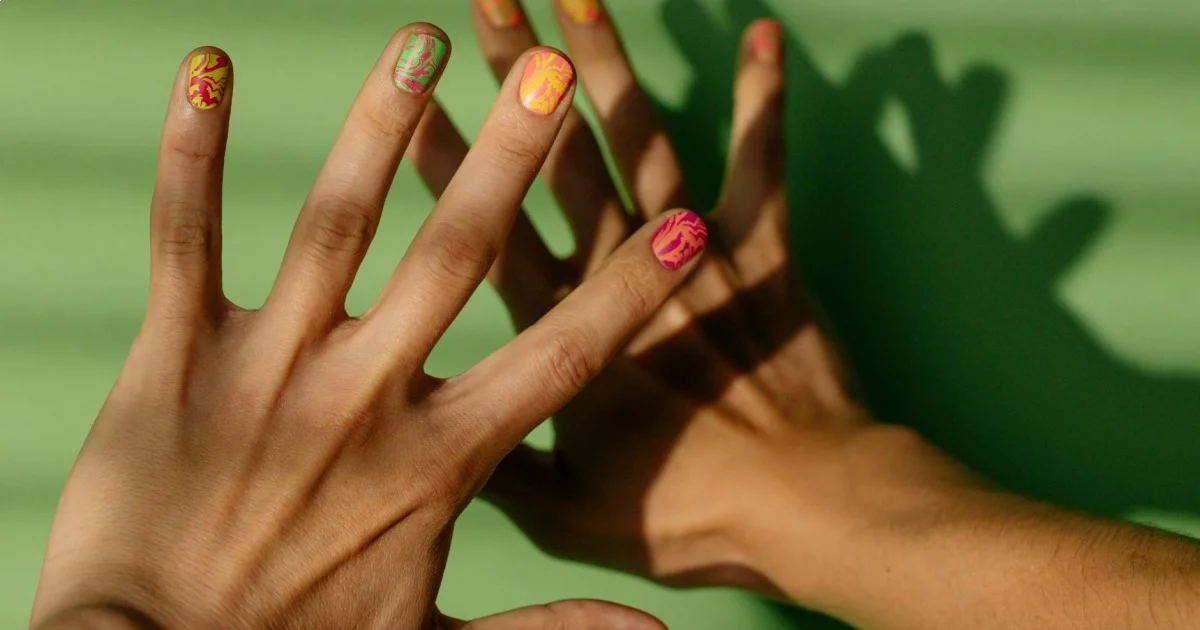
- Simple dot flowers using 3 colors create impressive spring designs in under 20 minutes
- Thin polish coats (2-3 layers) last longer than one thick application
- Sealing edges with top coat extends wear time to 5-7 days on natural nails
What Supplies Do You Actually Need for Spring Nail Art?
You don't need a professional setup to create spring designs. I've tested dozens of household alternatives, and honestly, some work better than the "real" tools. Here's what actually matters versus what's just marketing.
Essential Supplies:
- Base coat (I use OPI Natural Nail Base Coat - $10)- 3-4 spring colors (pastels or brights)- Top coat (Seche Vite is worth the $9 investment)- Nail file and buffer- Cuticle pusher or orange stick
Household Tool Alternatives:
- Bobby pins = dotting tools (seriously, they're identical)- Scotch tape = striping tape- Makeup sponges = gradient tools- Toothpicks = detail brushes- Small scissors = cuticle nippers
| Tool Type | Professional Cost | Household Alternative | My Rating |
|---|---|---|---|
| Dotting tools | $8-15 | Bobby pins (free) | 5/5 |
| Striping tape | $5-8 | Scotch tape | 4/5 |
| Detail brushes | $12-20 | Toothpicks | 3/5 |
| Cleanup brush | $6-10 | Old eyeliner brush | 5/5 |
Key Finding: Proper nail preparation, including dehydrating and base coat application, is the most important factor in DIY manicure longevity — American Academy of Dermatology
How Do You Prep Your Nails for Long-Lasting Art?
Skipping prep is why most DIY nail art chips within two days. I learned this the hard way after ruining countless designs. The secret isn't expensive products, it's patience with the process. Key Finding: Applying a proper base coat is crucial for extending the wear time of nail polish and preventing chips.
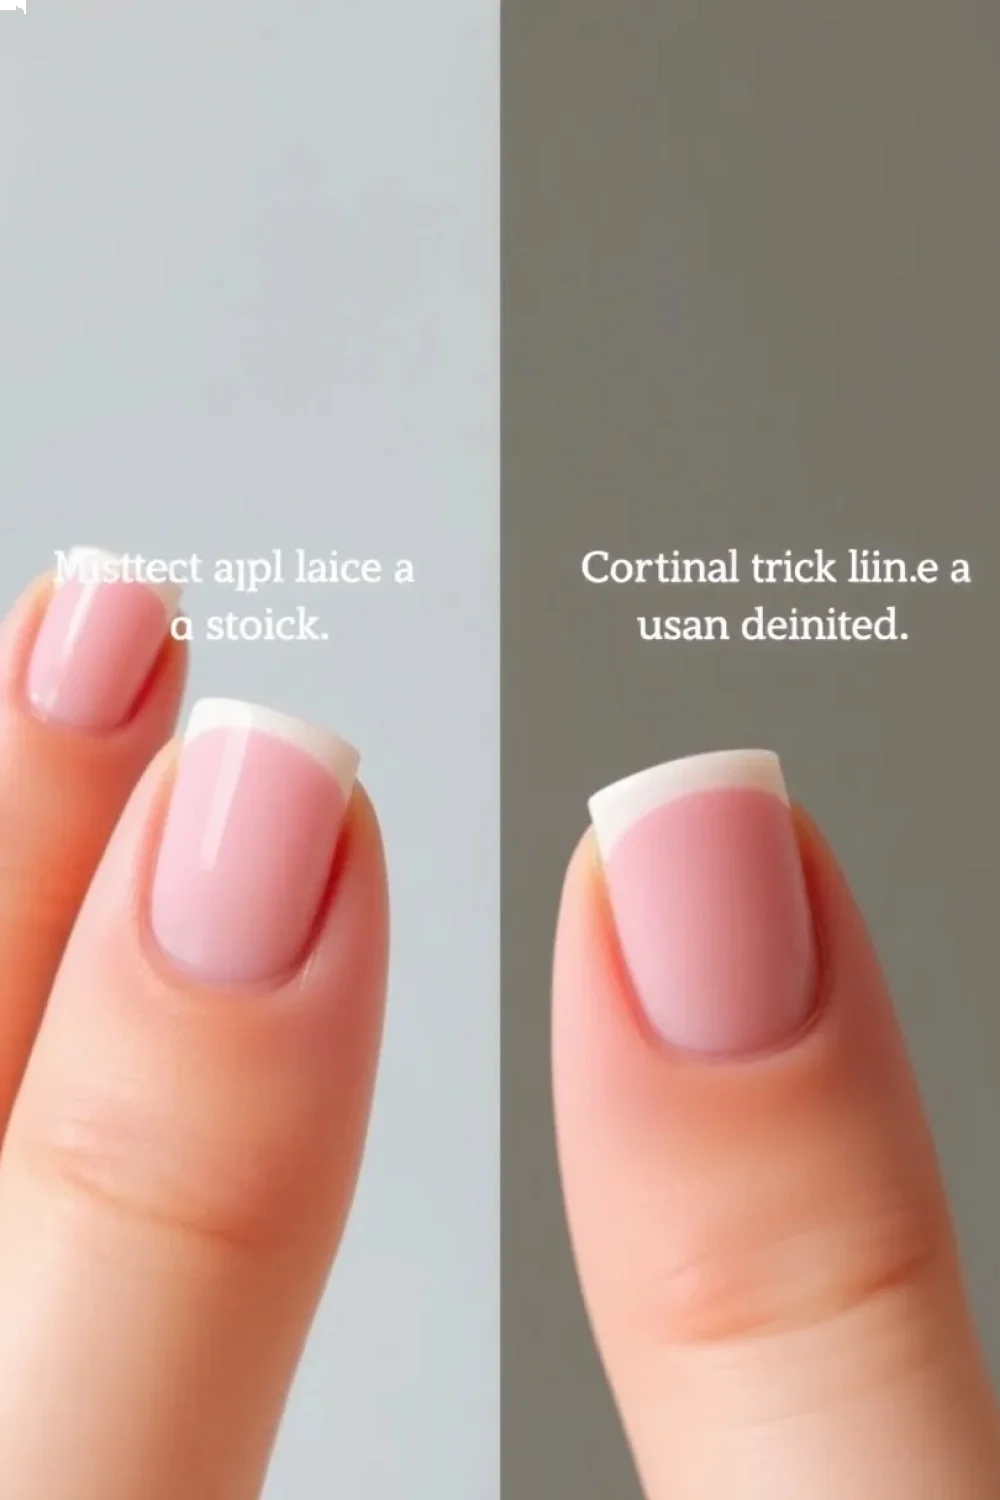
p> Step 1: Shape and Clean (5 minutes) File nails in one direction only. I prefer a slightly rounded square for spring designs because it shows off patterns better than sharp points. Push cuticles back gently - don't cut them unless you're experienced.
Step 2: Dehydrate the Nail Surface This step changed everything for me. Wipe each nail with rubbing alcohol or acetone to remove oils. Your nails should feel slightly rough, not smooth. Smooth nails = polish slides right off.
Step 3: Apply Base Coat Properly Thin coats only. I brush from cuticle to tip in three strokes: left side, center, right side. Then "cap" the free edge by running the brush along the nail tip. This seals everything in.
Let the base coat dry for 2 full minutes. Not "feels dry" - actually dry. Touch test on your pinky first.

Step-by-Step: Simple Spring Dot Flowers (Perfect for First-Timers)
This design looks way harder than it is. I've taught this to friends with zero nail art experience, and they nail it (pun intended) on the first try. Total time: 20 minutes plus drying.
Colors needed:
- Light pink or lavender base (I use Essie "Fiji")- White for flower petals- Yellow for centers- Green for leaves (optional)
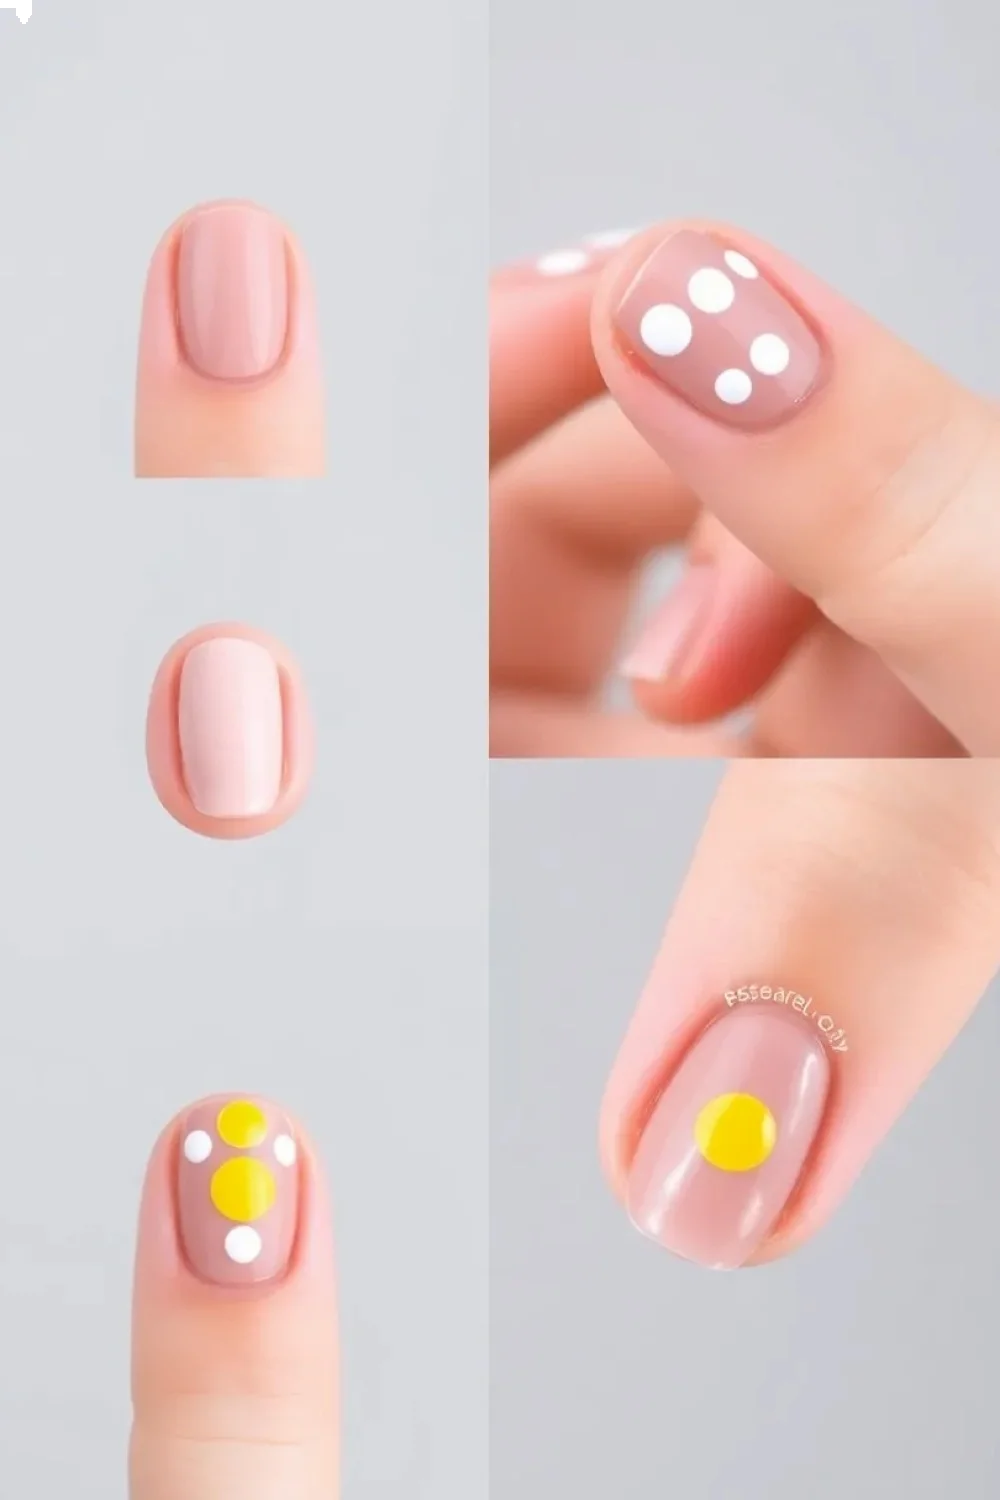
Step 1: Apply Your Base Color Two thin coats of your spring base color. Wait 90 seconds between coats. The second coat should look completely opaque. If it's streaky, add a third thin coat rather than one thick one.
Step 2: Create the Flower Petals Dip a bobby pin's round end into white polish. Dab off excess on the bottle rim - you want just a small amount. Make 5 dots in a flower pattern on each nail. Don't worry about perfect circles. Slightly irregular dots look more natural.
Work on one hand at a time so the base doesn't get too dry. The white should sit on top, not sink in.
Step 3: Add Flower Centers Clean your bobby pin with acetone. Dip into yellow polish and dot the center of each flower. These dots should be smaller than the petals. If your yellow is sheer, let it dry and add a second dot.
Step 4: Optional Leaves Using a toothpick, drag small lines from the flowers to create simple leaves. Keep the lines short and don't overthink the shape.
Step 5: Seal Everything Wait 3 full minutes, then apply top coat. Cap the edges again. The design should look glossy and slightly raised.
How Do You Create Perfect Stripes with Household Tape?
Stripes seem foolproof but there's a specific technique that prevents bleeding. I ruined my first five attempts before figuring out the tape trick. Key Finding: Filing nails in one direction helps to prevent splitting and peeling, promoting stronger nail growth.
p> The Setup: Start with two contrasting spring colors. I love mint green with coral, or lavender with bright yellow. Apply your base color (the color you want the stripes to be) and let it dry completely - 5 minutes minimum.
Tape Application Secret: Here's what nobody tells you: stick the tape to your skin first, then to your nail. Fresh tape is too sticky and will pull off your base color. Stick it to the back of your hand, peel it off, then apply to your nail.
Place tape strips where you want the base color to show through. Press down edges firmly with a cuticle pusher.
Painting Over Tape: Apply your second color right over the tape. Don't worry about being neat - the tape handles that. The key is removing the tape while the polish is still slightly wet. If you wait until it's dry, you'll get jagged edges.
Peel the tape at a 45-degree angle, slowly. Clean lines every time.
Key Finding: Professional nail artists recommend removing tape while polish is still tacky to prevent peeling and achieve clean lines — OPI Professional Blog
What About Gradient Effects with a Makeup Sponge?
Gradients (or "ombre") look complicated but they're actually more forgiving than solid colors. Imperfections blend away, which is perfect for shaky hands.
Sponge Prep: Use a makeup sponge, not a kitchen sponge. Dampen it slightly - completely dry sponges absorb too much polish, soaking wet ones make a mess.
Color Application: Paint stripes of your chosen colors directly onto the sponge, slightly overlapping where you want them to blend. I typically use 2-3 spring colors: light to dark or complementary pastels.
Dab the sponge onto your nail with a bouncing motion. Don't drag or swipe. The first application will look patchy - that's normal. Let it dry for 60 seconds, then repeat 2-3 times until you like the opacity.
Cleanup: Gradients are messy. Use a small cleanup brush dipped in acetone to clean around your cuticles. Do this before your top coat.
What Are Common Beginner Mistakes and How Do You Fix Them?
I've made every possible nail art mistake, so you don't have to. Here are the big ones that trip up beginners, plus my fixes.
Mistake 1: Thick Polish Coats Thick coats take forever to dry, bubble easily, and chip faster. Two thin coats always beat one thick coat. If your first coat looks streaky, resist the urge to go back over it immediately. Let it dry, then add a second thin layer.
Mistake 2: Skipping Dry Time I used to think "feels dry" meant ready for the next step. Wrong. Polish has multiple drying stages. Surface dry (feels dry to touch) happens in 30-60 seconds. Full dry (can handle pressure) takes 3-5 minutes per coat.
Test dryness by gently tapping nails together. If they stick or dent, wait longer.
Mistake 3: Using Polish Straight from the Fridge Cold polish applies poorly and bubbles easily. Room temperature polish flows better. If your polish is thick, roll the bottle between your hands - don't shake it. Shaking creates air bubbles.
Mistake 4: Flooding the Cuticles Leave a tiny gap between polish and cuticle. Polish that touches skin will chip faster as your hands move. If you flood the cuticle, clean it up immediately with a small brush dipped in acetone.
How Long Should Spring Nail Art Last?
With proper prep and application, expect 5-7 days of chip-free wear on natural nails. Here's what affects longevity in my experience:
Factors That Extend Wear:
- Capping the free edge with each coat- Using a quality base coat (I swear by OPI)- Avoiding hot water for 2 hours after application- Wearing gloves for cleaning and gardening
What Kills Nail Art Fast:
- Skipping base coat (chips within 24 hours)- Thick polish application (bubbles and peels)- Not sealing cuticle area properly- Using acetone-based hand sanitizer frequently
Key Finding: Thin polish applications with proper base and top coats significantly improve wear time compared to single thick coats — Allure Beauty
Daily Maintenance: Apply cuticle oil daily - it keeps the nail flexible and prevents cracking around the edges. I use jojoba oil from the grocery store. Expensive cuticle oils aren't worth it.
If you get a small chip, don't pick at it. Dab on a tiny bit of matching polish, let dry, then seal with top coat.
Which Spring Colors Work Best for Beginners?
Color choice can make or break a design. Some combinations are naturally forgiving, others highlight every mistake. After testing countless combinations, here are my go-to spring palettes.
Foolproof Beginner Combinations:
- Soft pink + white + gold (classic and forgiving)- Mint green + coral (mistakes blend well)- Lavender + yellow + white (cheerful spring tones)- Nude base + any bright accent (lets you practice without commitment)
Colors to Avoid as a Beginner:
- Dark colors show brush strokes and bubbles more- Red requires perfect application (unforgiving)- Black makes every flaw obvious- Glitter is nearly impossible to remove cleanly
Finish Considerations: Creme finishes are most beginner-friendly. Shimmers hide minor imperfections. Metallics show every brush stroke. Mattes require perfect application since you can't clean up mistakes easily.
Additional Easy Spring Design Ideas
Once you master the dot flowers, try these variations using the same techniques:
Simple Daisy Chain: Create a line of small white dot flowers across the nail horizontally. Add yellow centers and tiny green stems with a toothpick. Takes 10 minutes per hand.
Polka Dot Garden: Random dots in 3 spring colors over a neutral base. Vary the sizes by using different ends of bobby pins or toothpicks. No pattern needed - random looks intentional.
Minimalist Spring Lines: Thin vertical or diagonal lines in a bright spring color over a pastel base. Use tape as a guide or freehand with a toothpick. Even shaky lines look artistic.
What's Your Next Step?
Start with the dot flower tutorial this weekend. Pick up base coat, top coat, and three spring colors - total investment under $25. Practice the technique on one accent nail first before doing a full manicure.
Once you're comfortable with dots, try the stripe technique using tape. Master these two methods and you'll have dozens of design possibilities. Check out our [DIY Spring Nail Art: 5 Easy Designs You Can Do at Home](/diy-spring-nail-art) for more inspiration once you've nailed the basics.
Remember: your first attempt won't be perfect, and that's completely normal. I still mess up designs after years of practice. The difference is knowing how to fix mistakes and having realistic expectations. Start simple, focus on clean application, and build your skills gradually.
For more beginner tutorials and technique breakdowns, explore our complete DIY Nail Art for Beginners guide. Your nail art journey starts with a single dot - make it a good one.
- Proper nail preparation with dehydrator and base coat prevents chipping within 24 hours.
- Household items like bobby pins and tape effectively replace expensive nail art tools.
- Simple dot flowers using three colors create impressive spring designs in under 20 minutes.
- Thin polish coats (2-3 layers) last longer than one thick application for better wear.
- Sealing nail edges with top coat extends natural nail wear time to 5-7 days.
Frequently Asked Questions
What Supplies Do You Actually Need for Spring Nail Art?
You don't need a professional setup to create spring designs. I've tested dozens of household alternatives, and honestly, some work better than the "real" tools. Here's what actually matters versus what's just marketing.
How Do You Prep Your Nails for Long-Lasting Art?
Skipping prep is why most DIY nail art chips within two days. I learned this the hard way after ruining countless designs. The secret isn't expensive products, it's patience with the process. Step 1: Shape and Clean (5 minutes)
How Do You Create Perfect Stripes with Household Tape?
Stripes seem foolproof but there's a specific technique that prevents bleeding. I ruined my first five attempts before figuring out the tape trick. The Setup: Start with two contrasting spring colors. I love mint green with coral, or lavender with bright yellow.
What About Gradient Effects with a Makeup Sponge?
Gradients (or "ombre") look complicated but they're actually more forgiving than solid colors. Imperfections blend away, which is perfect for shaky hands. Sponge Prep: Use a makeup sponge, not a kitchen sponge.
What Are Common Beginner Mistakes and How Do You Fix Them?
I've made every possible nail art mistake, so you don't have to. Here are the big ones that trip up beginners, plus my fixes. Mistake 1: Thick Polish Coats Thick coats take forever to dry, bubble easily, and chip faster. Two thin coats always beat one thick coat.