Watermelon Nails: 10 Juicy Summer Designs Tutorial
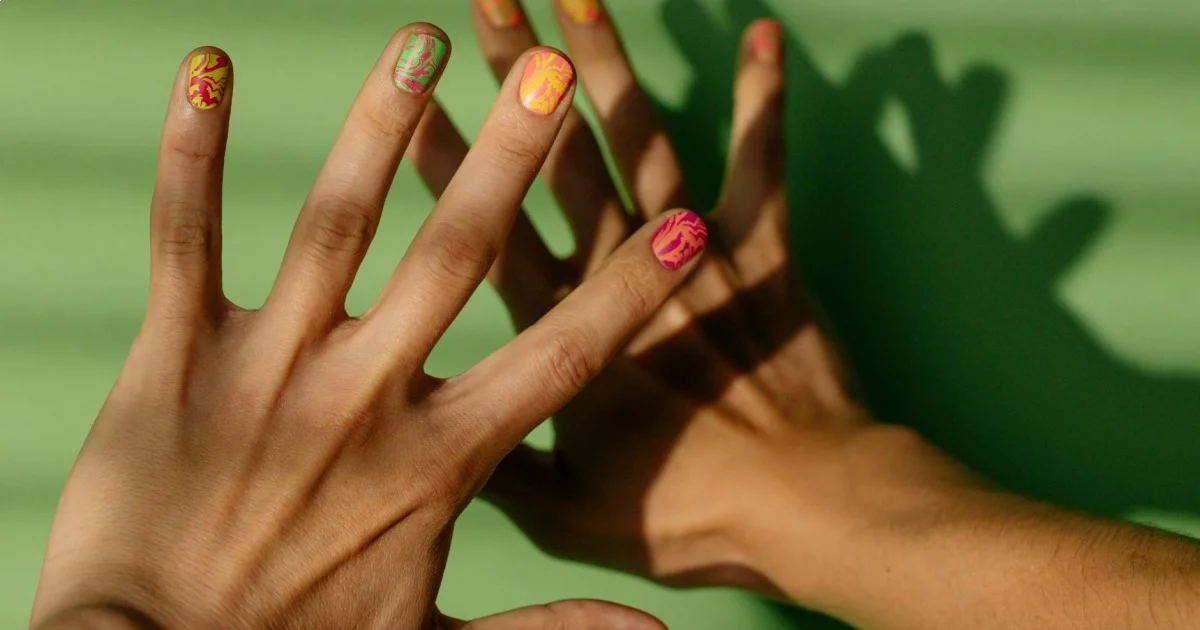
Watermelon nails capture summer's aesthetic through pink, green, and black color blocking that mimics the fruit's cross-section.
Watermelon nails capture summer's aesthetic through pink, green, and black color blocking that mimics the fruit's cross-section. These designs range from simple gradient fades to detailed seed placement, with most techniques requiring 45-90 minutes and readily available drugstore polishes. According to industry data, fruit-inspired nail art consistently ranks among the top five seasonal search queries from May through August.
- Watermelon designs work on any nail length, with short nails favoring vertical stripes and longer nails accommodating horizontal sections
- Most designs require only three core shades: coral or pink, light green or white, and dark green, plus black for seeds
- Dotting tools create realistic seed placement; toothpicks work as budget alternatives
- Proper base coat application and thin color layers prevent chipping during the typical one-week wear window
- Matte top coats transform glossy watermelon nails into realistic rind textures
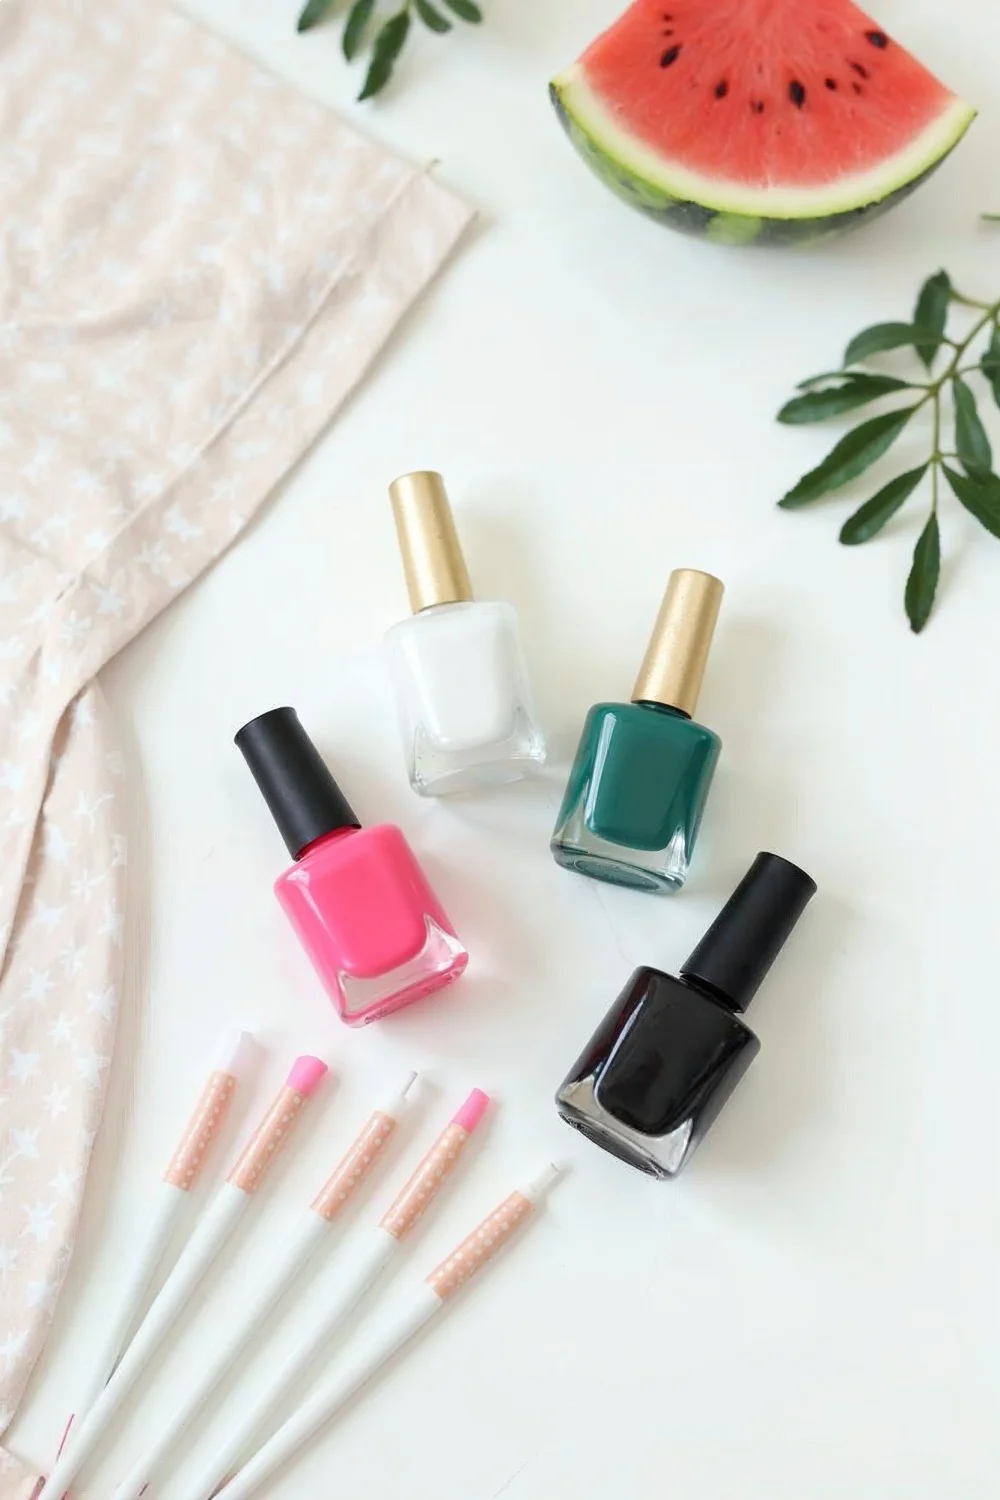
Required Supplies and Preparation
Before starting any watermelon design, gather your core supplies: a base coat (Sally Hansen Hard as Nails or OPI Natural Nail Base Coat both work well at $8-10), three to four polish shades, a fast-dry top coat like Seche Vite ($10), and detailing tools. For color selection, you need a coral or bright pink (Essie Cute as a Button or OPI Live.Love.Carnaval), a light green or white (OPI Funny Bunny or China Glaze Re-Fresh Mint), a dark green (Sally Hansen Jaded or Essie Going Incognito), and black polish for seeds. Dotting tools run $5-8 for a five-piece set; bobby pins work in a pinch.
Nail preparation determines wear length more than polish quality. Start by removing any existing polish with acetone, then wash hands thoroughly to remove oil residue. Push back cuticles gently with an orange wood stick—never cut them, as proper nail care maintains the protective barrier. File nails to your preferred shape; watermelon designs work on round, oval, or almond shapes equally well. Buff the nail surface lightly with a 240-grit file to create texture for polish adhesion. Wipe nails with rubbing alcohol on a lint-free pad to dehydrate the nail plate completely.
Apply a thin base coat layer, extending it slightly over the free edge to cap the tip. This prevents water infiltration that causes lifting. Let dry for two full minutes before adding color. Most watermelon design failures trace back to skipping this dehydration and base coat step.
Key Finding: Proper nail preparation, including dehydrating and base coat application, is the most important factor in DIY manicure longevity — American Academy of Dermatology
Design 1: Classic Horizontal Watermelon Slice
The horizontal slice creates a realistic watermelon cross-section by layering three distinct color bands across the nail. This beginner-friendly design takes 45 minutes including dry time and requires no special tools beyond your polish brushes.
Apply two coats of coral or hot pink polish to the entire nail, letting each coat dry for 90 seconds. The first coat typically looks streaky—that's normal. The second evens out coverage. Once fully dry (wait three minutes), paint a thin curved band of white or light green along the bottom quarter of the nail, following the natural curve of your cuticle. This represents the rind's inner flesh.
After another two-minute dry time, add a slightly thicker band of dark green polish along the very bottom edge of the nail, overlapping the light green slightly. Keep this band narrow—about 2mm wide. The transition doesn't need to be perfect; slight color mixing actually looks more organic.
For seeds, dip a small dotting tool or toothpick tip into black polish. Blot once on paper to remove excess. Place 5-7 tiny dots randomly across the pink section, concentrating them slightly toward the center. Let dots dry completely before applying top coat—wet seeds will smear. Apply two thin layers of top coat, waiting 60 seconds between coats. Cap the free edge with both layers.
This design typically lasts 5-7 days before tip wear becomes noticeable. Reapply top coat on day three to extend wear.
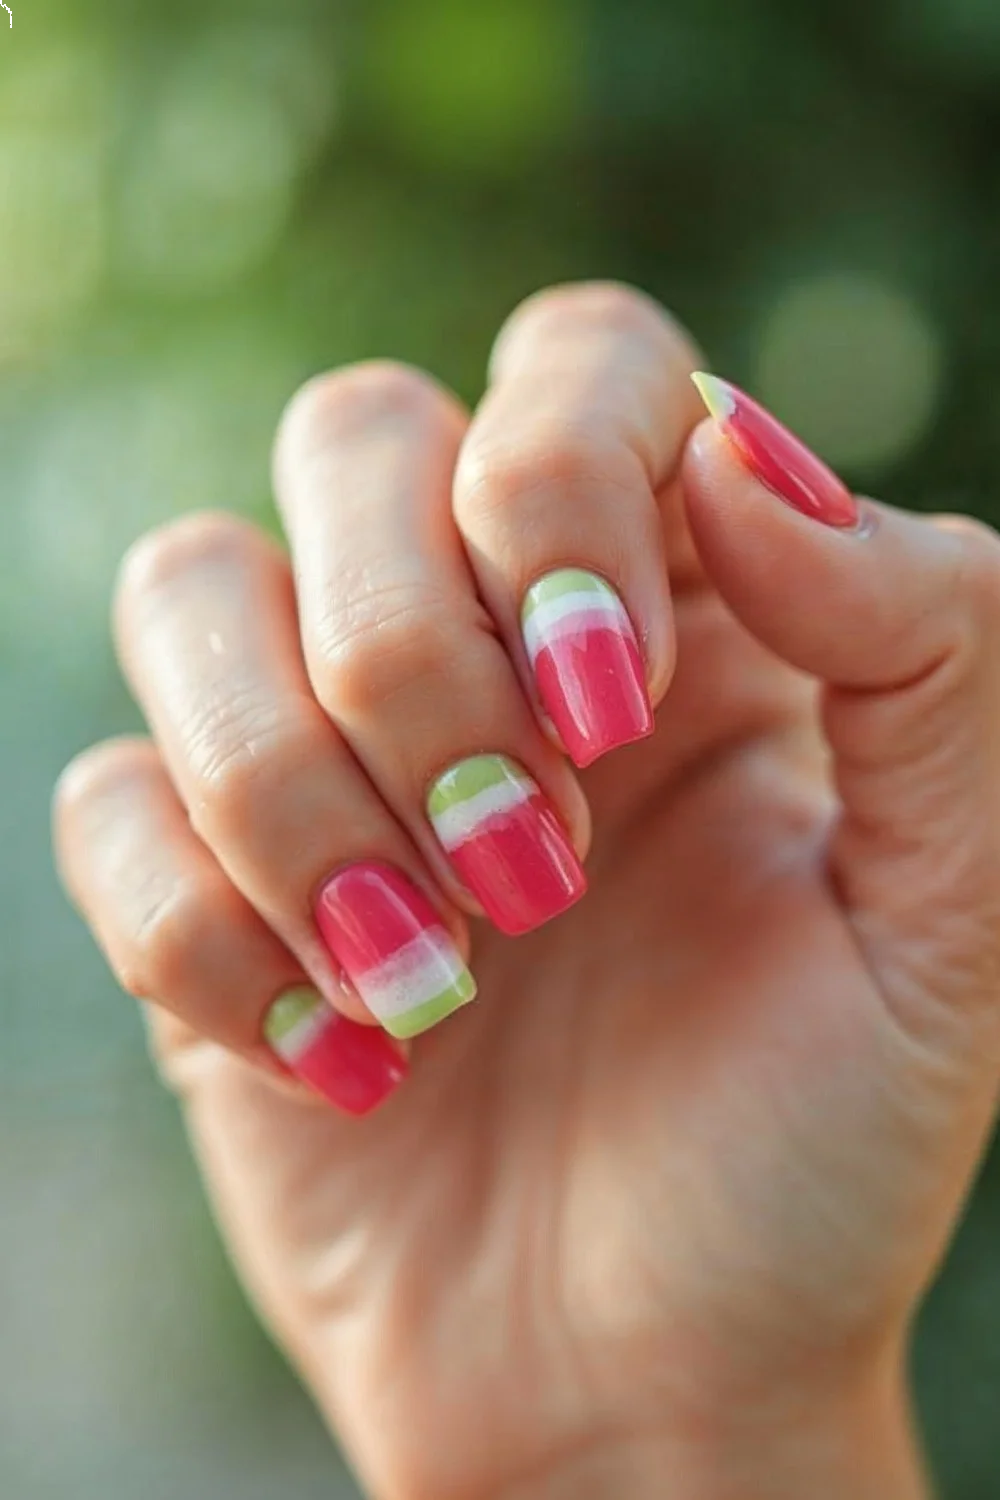
Design 2: Vertical Watermelon Stripe Pattern
Vertical stripes elongate short nails while maintaining the watermelon color story. This intermediate design takes about 60 minutes and works particularly well on short nail designs where horizontal bands can make nails appear wider.
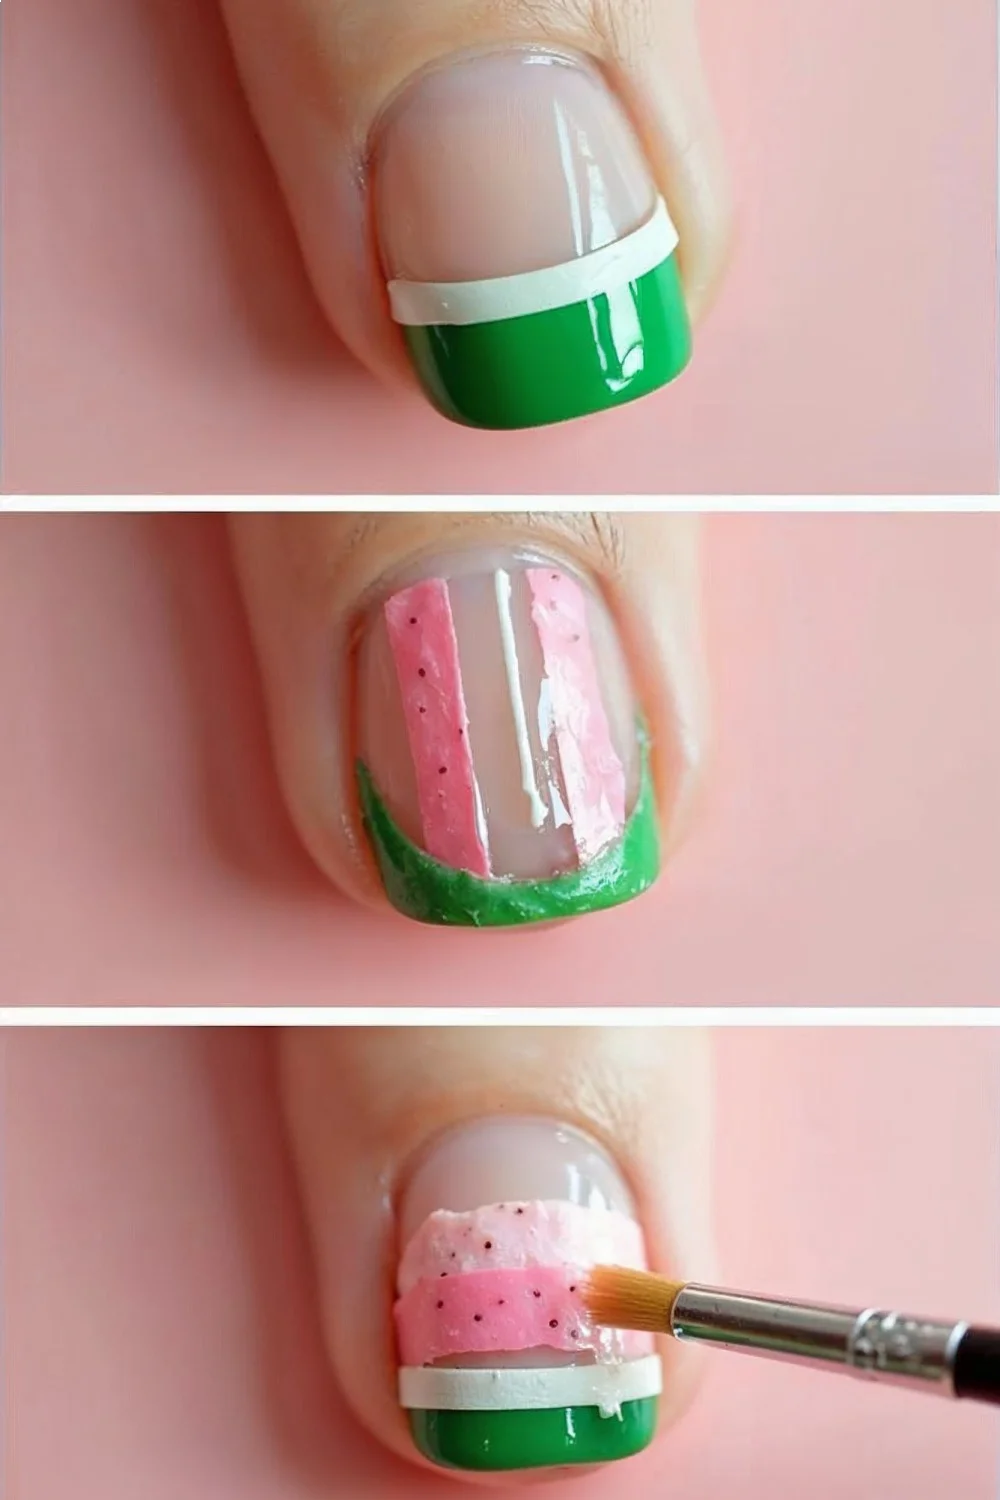
Start with a white or light pink base—two coats applied as described above. Once completely dry, use striping tape or cut regular office tape into 2mm strips. Place three to four strips vertically down each nail, spacing them evenly. Press tape edges firmly to prevent polish bleed.
Paint exposed sections with alternating colors: coral pink, light green, and dark green. Work carefully around tape edges. The polish will be slightly thicker than usual since you're working in confined spaces. That's fine—just avoid globbing.
Wait five full minutes before removing tape. This is longer than most tutorials suggest, but premature removal causes smearing. Peel tape slowly at a 45-degree angle, not straight up. If any edges look rough, clean them with a small brush dipped in acetone.
 nails design with green base, pink stripes, and white accents using tape technique" loading="lazy">
Add black seed dots randomly across pink stripes only. The contrast against pink makes seeds visible; dots on green sections get lost visually. Seal with top coat, using thin coats to avoid flooding the design and obscuring color transitions.
| Design Element | Classic Horizontal | Vertical Stripe | Diagonal Slice | Half-Moon |
|---|---|---|---|---|
| Skill Level | Beginner | Intermediate | Intermediate | Advanced |
| Time Required | 45 minutes | 60 minutes | 55 minutes | 75 minutes |
| Best Nail Length | Medium to long | Short to medium | Any length | Medium to long |
| Special Tools | Dotting tool only | Striping tape | Angled brush | Reinforcement stickers |
Design 3: Gradient Watermelon Fade
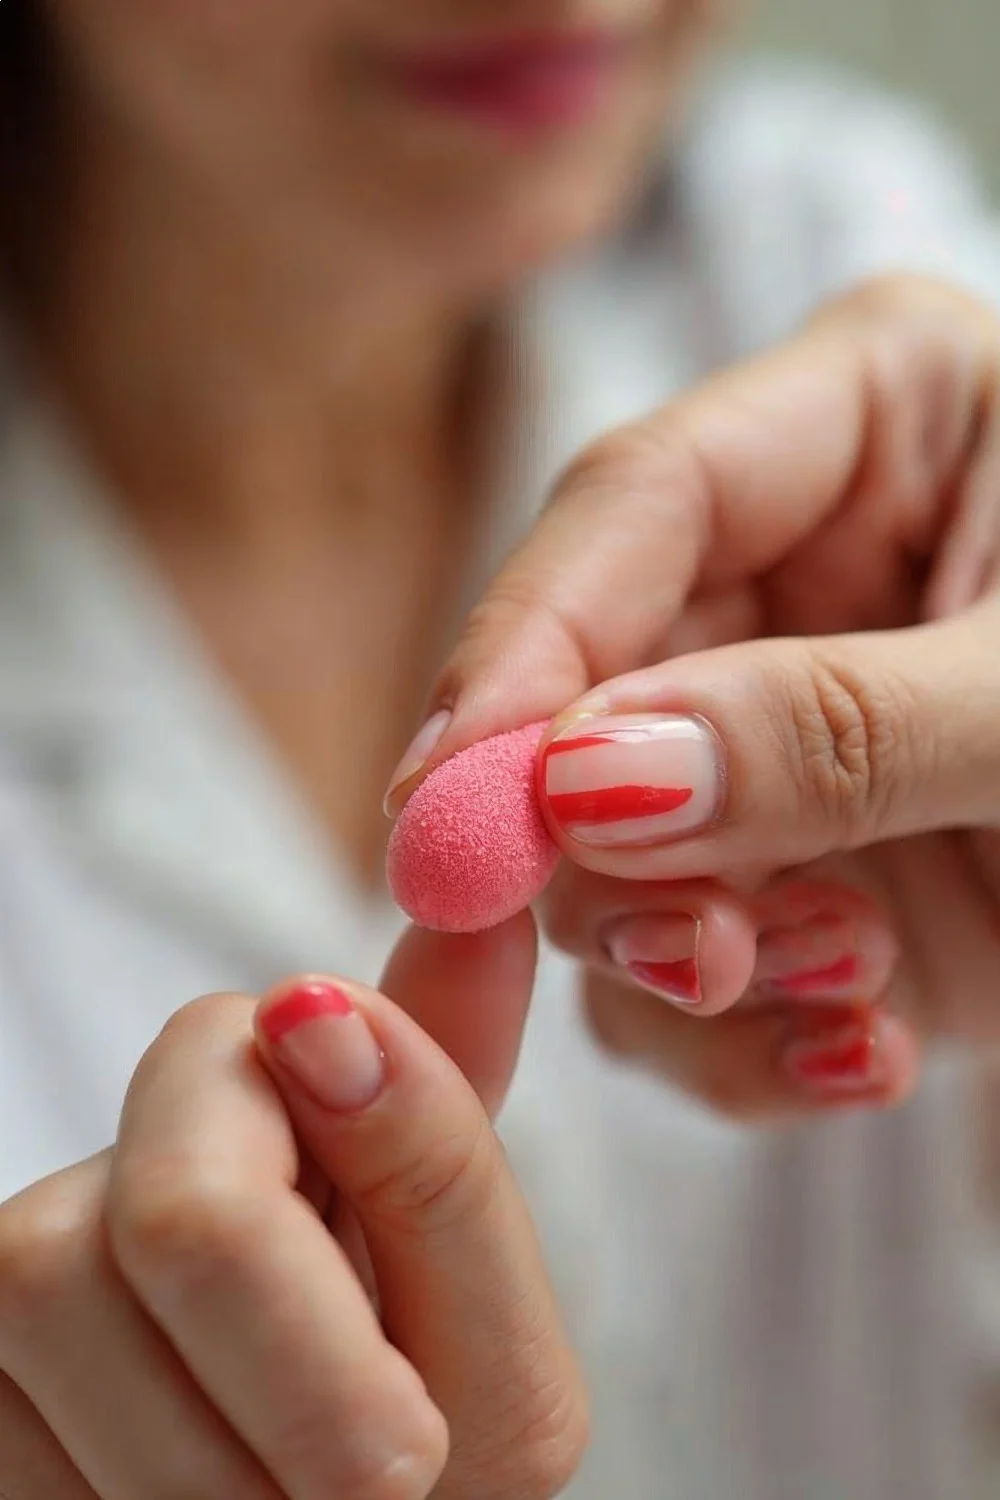
Gradient techniques blend pink into green seamlessly, creating a stylized watermelon interpretation. This takes 70 minutes and requires a makeup sponge—the cheap wedge sponges from drugstores work better than beauty blenders because their density is lower.
Apply white polish as your base—two coats, fully dried. Cut your makeup sponge into a narrow rectangle about 1cm wide. Paint three horizontal stripes directly onto the sponge: coral pink at the top, white in the middle, and light green at the bottom. While polish is still wet, dab the sponge onto your nail in a bouncing motion, not a wiping motion. Bounce 8-10 times per nail.
The first application looks patchy. That's expected. Let it dry for two minutes, then repeat the process—fresh polish on the sponge, bounce again. Most gradients need three sponge applications to achieve opacity. Between applications, trim away any sponge edges that have become saturated and messy.
Cleanup is messier with sponge techniques. Use a small brush dipped in acetone to clean skin around nails, or apply liquid latex or petroleum jelly to surrounding skin before starting (remove after sponging). Add a thin dark green stripe at the base for the rind, then place seeds. The gradient creates a modern, abstract watermelon interpretation that reads more sophisticated than literal fruit mimicry.
According to Essie's nail art guides, sponge gradients work best with cream finish polishes rather than shimmers, which can create muddy transitions.
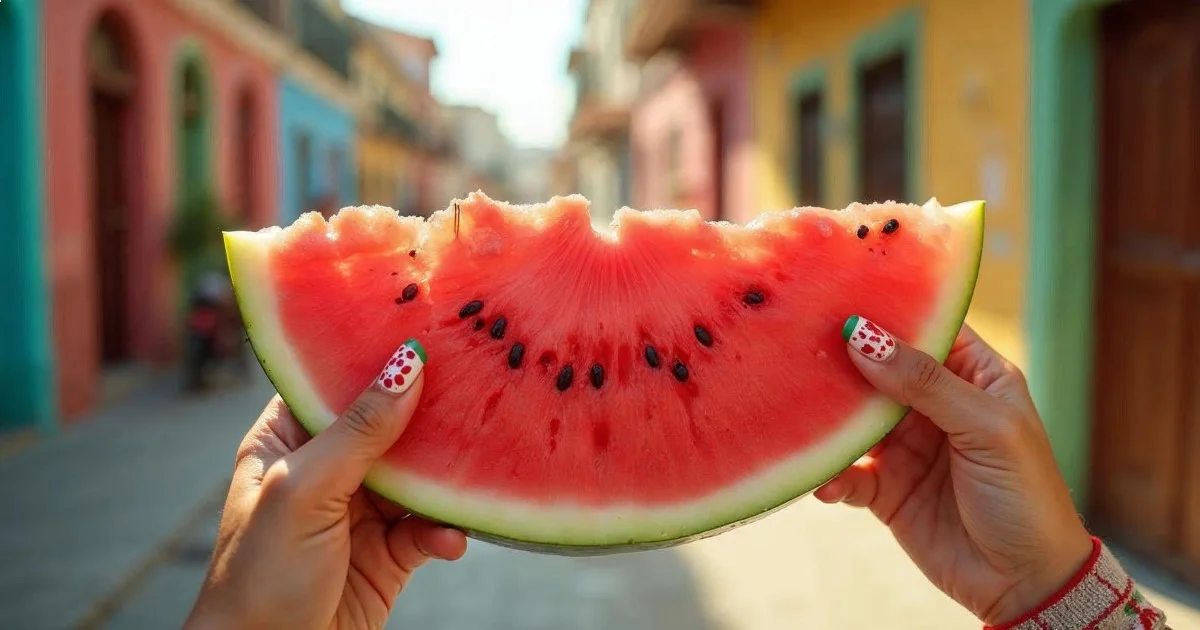
Design 4: Minimalist Single Watermelon Accent
Not every nail needs a full design. The accent nail approach features one detailed watermelon nail among four solid-color nails, balancing visual interest with wearability. This beginner-friendly option takes 40 minutes.
Paint your thumb, index, middle, and pinky nails with two coats of coral pink polish. On your ring finger (the traditional accent placement), create the full horizontal watermelon design described in Design 1: pink base, white curve, green rind, black seeds. The contrast draws the eye without overwhelming the hand.
Alternatively, paint four nails solid dark green and feature the watermelon on one nail. This reverses the typical approach and reads slightly edgier—the green becomes dominant rather than an accent. For professional settings, this green-heavy version looks less juvenile while maintaining summer vibes.
The single accent technique works particularly well for vacation nails where you want personality without high maintenance. If the detailed nail chips, you can simply paint over it with the solid color and still have a cohesive look.
Design 5: Abstract Watermelon Color Blocking
Geometric color blocking translates watermelon tones into modern nail art without literal fruit representation. This advanced design takes 80 minutes and requires striping tape and a steady hand.
Divide each nail into asymmetric sections using striping tape—think abstract shapes, not even quarters. One nail might have a large coral triangle in the upper right, a thin dark green stripe down the left, and white filling the remaining space. Another nail uses completely different proportions and placement.

The key is maintaining the watermelon color palette (pink, green, white, black) while abandoning fruit imagery. Paint each taped section carefully, working one color at a time. Remove tape after five minutes per color. This is tedious—you're applying and removing tape multiple times per nail—but the graphic result justifies the effort.
Add tiny black dots sparingly, using them as design elements rather than seeds. Place them at color intersections or cluster them in one geometric section. Finish with a glossy top coat that emphasizes the clean lines.
This approach appears frequently in matte nail designs as well; substituting matte top coat for glossy creates an entirely different mood with the same color blocking.
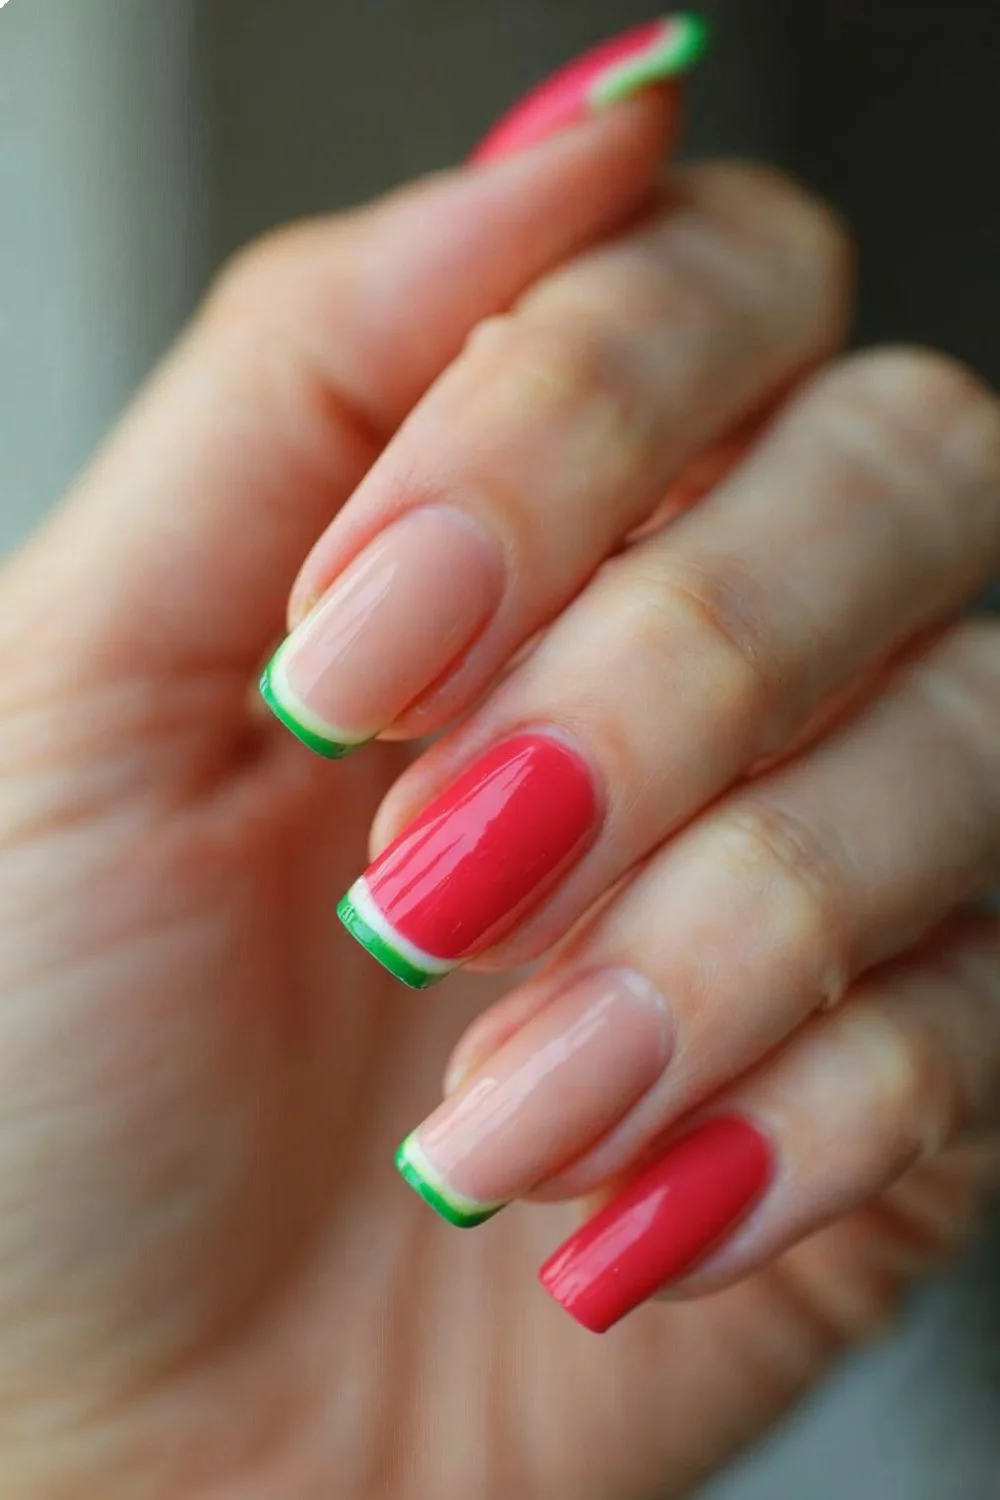
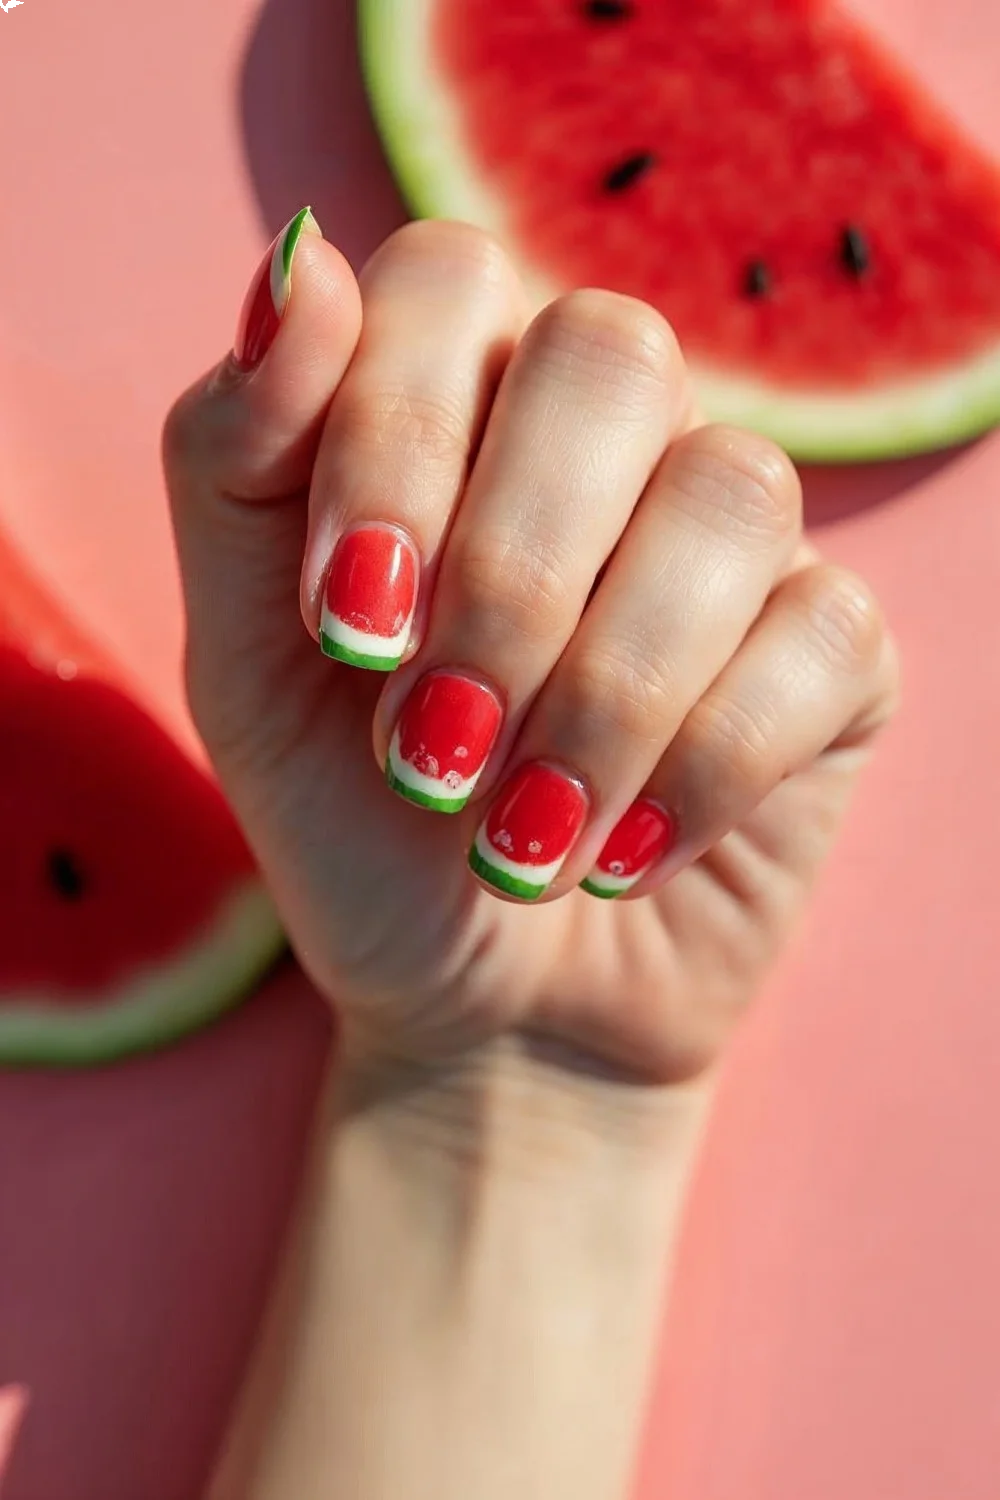
Design 6: Watermelon French Tips
The French manicure structure adapts perfectly to watermelon design by concentrating color at the nail tip. This intermediate technique takes 55 minutes and combines classic elegance with summer fun.
Apply a sheer pink or nude base to the entire nail—two coats. Essie Ballet Slippers or OPI Bubble Bath both work well. Once dry, paint the free edge (tips) with coral or hot pink polish, creating a thicker smile line than traditional French tips—about 4-5mm rather than 2-3mm. The wider band provides space for the green rind detail.
After the coral dries (wait three minutes), add a thin dark green line at the very tip edge, about 1mm wide. This represents the rind sitting at the watermelon's outer edge. The green line should follow the same curve as your tip—use a striping brush or the edge of a regular polish brush for control.
Place 2-3 black seed dots on each nail within the coral section only. Keep dots small and spaced apart—crowding makes tips look messy. Seal with top coat, paying extra attention to cap the free edge since tips experience the most wear.
This design looks more sophisticated than full watermelon nails and transitions better into non-beach settings. French tip variations remain among the most requested nail art categories regardless of season.
Design 7: Watermelon Half-Moon Manicure
Half-moon (or reverse French) manicures place design emphasis at the cuticle rather than the tip. This advanced design takes 75 minutes and requires reinforcement stickers or steady freehand skills.
Apply two coats of coral pink to the entire nail. Once completely dry, place half-moon reinforcement stickers (nail art stickers shaped like crescents) along the cuticle line, leaving the bottom 3-4mm exposed. Paint the exposed crescent with dark green, then carefully add a thinner light green or white stripe between the green and pink sections after the green dries.
Reinforcement stickers leave slightly raised edges—that's the trade-off for easier application. Remove stickers after five minutes, then use a small brush to smooth any ridges where colors meet. Freehand half-moons skip the stickers but require a very steady hand and a striping brush.
Add seeds to the pink section as usual. The half-moon creates visual interest at the cuticle where growth is most noticeable, so this design actually looks better as it grows out compared to tip-focused designs. Regrowth blends into the green "rind" naturally.
For technique guidance, Allure's DIY manicure guide covers clean cuticle lines and color blocking fundamentals that apply directly to half-moon designs.
Design 8: Matte Watermelon with Glossy Seeds
Texture contrast elevates simple designs dramatically. The matte finish mimics watermelon rind texture while glossy seeds add dimension. This beginner-friendly technique takes 50 minutes.
Create any watermelon design from options above—the classic horizontal slice works particularly well. Complete the design including seeds and let everything dry fully. Apply one coat of regular glossy top coat and let dry for two minutes.
Now apply matte top coat over the entire nail. Work quickly with thin coats—matte formulas can drag and disturb underlying color if you overwork them. Essie Matte About You and Sally Hansen Big Matte Top Coat both apply smoothly at $8-10 per bottle. Let dry for five minutes.
The matte finish transforms the look from candy-sweet to sophisticated. The rind sections particularly benefit—matte green reads more like actual watermelon skin than glossy green. For extra dimension, you can use a small brush to apply additional glossy top coat only over the black seeds after the matte coat dries. This creates glossy seed "pops" against the matte background.
Matte top coats typically last 4-6 days before showing wear, slightly shorter than glossy formulas. Reapply matte top coat as needed rather than switching to glossy, which changes the entire aesthetic.
Design 9: Watermelon Slice Negative Space Design
Negative space techniques let the natural nail show through as part of the design. This intermediate approach takes 65 minutes and works best on healthy, even-toned nails.
Apply base coat but skip the color base. Using striping tape or a steady hand, paint a curved pink section starting at the free edge and extending about halfway down the nail—this represents the watermelon flesh. Below it, paint a thin curved white or light green band, then a dark green band at the cuticle. The middle section of the nail remains bare.
The bare nail provides visual breathing room and creates a modern, editorial look. Add 3-4 black seed dots in the pink section only. When applying top coat, cover the entire nail including bare sections—this protects your natural nail and creates a cohesive sheen.
Negative space designs require more maintenance than full-coverage options. Any nail discoloration or ridges become visible, and natural nail growth is more obvious. If your nails have significant ridging, use a ridge-filling base coat like OPI Ridge Filler before starting. For nail health fundamentals, reference our guide on how to strengthen weak nails.
Design 10: 3D Watermelon Slice Charm Application
Tiny 3D polymer clay charms add literal dimension to watermelon nails. This beginner-friendly technique takes 35 minutes plus charm acquisition time—slices cost $5-8 for a pack of 10 on Amazon or at beauty supply stores.
Paint nails with a solid base color—white, light pink, or even light green all work. Two coats, fully dried. Place one small watermelon slice charm on each accent nail (typically ring fingers or thumbs). Apply a small dot of nail glue or a blob of thick top coat to the nail, position the charm flat against the surface, and press gently for 30 seconds.
Apply regular top coat carefully around the charm, not over it. Most polymer clay charms sit 2-3mm thick—submerging them in top coat creates a bubble effect and traps air. Instead, seal the edges where the charm meets the nail. This prevents water infiltration that causes lifting.
Charms last 3-5 days typically, falling off before the base polish chips. When a charm detaches, simply remove remaining glue with tweezers and reapply or leave the nail solid. This makes 3D designs perfect for summer nail colors when you want temporary embellishment without commitment.
Sally Hansen's manicure tips note that 3D embellishments work best on shorter nails where they're less likely to catch on clothing or hair.
Common Mistakes and How to Avoid Them
Watermelon designs fail most often from rushing dry times between color layers. Polish that feels dry to touch typically needs 60-90 seconds longer before adding the next layer. Smudging occurs when partially cured polish shifts under new applications. Test dry time by pressing your thumbnail gently into a hidden edge—if it leaves an impression, wait longer.
Seed placement mistakes include using too much black polish (creating blobs instead of dots) and placing seeds on green sections where they disappear visually. Always blot your dotting tool after dipping it in black polish. The first dot should be the darkest; subsequent dots get lighter, which actually looks more realistic since watermelon seeds vary in maturity.
Color choice affects realism significantly. True watermelon flesh is coral-toned, not hot pink or magenta. OPI Live.Love.Carnaval and Essie Sunday Funday both capture the right coral-orange undertone. If your pink leans purple or blue, the design reads more as abstract color blocking than fruit representation.
Skipping the base coat causes staining, particularly from coral and pink polishes. These shades contain pigments that penetrate the nail plate during wear, leaving yellow discoloration that can take weeks to grow out. Always use base coat, even for designs lasting only a few days.
Top coat application matters more than most tutorials acknowledge. Two thin top coat layers outperform one thick layer. Thick applications take longer to dry, trap solvents that cause shrinkage, and create a surface tension that can pull on underlying design elements. According to Cosmopolitan's manicure longevity guide, proper top coat technique can nearly double wearable time before chipping becomes noticeable.
Your Next Steps
Start with Design 1 (classic horizontal slice) to master the layering technique and seed placement fundamentals. Once comfortable with color transitions, experiment with the gradient or color-blocking approaches. Keep notes on which color combinations and dry times work best with your specific polish brands—formula thickness varies significantly between manufacturers.
For summer nail inspiration beyond watermelon, explore our beach nail designs for complementary ocean-inspired looks, or browse the full seasonal nail designs category for year-round ideas. If you're working with shorter nails, our DIY nail art section covers adaptation techniques for limited nail real estate.
Practice these designs now while summer fruit is abundant—it's easier to reference actual watermelon coloring when designing. Take photos of your finished nails in natural daylight to capture color accuracy and identify areas for improvement in your next attempt.