Matte Nail Designs: 18 Stunning Ideas + How to Get the Look
Matte nail designs transform traditional polish finishes into velvety, non-reflective surfaces using a matte top coat or DIY alternatives like steam or...

Matte nail designs transform traditional polish finishes into velvety, non-reflective surfaces using a matte top coat or DIY alternatives like steam or cornstarch. These designs range from simple single-color applications to complex mixed-finish nail art combining glossy and matte textures on the same nail.
- Matte top coats from brands like OPI and Essie create a flat, non-reflective finish that typically lasts 4-7 days before showing texture wear
- DIY matte alternatives include steam exposure for 3-5 seconds or lightly buffing with cornstarch immediately after polish dries
- Mixed-finish designs pairing matte bases with glossy accent details offer the most visual dimension and hide wear patterns better than single-finish manicures
- Short nails and round nail shapes showcase matte finishes most effectively because the texture reads more uniformly on smaller surface areas
Understanding matte finishes means knowing that they fundamentally change how polish interacts with light and what types of wear become visible first. Based on guidance from major polish manufacturers like OPI and Sally Hansen, matte finishes tend to show texture changes before color fading, which is the opposite of glossy manicures that chip at edges first.
Selection Methodology: What Makes a Matte Design Worth Trying
For this compilation, I focused on designs that meet specific practical criteria rather than pure aesthetic appeal. Each design needed to demonstrate one of three characteristics: technique accessibility for at-home application, visual interest that justifies the extra step of matte finishing, or practical wearability for specific contexts like professional environments or active lifestyles.
The designs span difficulty levels from beginner (single-color matte application) to advanced (mixed-finish techniques requiring tape or precise brush work). According to beauty publications like Allure and Cosmopolitan UK, matte designs have seen consistent popularity since 2020, with mixed-finish techniques showing the strongest engagement on visual platforms.
I've intentionally avoided designs requiring specialized equipment beyond basic dotting tools or striping tape, keeping the barrier to entry low. Every design listed includes specific product references where formulation matters—matte top coats aren't universally equivalent, and some pigments read differently under matte finishes than others.
Key Finding: Proper nail preparation, including dehydrating the nail plate and applying a quality base coat, is the most critical factor in matte manicure longevity regardless of design complexity — OPI Professional Education
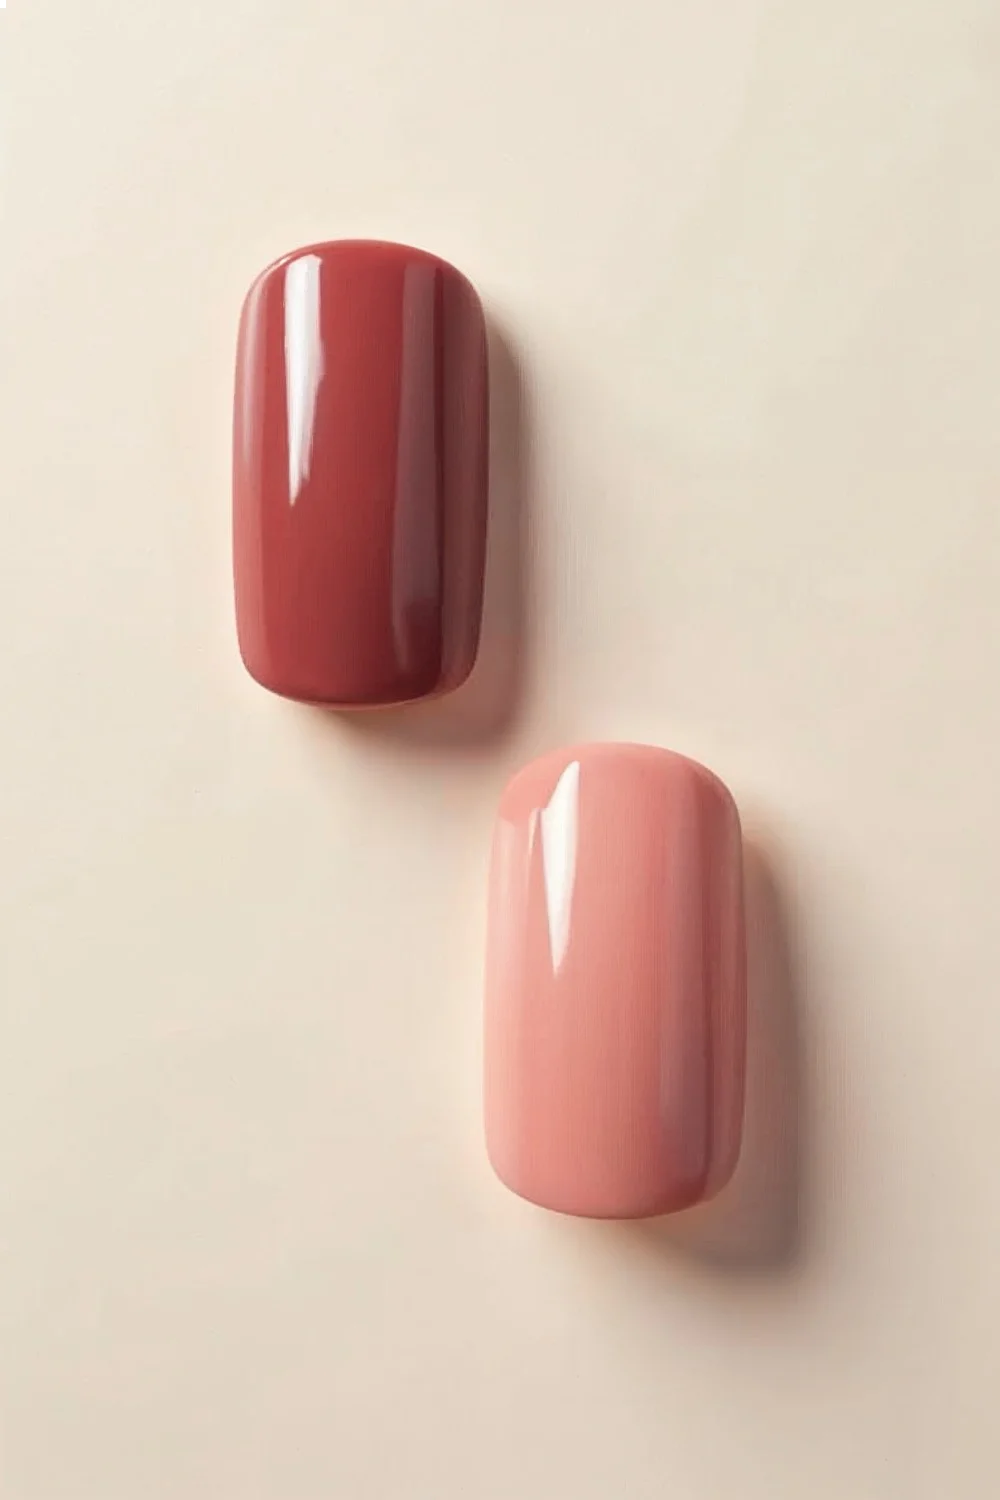
Classic Solid Matte in Deep Neutrals
Difficulty: Beginner | Time: 15 minutes | Lasts: 5-7 days
A single-color matte finish in deep neutral tones—think charcoal, chocolate brown, or deep olive—offers the most forgiving introduction to matte application. OPI's "Lincoln Park After Dark" or Essie's "Licorice" both provide excellent opacity in two coats, which matters because matte top coats can expose streaking that glossy finishes hide.
The application sequence: base coat, two thin color coats with full drying time between (3-4 minutes each), then matte top coat. Sally Hansen's Insta-Dri Matte Top Coat dries in 90 seconds, while Essie's Matte About You requires the full 8-10 minutes but shows less texture variation over time.
Deep colors under matte finishes photograph nearly black in most lighting, which reads more sophisticated than the actual shade suggests. This works particularly well on short nail designs where surface area is limited.
What can go wrong: Applying matte top coat before the color is fully dry creates drag marks. The top coat will pull partially cured polish, leaving visible streaks. Test dryness by tapping nails together—they should make a hard clicking sound, not stick slightly.

Matte with Glossy Tips (Reverse French)
Difficulty: Beginner | Time: 25 minutes | Lasts: 6-8 days
This design inverts the traditional French manicure by keeping the nail bed matte and the tips glossy. The contrast requires zero artistic skill—just tape placement and patience.
Application method: After base coat and two color coats, apply matte top coat to the entire nail. Let it cure fully (minimum 10 minutes). Apply small strips of Scotch tape or nail striping tape across the nail 2-3mm from the free edge. Apply regular glossy top coat over the entire nail, then immediately remove the tape before the top coat skins over (within 20-30 seconds).
The glossy section will slightly overlap the matte, creating a subtle dimensional line without needing steady hands or perfect edges. This technique works with any color but shows most dramatically with darker shades. For guidance on traditional techniques, see our French manicure tutorial.
Cost breakdown: Assuming you have base polish, you need matte top coat ($8-12) and regular top coat ($6-10). Striping tape runs $2-4 for a roll that lasts 50+ manicures.
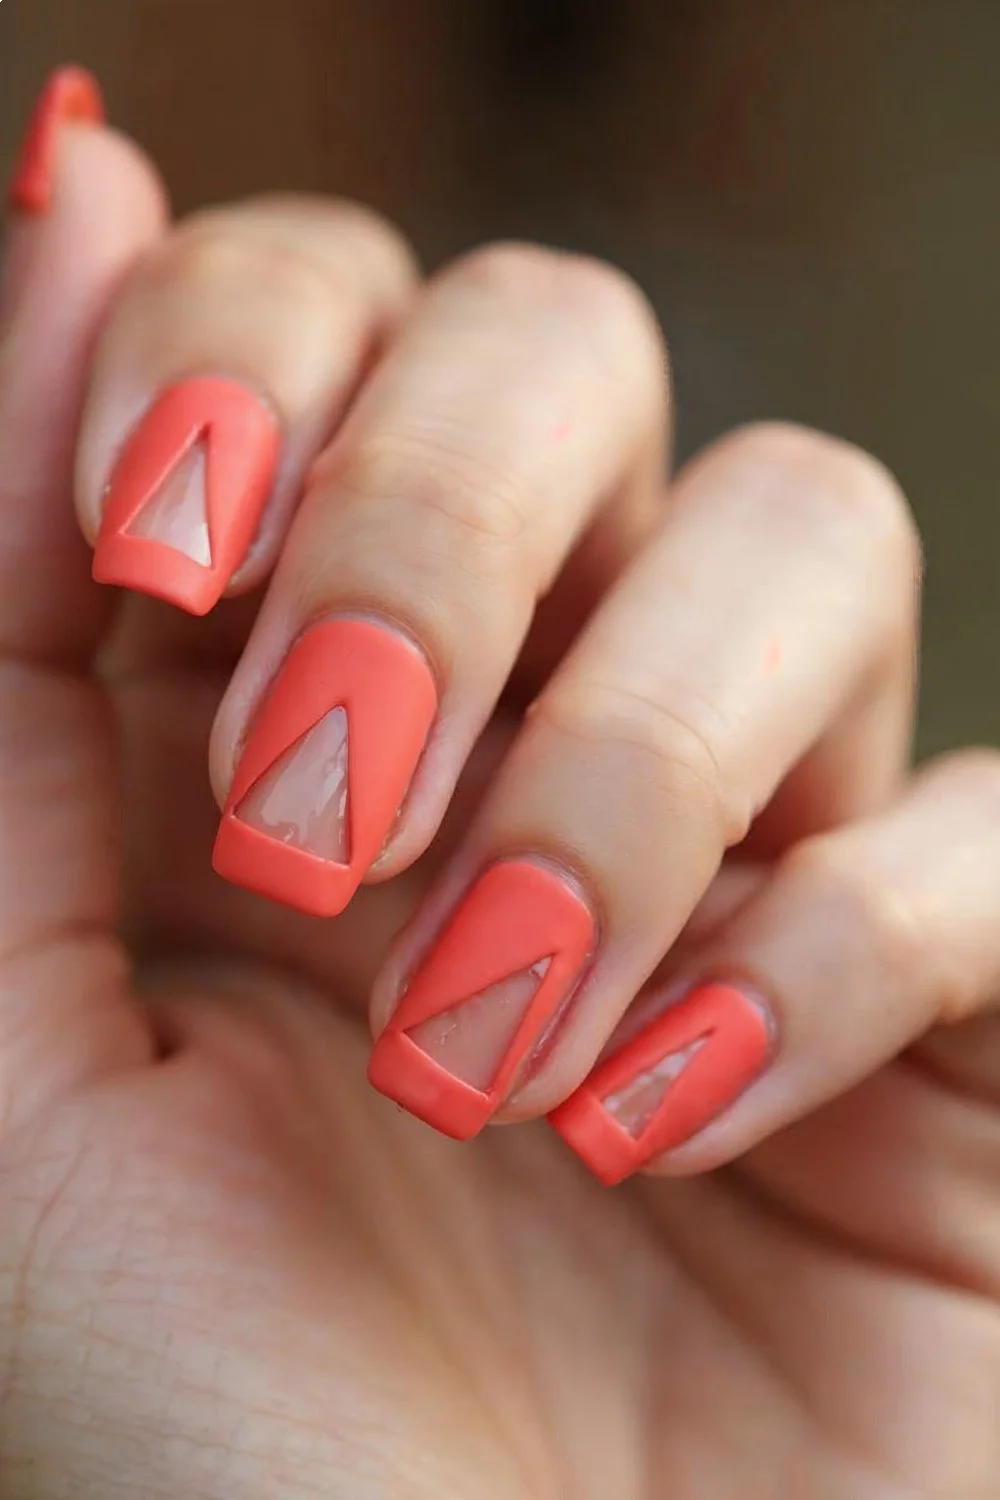
Matte Base with Glossy Geometric Accents
Difficulty: Intermediate | Time: 45 minutes | Lasts: 5-7 days
Geometric designs pair matte and glossy finishes using striping tape to create clean lines. The most accessible version: diagonal stripes, triangles at the cuticle, or half-moon negatives.
The process differs from reverse French because you're creating isolated glossy sections, not just tips. Start with base coat and two color coats. Apply matte top coat everywhere, let dry completely (10 minutes minimum). Use striping tape or cut regular tape into thin strips to mask off geometric sections. Apply glossy top coat only to exposed areas, remove tape immediately.
For sharper lines, some nail artists apply a thin coat of base coat along tape edges before the glossy top coat—this seals the edge and prevents bleeding. Born Pretty striping tape ($3-5) comes in metallic colors that add extra detail if you leave thin strips in place rather than removing them.
This design photographs extremely well, which explains its popularity on Pinterest and Instagram. The dimensional contrast creates shadows that read clearly even in flat photography.
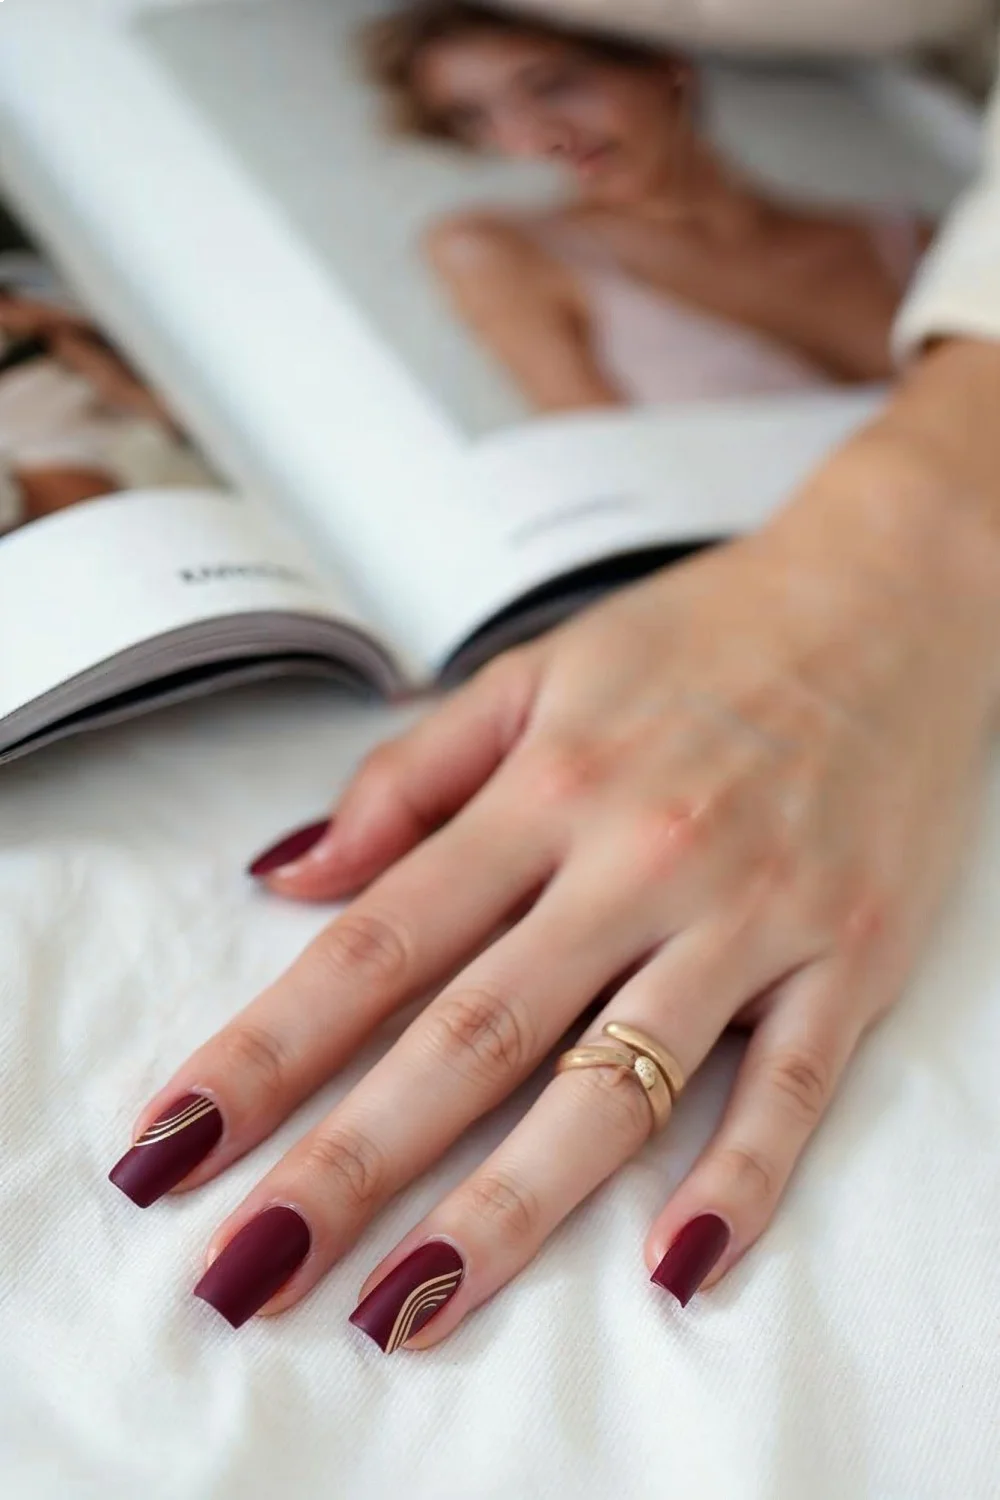 matte nails with gold diagonal glossy stripes on a hand resting on a white surface next to a magazine" loading="lazy">
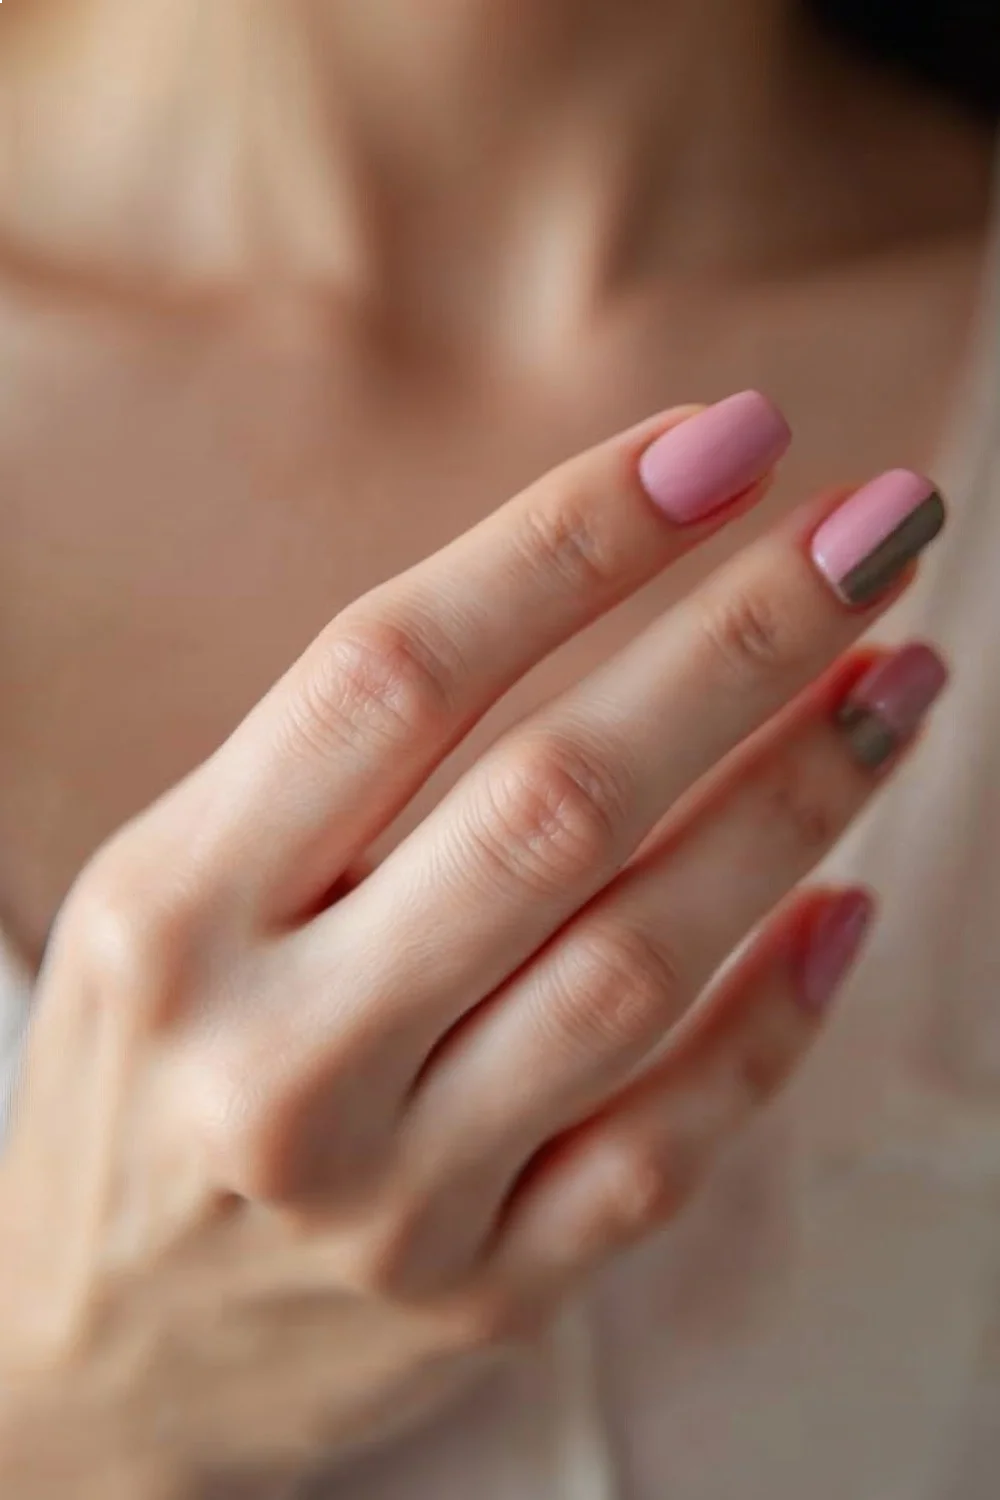
Single Glossy Accent Nail (Statement Nail)
Difficulty: Beginner | Time: 20 minutes | Lasts: 6-8 days
The simplest mixed-finish approach: matte on four nails, glossy on one (typically ring finger). This works because the contrast is bold enough to read as intentional rather than inconsistent application.
Application is straightforward—base coat all nails, apply two color coats to all nails, then apply matte top coat to four fingers and glossy to one. The technique allows you to test how a color reads in both finishes without committing to a full set of either.
Interestingly, the glossy nail typically shows chipping first because matte finishes hide minor edge wear. When the matte texture starts looking patchy (usually day 5-6), you can refresh just the matte top coat without redoing color—something you can't do with glossy finishes where you'd see lap marks.
This design pairs well with vacation nails because the single glossy nail can incorporate travel-themed details or metallic accents while the matte base stays neutral.
Matte Ombre (Gradient Finish Variation)
Difficulty: Intermediate | Time: 35 minutes | Lasts: 4-6 days
Traditional ombre blends colors; matte ombre blends finishes from glossy at the cuticle to matte at the tip using progressive layers of matte top coat. The result creates a subtle sheen gradient that catches light differently than color gradients.
The technique: Apply base and two color coats as normal. Apply glossy top coat to entire nail, let dry. Apply one thin coat of matte top coat starting at the free edge, covering about half the nail. Let dry 5 minutes. Apply a second matte coat covering only the tip. The overlapping layers create gradual matte intensification.
This technique works best with medium-to-light colors where the subtle finish change is visible. On very dark colors, the gradient disappears except in direct light. For traditional color ombre techniques, reference our DIY gradient nails guide.
What fails: Trying to blend the matte coat while wet creates streaking. The layers must dry between applications or you'll drag and create texture variations that look unintentional.

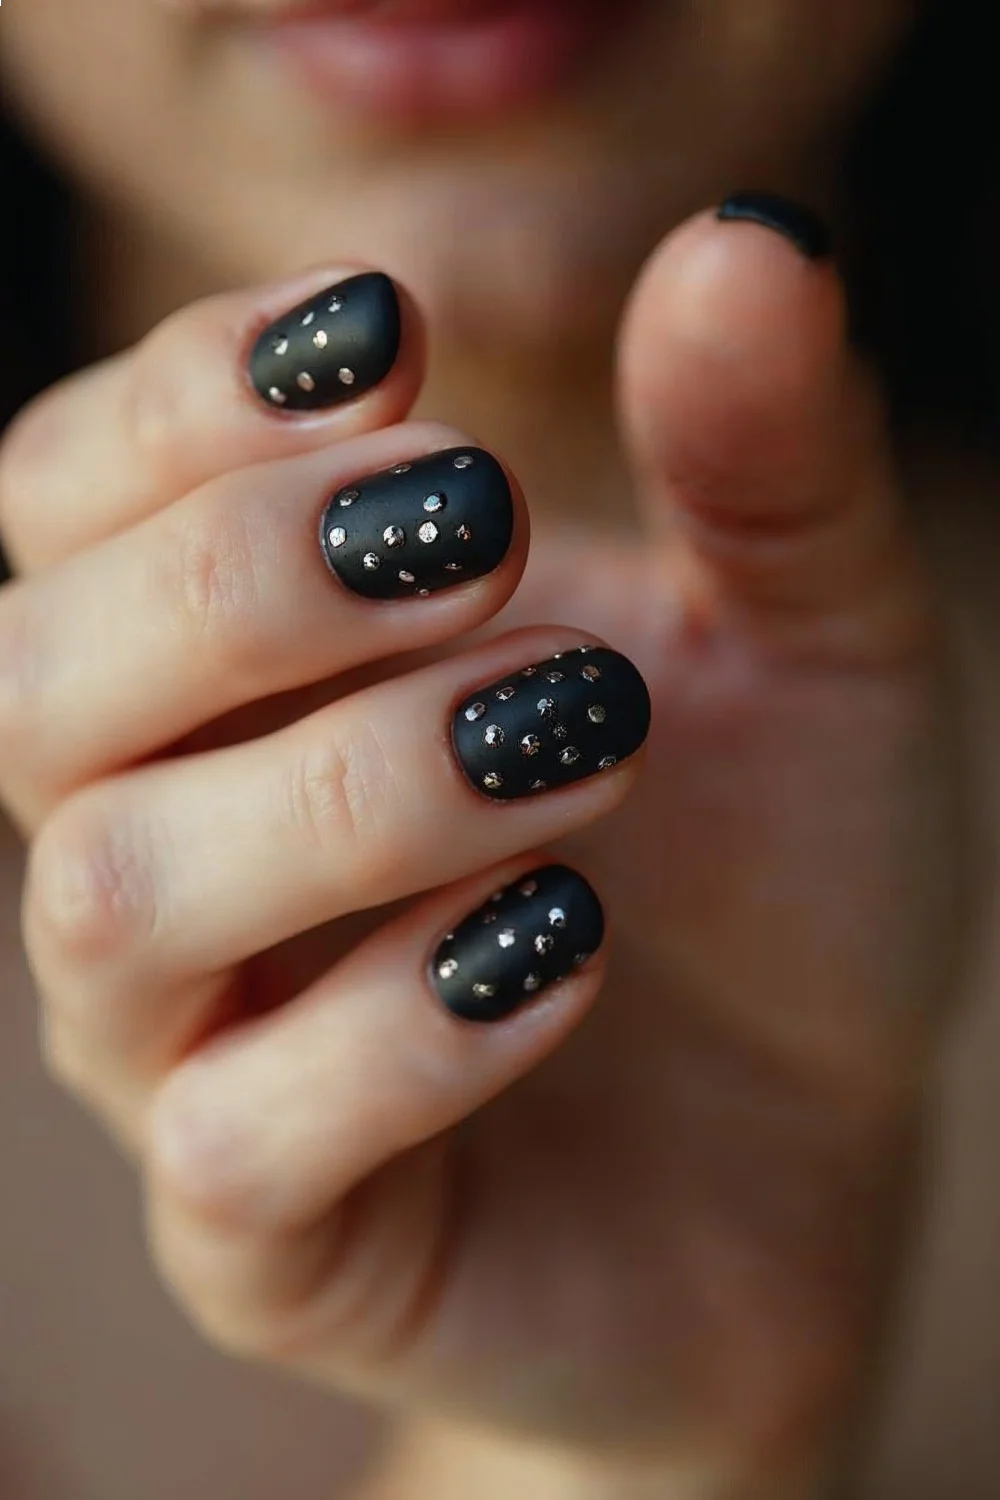
Matte with Glossy Dots (Simple Nail Art)
Difficulty: Beginner | Time: 30 minutes | Lasts: 5-7 days
This design uses a dotting tool to place glossy accents on a matte base. The dimensional contrast makes simple dot patterns look significantly more complex than they are.
Process: Base coat, two color coats, matte top coat on all nails, full dry time. Use a small dotting tool dipped in glossy top coat to place dots in your pattern—random scatter, diagonal line, clustered at cuticle, whatever appeals. The glossy top coat creates raised, shiny dots against the flat matte.
For metallic accents, you can use actual polish instead of just glossy top coat. OPI's chrome polishes ("Cosmo-Not Tonight Honey," "I Can't Cope-acabana") create bold glossy metallic dots on matte bases. The key is working quickly so each dot is complete before the top coat starts to dry—partial dots look sloppy.
Winstonia dotting tools ($6-8 for a set of five sizes) offer the most control. Toothpicks work but absorb top coat, requiring frequent re-dipping.
Negative Space Matte Design
Difficulty: Intermediate | Time: 40 minutes | Lasts: 6-8 days
Negative space designs leave portions of the nail bare while applying color and matte finish to other sections. The bare nail reads as glossy (even without top coat) against matte sections, creating inherent contrast.
The most accessible approach uses striping tape to mask off geometric sections before color application. Apply base coat to entire nail, let dry. Apply striping tape in your pattern (parallel lines, triangles, half-moons). Apply two coats of color over tape and exposed nail, let dry, remove tape. The base coat protects the negative space. Apply matte top coat only to colored sections.
This design requires healthy nail care because bare nail is visible—ridges, discoloration, or damage shows clearly. A ridge-filling base coat (OPI's Ridge Filler, $10-12) helps create a smooth negative space surface.
Timing note: Tape removal needs to happen when polish is mostly dry but not fully cured—about 60-90 seconds after second color coat. Too wet and it smears; too dry and it pulls color off in chunks.
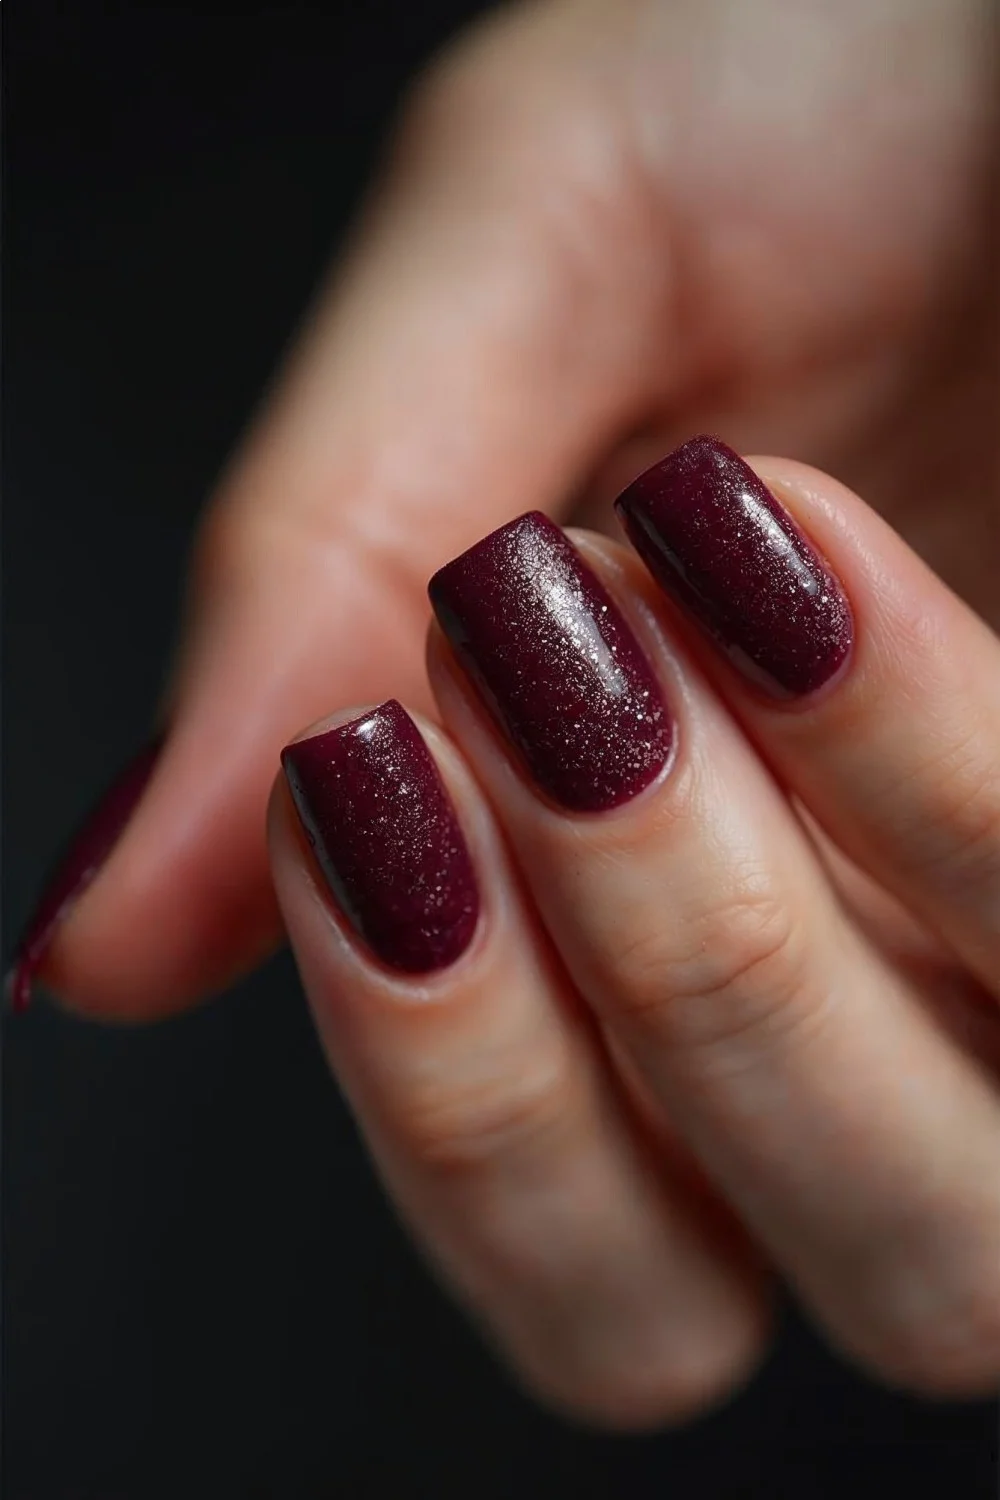
Matte Velvet Effect (Textured Matte)
Difficulty: Intermediate | Time: 25 minutes | Lasts: 4-6 days
True velvet or suede nail polishes (Zoya's PixieDust line, OPI's Liquid Sand collection) create texture through matte formulation with micro-glitter particles. The result reads as soft, almost fuzzy texture rather than flat matte.
These polishes require different application than standard matte—no top coat at all. The texture is built into the formula, and adding any top coat (matte or glossy) destroys the velvet effect. Apply base coat, then two coats of the textured polish. The first coat looks patchy; the second creates the velvet surface.
Zoya's "Tomoko" (gray-lavender) and "Dahlia" (burgundy) both photograph with rich depth that flat matte can't achieve. The texture hides minor application flaws but shows damage more readily than smooth matte—chips are immediately obvious because the surrounding texture makes them stand out.
Wear time averages 4-6 days because the texture catches on fabric, hair, and daily surfaces more than smooth finishes. This isn't ideal for active lifestyles but works well for special occasions or photography.
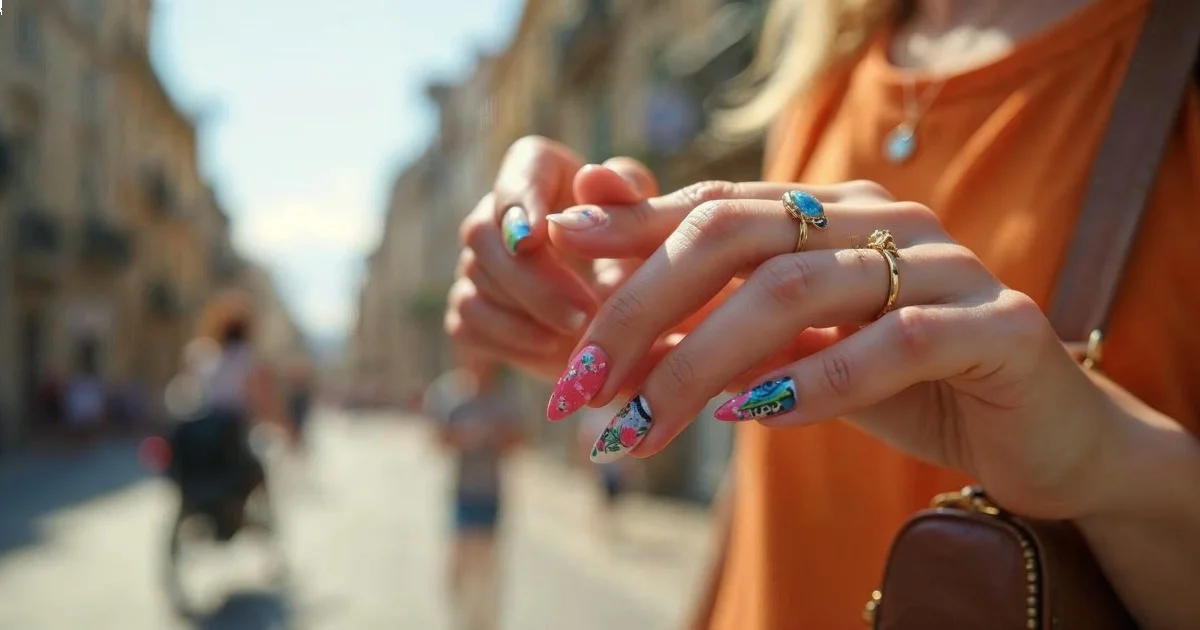
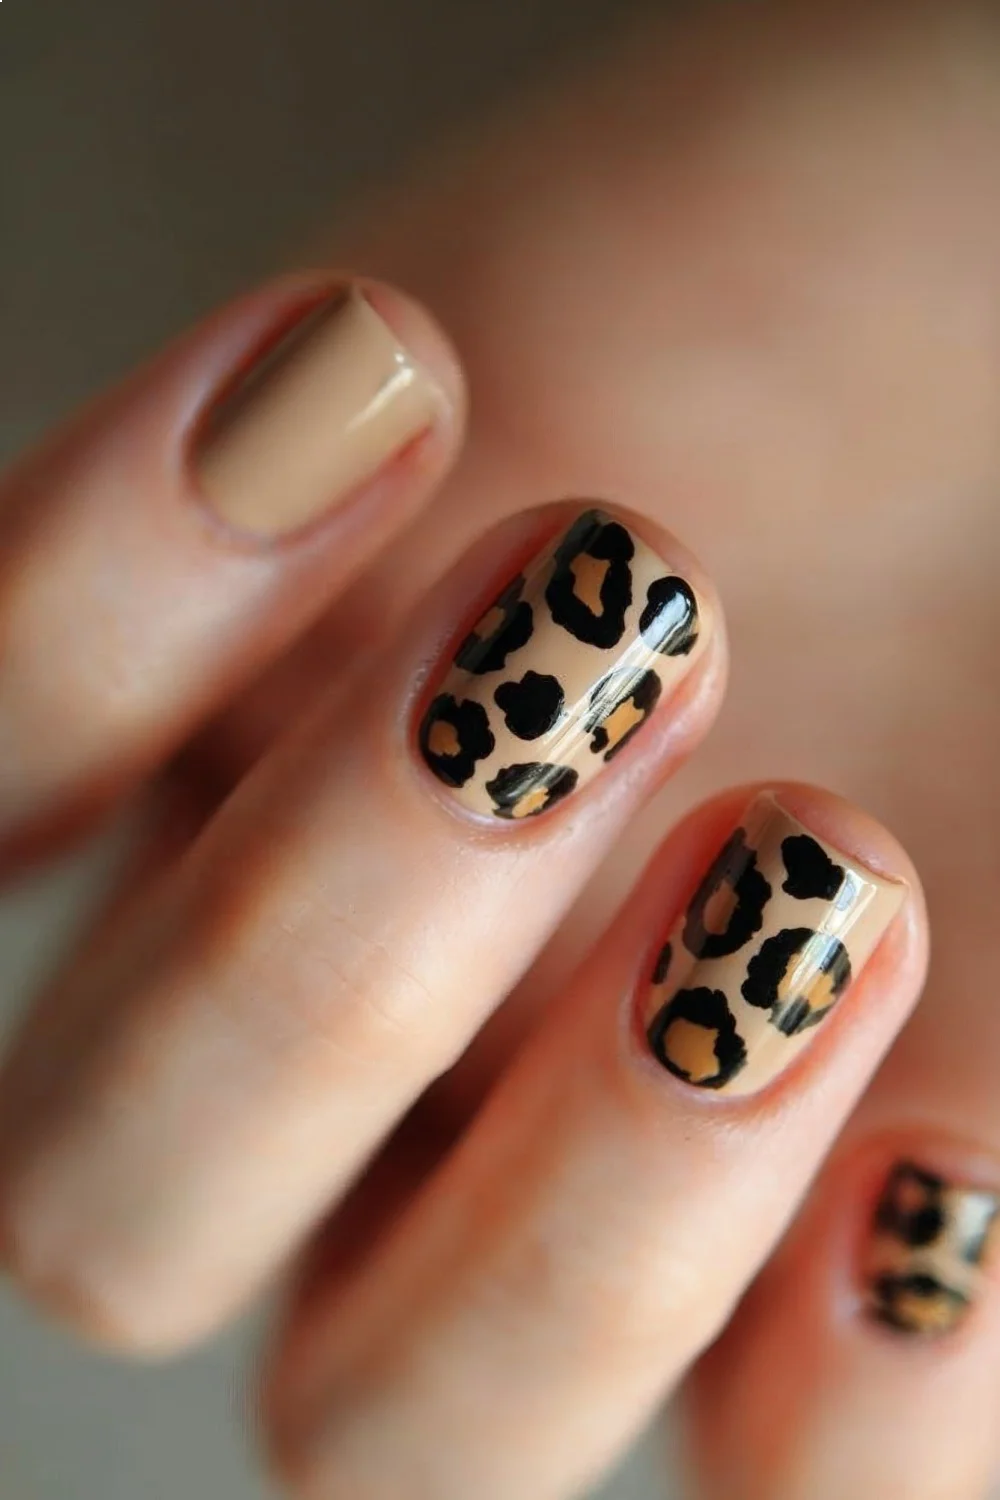
Matte Animal Print (Leopard or Zebra)
Difficulty: Intermediate | Time: 50 minutes | Lasts: 6-8 days
Animal prints rendered in matte finish look sophisticated rather than costume-like because the flat texture softens what can otherwise read as loud. The classic approach: matte neutral base with glossy accent spots or stripes.
For leopard: Apply base coat and two coats of tan, nude, or gray. Apply matte top coat, let dry completely. Use a small brush (or toothpick for tiny dots) with brown or black regular polish to create irregular oval spots. Immediately after each spot, use a smaller tool to add a darker partial outline on one side of each spot. Don't add top coat to the spots—they'll dry glossy naturally against the matte base.
For zebra: Same matte base process, then use a thin striping brush to paint irregular black diagonal stripes. The stripes should vary in thickness and spacing—too uniform looks screen-printed rather than animal-inspired.
This technique works on any nail length but reads most clearly on almond nail shapes where the extended canvas allows pattern development.
Matte Metallics (Unconventional Pairing)
Difficulty: Beginner | Time: 20 minutes | Lasts: 5-7 days
Metallic polishes under matte top coat create an unexpected brushed metal effect that eliminates the mirror-shine of standard metallics while retaining color depth. Not all metallics work—some turn muddy under matte coating.
Best performers: Chrome silvers and golds, copper tones, gunmetal grays. Poor performers: Holographic or duo-chrome metallics (the effect disappears entirely under matte). Essie's "Good as Gold" and "No Place Like Chrome" both retain visual interest under Essie's Matte About You top coat.
Application is standard: base coat, two thin coats of metallic (they need to be thin or the matte top coat can't create uniform texture), matte top coat. The result photographs beautifully in natural light where the brushed effect creates subtle highlights.
This pairs well with summer nail colors in metallic formulations—bronze, rose gold, and champagne read as sophisticated rather than flashy under matte finish.
Matte French Tips (Classic with Texture Twist)
Difficulty: Intermediate | Time: 35 minutes | Lasts: 6-8 days
Traditional French manicure with both the nail bed and white tips in matte finish creates a modern, editorial look. The application requires more precision than glossy French because matte shows application errors.
Process: Apply base coat. Apply two coats of nude or pale pink to entire nail. For the white tips, you have two options: freehand with a detail brush (difficult) or use French tip guides (adhesive stickers that mask the nail bed, $3-5 per pack). Apply two coats of white to the tips, remove guides if using. Let dry completely. Apply matte top coat to entire nail.
The matte finish makes slightly imperfect tip lines less obvious because there's no shine to create hard shadows. This is the most forgiving French variation for home application.
Common mistake: Applying matte top coat before the white is fully dry creates a pinkish tint at the line where white and nude meet—the matte coat can pull slight amounts of wet white polish down.
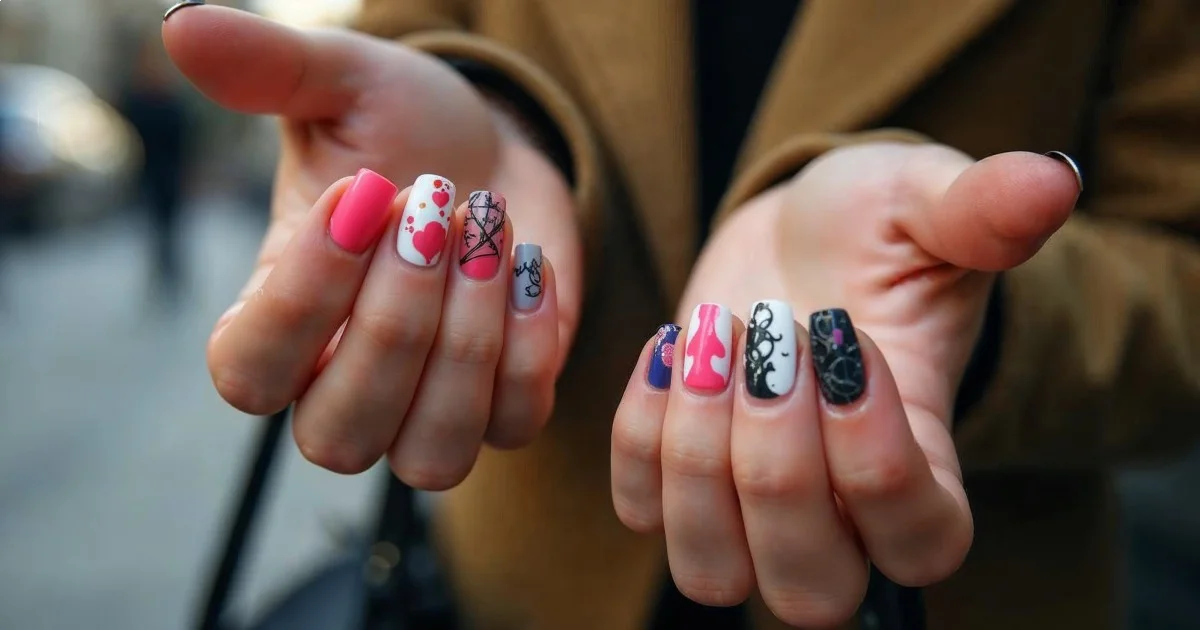
Matte Floral Accents (Mixed-Finish Nail Art)
Difficulty: Advanced | Time: 60 minutes | Lasts: 5-7 days
Simple floral designs rendered in glossy polish on matte bases create dimensional nail art without requiring advanced painting skills. The easiest approach uses a dotting tool for five-petal flowers rather than attempting brush-painted petals.
Technique: Apply base coat, two color coats (works best with medium-to-light bases like blush pink, lavender, or mint), matte top coat, full dry time. Use a small dotting tool with contrasting regular polish to place five dots in a circle (these become petals). Use a smaller dotting tool with a different color for the center dot. The glossy polish creates raised, shiny flowers against the flat matte.
For more detailed florals, you'll need striping polish (Born Pretty, $4-6 per bottle) and a thin detail brush. The striping polish is thinner and flows more smoothly for fine lines—regular polish is too thick for petal outlines.
This design works for wedding nails when executed in white or cream florals on pale matte bases—romantic without reading too young or informal.
Matte Gradient Between Two Colors
Difficulty: Advanced | Time: 50 minutes | Lasts: 4-6 days
Unlike the finish-gradient ombre, this blends two colors using sponge technique, then applies matte top coat to the entire result. The matte finish actually makes color gradients look more seamless because it eliminates the shine that can highlight sponge texture.
Process: Apply base coat and one coat of the lighter gradient color. Use a wedge makeup sponge to apply both colors (place them side-by-side on the sponge). Dab the sponge onto the nail in a rolling motion, reloading and repeating until the gradient is smooth. This takes 3-5 passes. The nail will look textured from sponge stippling. Apply matte top coat—the flat finish hides most of the texture and creates an almost airbrushed appearance.
Best color combinations: Analogous colors (next to each other on the color wheel) like pink-to-coral, purple-to-blue, or orange-to-yellow. Complementary colors (opposite on the wheel) often create muddy transitions.
Cleanup: This technique gets polish on surrounding skin. Use liquid latex barrier (Peel Off Base Coat, $6-8) or clean up with a small flat brush dipped in acetone after completion.
Matte Color Blocking (Geometric Color Sections)
Difficulty: Intermediate | Time: 55 minutes | Lasts: 6-8 days
Color blocking divides each nail into 2-3 sections of different colors, all finished with matte top coat. The flat finish makes even bold color combinations look sophisticated rather than chaotic.
The tape method: Apply base coat to all nails. Choose your first color and apply two coats to all nails, let dry completely (8-10 minutes). Apply striping tape to create your division line(s)—diagonal, horizontal at mid-nail, or triangular sections all work. Apply two coats of the second color to the masked sections. Remove tape immediately while the second color is still slightly wet (30-45 seconds after application). Let everything dry fully, then apply matte top coat to entire nail.
Popular color pairs: Navy and burgundy, gray and dusty pink, forest green and mustard, black and rust orange. The matte finish makes even high-contrast pairs wearable for professional settings.
This design requires patience—rushing tape removal creates smudging, but waiting too long causes polish to peel off with the tape.
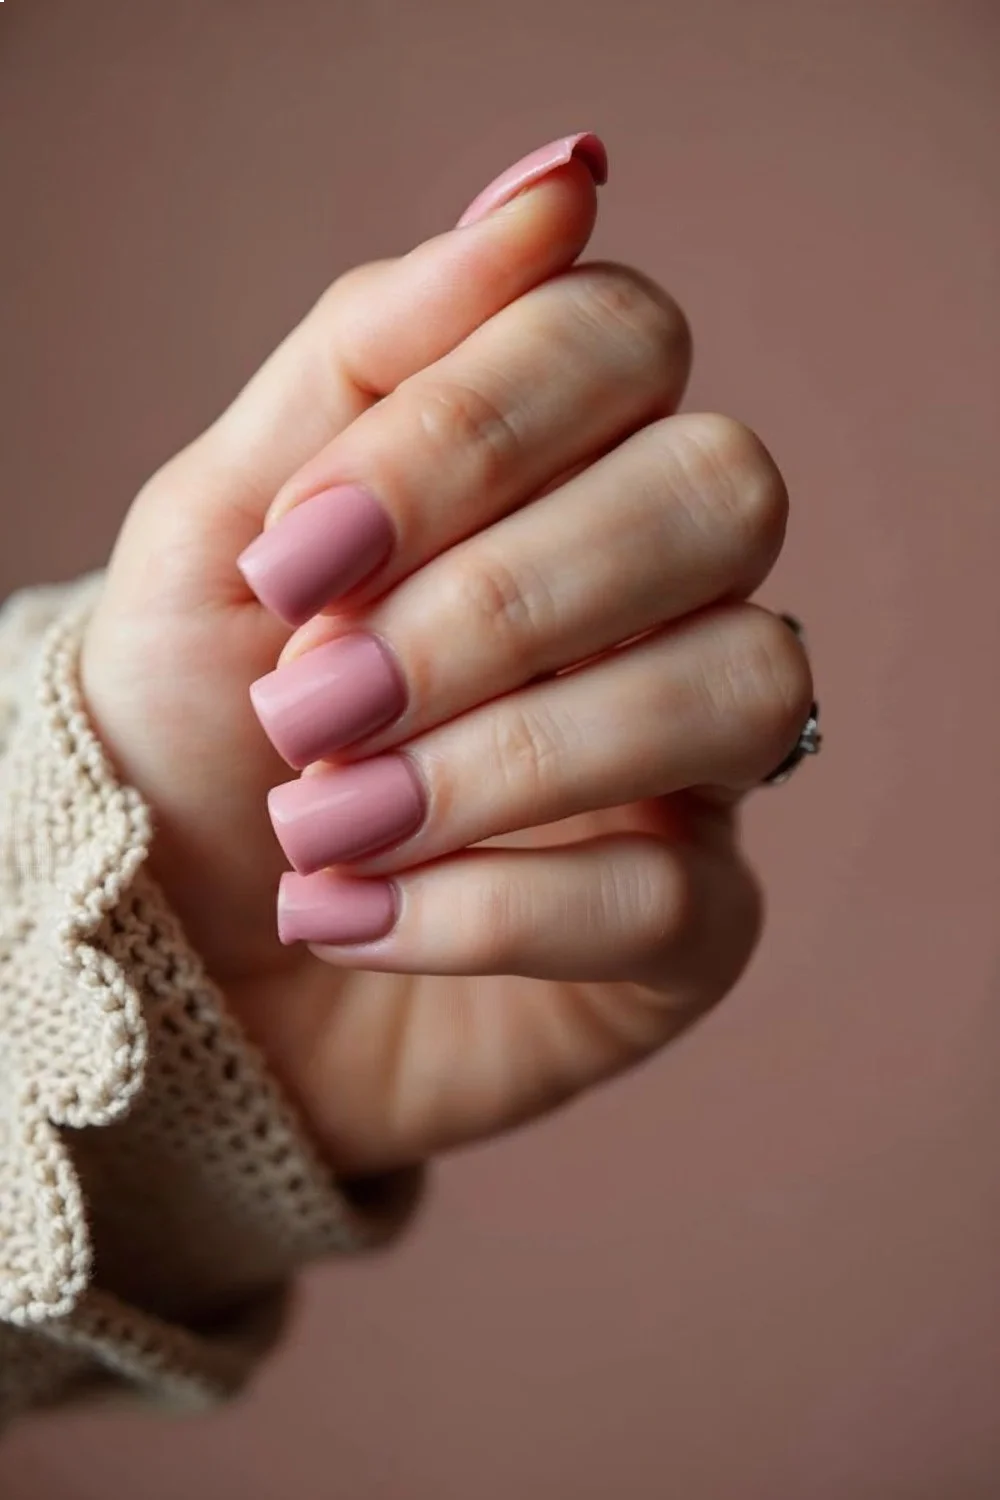
Matte Nude with Glossy Cuticle Detail
Difficulty: Beginner | Time: 25 minutes | Lasts: 6-8 days
This subtle design applies matte nude to most of the nail, with a thin glossy line following the cuticle curve. The result mimics a more complex negative-space design with minimal skill requirement.
Process: Apply base coat and two coats of nude. Apply matte top coat to entire nail, let dry completely. Use a thin striping brush or detail brush to apply glossy top coat in a thin line (1-2mm) following the cuticle curve. The glossy line catches light and creates the illusion of negative space or metallic detailing.
For extra dimension, use a metallic gold or silver polish instead of just glossy top coat for the cuticle line. OPI's "Make Light of the Situation" (bright gold) or Essie's "Good as Gold" both work. The thin line requires minimal polish and precision—if it's slightly wobbly, the matte surrounding helps camouflage imperfections.
This design photographs as more complex than the actual effort required, making it useful for occasions where you want polished appearance without extensive application time.
Matte with Glossy Half-Moon (Reverse Cuticle)
Difficulty: Intermediate | Time: 40 minutes | Lasts: 6-8 days
Half-moon manicures leave a crescent at the cuticle in contrasting finish or color. The matte/glossy version uses the same color for both sections, differentiating only by texture.
Technique: Apply base coat. Apply two coats of your chosen color to entire nail. Apply matte top coat to entire nail, let dry completely. Place reinforcement stickers (hole reinforcements for paper, available at office supply stores for $2-3 per pack) to mask off the cuticle crescent—position them about 2-3mm from the cuticle. Apply glossy top coat to the exposed crescents and remove stickers immediately. The result is a subtle, dimensional half-moon in glossy against the matte nail.
For more contrast, you can apply a different color to the half-moon before any top coat, then do matte on the nail bed and glossy on the crescent. This requires more precision because you're essentially doing two mini-manicures per nail.
The design works best on medium-to-longer nails where the crescent is visible. On very short nails, the half-moon can disappear visually.
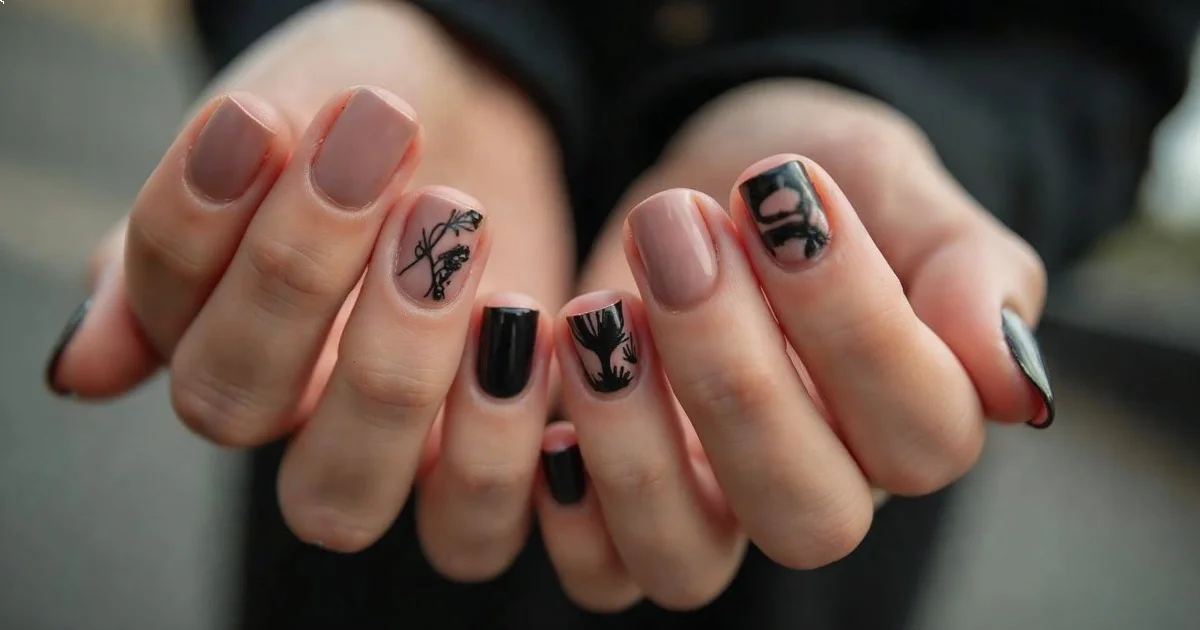
Matte Accent Nail with Glossy Nail Art
Difficulty: Advanced | Time: 70 minutes | Lasts: 5-7 days
This approach treats one nail as a canvas for more complex art—florals, abstract designs, or detailed patterns—rendered in glossy polish on a matte base, while keeping other nails simple solid matte.
Process: Apply base coat to all nails. Apply two color coats to all nails (the accent nail color can differ from the others or match). Apply matte top coat to all nails except your chosen accent nail. Let everything dry completely. On the accent nail, use detail brushes, dotting tools, or striping brushes with regular polish to create your design. The design elements dry glossy naturally. On the other four nails, they're finished.
Popular design choices: Abstract line art (facial profiles, geometric shapes), detailed florals with multiple colors, or micro-details like dots and dashes in patterns. The key is keeping the non-accent nails very simple so the detailed nail reads as intentional focus.
This works for DIY spring nail art or seasonal designs where you want thematic art on one nail without overwhelming the whole hand.
How to Achieve Matte Finish: Products and Techniques
Matte finishes require either dedicated products or DIY techniques that alter the polish surface after application. The most reliable method uses commercial matte top coats, but several alternatives work for testing the look before investing in products.
Matte Top Coat Method (Most Reliable)
Commercial matte top coats contain matting agents that create a flat, non-reflective surface. Application follows standard top coat rules: thin, even coat covering the entire nail including free edge, applied after color is completely dry. According to Sally Hansen's application guidance, waiting 8-10 minutes after final color coat prevents the matte top coat from pulling partially-cured color and creating streaks.
Top-performing brands:
- OPI Matte Top Coat ($10-12 per 0.5 oz bottle): Dries in 8-10 minutes, creates uniform matte texture, lasts 5-7 days before showing wear
- Essie Matte About You ($9-11 per 0.46 oz bottle): Slightly longer dry time (10-12 minutes), produces very flat matte finish with minimal texture variation
- Sally Hansen Insta-Dri Matte Top Coat ($6-8 per 0.31 oz bottle): Fast-drying formula (90 seconds) but shows wear slightly earlier (4-6 days)
Application tips: Thin coats prevent thick, uneven texture. If the matte coat goes on too thick, it can dry with visible brush strokes. One thin coat produces adequate matte effect; two coats create deeper, more velvety texture but require longer total dry time.
Steam Method (DIY Alternative)
Holding freshly dried polish over steam briefly creates temporary matte effect through surface condensation that disrupts the glossy finish. This works but lasts only 2-3 days before natural oils restore some shine.
Process: Apply base coat and two color coats, let dry completely (10+ minutes). Boil water in a kettle or pot. Hold nails 4-6 inches above the steam for 3-5 seconds per nail. The polish surface will fog and dry matte. Don't hold nails too close or too long—excessive steam can cause the polish to bubble.
The result is less uniform than commercial matte top coat, and humidity exposure during normal activities (showering, washing dishes) can partially reverse the effect. This method works for testing whether you like matte finishes before buying product.
Cornstarch Method (DIY Alternative)
Lightly dusting wet polish with cornstarch creates matte texture, but this method is messier and less predictable than commercial products.
Process: Apply base coat and two color coats. While the final color coat is still slightly wet (60-90 seconds after application), use a fluffy makeup brush to dust cornstarch over the entire nail. Let dry completely (15 minutes). Use a clean brush to remove excess cornstarch. The remaining particles embedded in the surface create matte texture.
The texture is grainier than commercial matte top coat and can look chalky on dark colors. The cornstarch can also trap under the free edge, requiring cleanup with a nail brush. This method is useful for one-time matte looks but impractical for regular use.
Buffing Method (Semi-Permanent, Not Recommended)
Lightly buffing dried glossy polish with a fine-grit buffer creates matte texture by scratching the surface. This damages the polish integrity and the technique isn't recommended for longevity.
If attempting: Apply base coat and two color coats, let dry completely (15 minutes). Use a 240-grit or higher buffer to lightly sweep across the nail surface—no pressure, just light contact. The scratches diffuse light reflection, creating matte appearance.
This weakens the polish structure and chips appear within 2-3 days. It also thins the color coat, potentially exposing base coat or natural nail underneath if you buffer too much. The technique isn't reversible without complete polish removal.
Key Finding: Steam and cornstarch methods alter the polish surface structure temporarily, while matte top coats use chemical matting agents that maintain finish integrity—commercial products consistently outlast DIY alternatives by 2-4 days — Sally Hansen Professional Guidance
Required Supplies for Matte Nail Designs
The specific supplies depend on which designs you're attempting, but certain items are universal across most matte applications.
Essential Supplies
- Base coat: OPI Natural Nail Base Coat ($10-12) or Orly Bonder ($9-11)
- Nail polish: Your chosen colors in desired opacity—two-coat coverage is standard
- Matte top coat: OPI, Essie, or Sally Hansen options listed above
- Glossy top coat (for mixed-finish designs): Seche Vite Dry Fast Top Coat ($10-12)
- Nail polish remover (acetone-based): Cutex or generic acetone ($3-6)
- Cotton pads: For cleanup
- Small detail brush: For cleanup and precision work ($2-4)
Additional Supplies for Specific Techniques
- Striping tape: For geometric designs, color blocking ($2-5 per roll)
- Dotting tools: Set of varying sizes for dot patterns ($6-8 for five-piece set)
- Makeup wedge sponges: For gradient techniques ($3-5 per bag of 24)
- Thin striping brush: For floral or line art ($3-6)
- Hole reinforcement stickers: For half-moon designs ($2-3 per pack at office stores)
- Liquid latex barrier (optional): For messy techniques like gradients ($6-8)
Total investment for basic matte capability: $35-50. For full technique range including mixed-finish designs: $60-80.
Matte Nail Design Comparison Table
| Design | Difficulty | Time Required | Lasts | Special Supplies Needed |
|---|---|---|---|---|
| Classic Solid Matte | Beginner | 15 min | 5-7 days | Matte top coat only |
| Matte with Glossy Tips | Beginner | 25 min | 6-8 days | Tape, glossy top coat |
| Geometric Accents | Intermediate | 45 min | 5-7 days | Striping tape, both top coats |
| Single Glossy Accent | Beginner | 20 min | 6-8 days | Both top coats |
| Matte Ombre (Finish) | Intermediate | 35 min | 4-6 days | Both top coats |
| Matte with Glossy Dots | Beginner | 30 min | 5-7 days | Dotting tool, both top coats |
| Negative Space Design | Intermediate | 40 min | 6-8 days | Striping tape, matte top coat |
| Velvet Effect | Intermediate | 25 min | 4-6 days | Textured polish (no top coat) |
| Matte Animal Print | Intermediate | 50 min | 6-8 days | Detail brush, matte top coat |
| Matte Metallics | Beginner | 20 min | 5-7 days | Metallic polish, matte top coat |
| Matte French Tips | Intermediate | 35 min | 6-8 days | White polish, tip guides, matte top coat |
| Matte Floral Accents | Advanced | 60 min | 5-7 days | Dotting tools or detail brush |
| Color Gradient | Advanced | 50 min | 4-6 days | Sponge, both top coats |
| Color Blocking | Intermediate | 55 min | 6-8 days | Striping tape, matte top coat |
| Nude with Cuticle Detail | Beginner | 25 min | 6-8 days | Detail brush, both top coats |
| Glossy Half-Moon | Intermediate | 40 min | 6-8 days | Reinforcement stickers, both top coats |
| Accent Nail with Art | Advanced | 70 min | 5-7 days | Detail brushes, both top coats |