Wedding Nails: 12 Elegant Designs for Brides 2026
Wedding nails for 2026 balance timeless elegance with modern twists — classic French tips, subtle shimmer, and minimalist designs dominate bridal...
Wedding nails for 2026 balance timeless elegance with modern twists — classic French tips, subtle shimmer, and minimalist designs dominate bridal preferences. According to The Knot's wedding nail trends research, most brides choose neutral palettes with delicate accents that complement their dress without competing for attention.
- French manicures and sheer nude bases remain the most requested bridal nail designs across professional salons
- Gel manicures typically last 2-3 weeks, making them ideal for wedding timelines including engagement photos and honeymoons
- Nail preparation should begin 3-4 months before the wedding date for optimal health and strength
- Almond and oval shapes photograph best on bridal hands and complement most ring styles
Wedding nails have a unique purpose. Unlike editorial work or runway designs, bridal manicures need to photograph flawlessly, last through a 12-hour event, and look intentional in both natural light and flash photography. Based on data from major bridal publications, the designs brides actually choose differ significantly from what gets pinned on inspiration boards.
Selection Methodology
I compiled these 12 designs by analyzing current bridal nail trends from major wedding industry publications including Brides.com's comprehensive wedding nail guide and cross-referencing with professional nail technician forums discussing real client requests. Each design meets specific criteria: achievability for DIY or salon execution, longevity through a full wedding day, photographic appeal in various lighting conditions, and compatibility with different bridal aesthetics. I excluded overly trendy designs that may look dated in wedding albums years later, focusing instead on contemporary interpretations of classic looks.
Key Finding: Proper nail preparation, including cuticle care and base coat application, matters more for wedding day longevity than the specific design chosen — OPI Professional Nail Care Guidelines
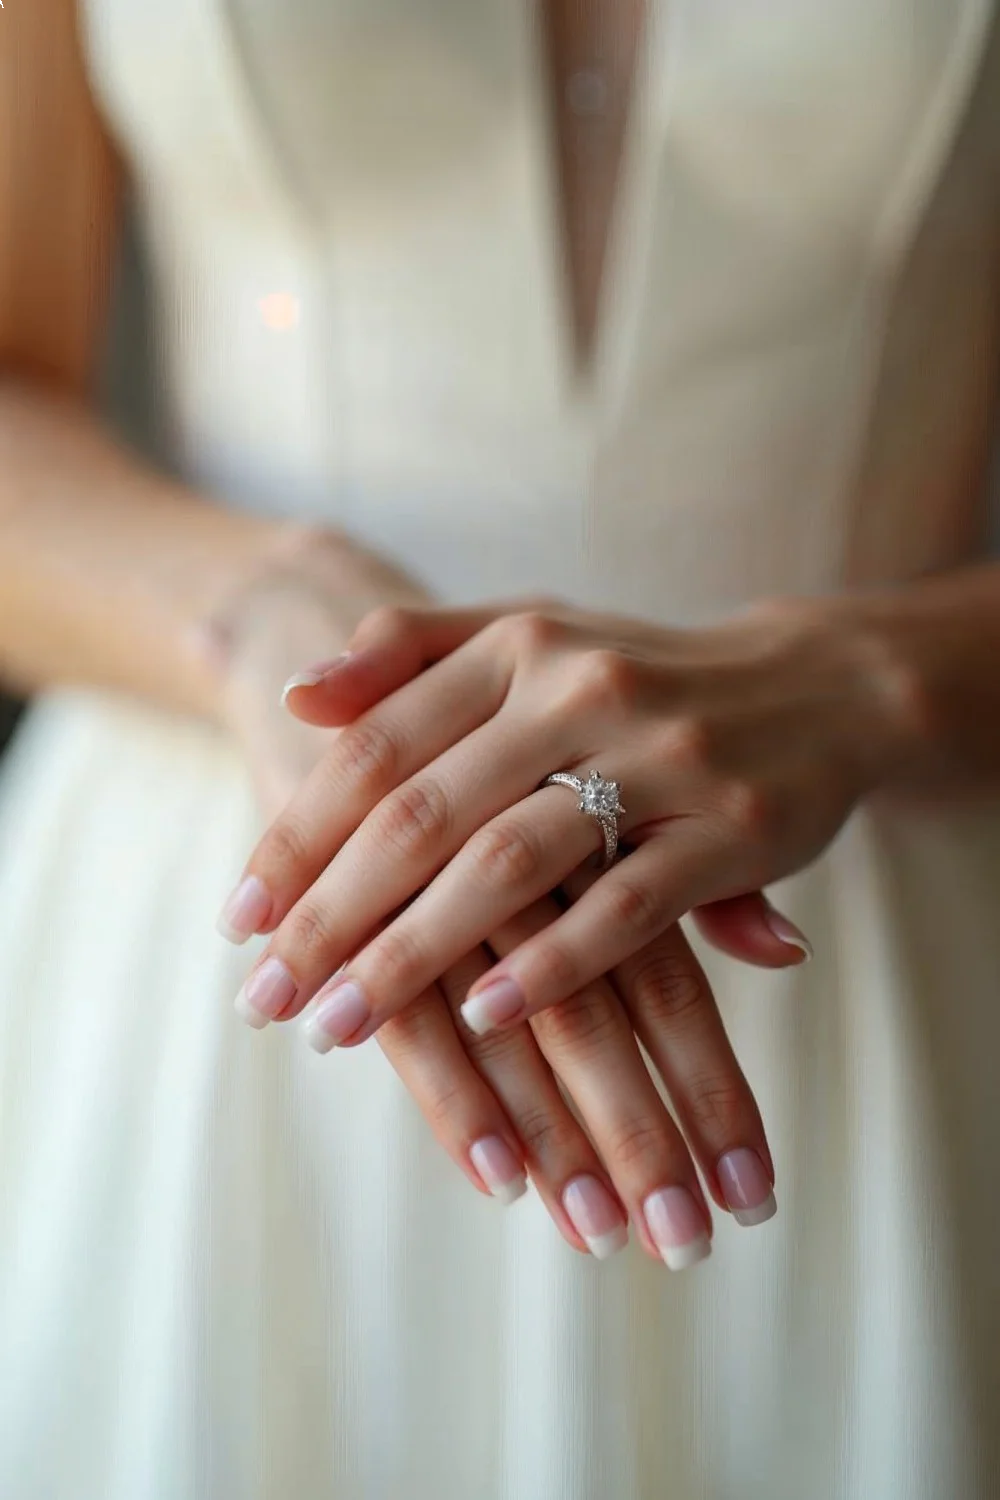
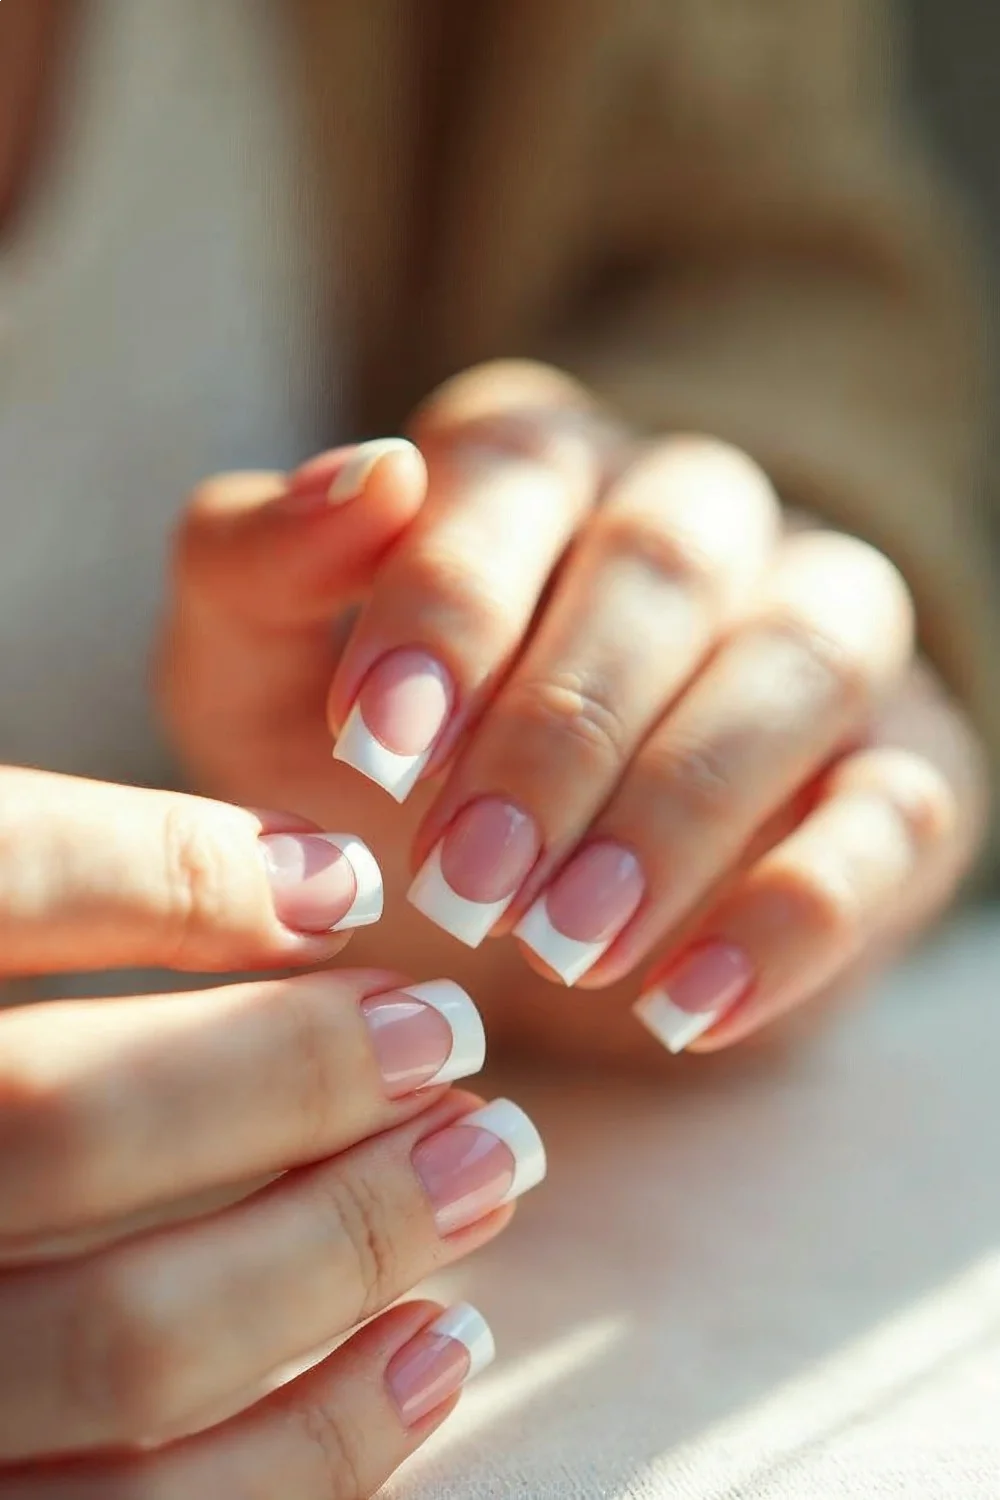
Classic French Manicure with Modern Proportions
The traditional French manicure remains the top bridal request, but 2026 versions feature thinner white tips and softer pink bases. The modern proportion creates a 2-3mm white tip rather than the thick, stark lines from decades past. This updated ratio photographs more naturally and reads as intentional rather than dated.
CND Shellac French Manicure White and Romantique provide the classic combination with gel durability. The formula self-levels during application, reducing visible brush strokes that photograph poorly. Expect 10-14 days of chip-free wear when applied over properly prepped nails with quality base coat application.
For DIY execution, OPI Funny Bunny and Alpine Snow offer excellent opacity in regular polish formulas. The key difference: Funny Bunny has a slight pink undertone that softens the contrast, while Alpine Snow reads as pure white. Cure time under LED lamps is 30 seconds for gel versions; air-dry polish needs 5-7 minutes between coats to prevent smudging.
Difficulty: Beginner to Intermediate
Time Required: 45-60 minutes for full application
Best For: Traditional weddings, classic dress styles, brides wanting timeless photos
Sheer Nude with Gold Accent Nail
Sheer nude bases create a "your nails but better" effect that photographs beautifully against white dresses and doesn't compete with other bridal jewelry. Adding gold foil or metallic accent to just the ring finger draws attention to the engagement ring without overwhelming the overall look.
Essie Gel Couture in Lace Me Up and Ballet Slippers are go-to sheer nude shades for varying skin tones. Lace Me Up leans slightly peachy and complements warm undertones; Ballet Slippers has a pink base that flatters cool undertones. Both require two thin coats for even coverage without opacity.
For the gold accent, Born Pretty gold foil flakes ($4-6 per jar) or OPI Goldeneye ($10-12 per bottle) provide different finishes. Foil creates textured dimension, while metallic polish reads as smooth and uniform. Apply foil over tacky gel base before top coat; metallic polish goes on like standard color.
Difficulty: Beginner
Time Required: 35-45 minutes
Best For: Minimalist brides, vintage-inspired weddings, ring-focused designs
Almond Shape with Subtle Shimmer
Almond nail shapes photograph exceptionally well on bridal hands — the tapered sides create an elongating effect that complements engagement rings and looks intentional in both close-up ring shots and full-hand photos. Paired with subtle shimmer rather than chunky glitter, this design adds dimension without reading as "sparkly" in images.
The almond nail shape requires specific filing technique: file sides at a 45-degree angle toward the center, then round the tip slightly. This differs from stiletto shapes which taper to a point. Most nail lengths need at least 3-4mm of free edge to achieve the almond silhouette without looking stubby.
OPI Cosmo-Not Tonight Honey provides micro-shimmer in a sheer pink base — the particles refract light subtly rather than creating obvious sparkle. China Glaze Fairy Dust works as a top coat shimmer layer over any nude base. Both formulas photograph as elegant shine rather than costume glitter.
Difficulty: Intermediate (requires filing skill)
Time Required: 60-75 minutes including shaping
Best For: Modern weddings, brides with longer nail beds, outdoor ceremonies with natural light
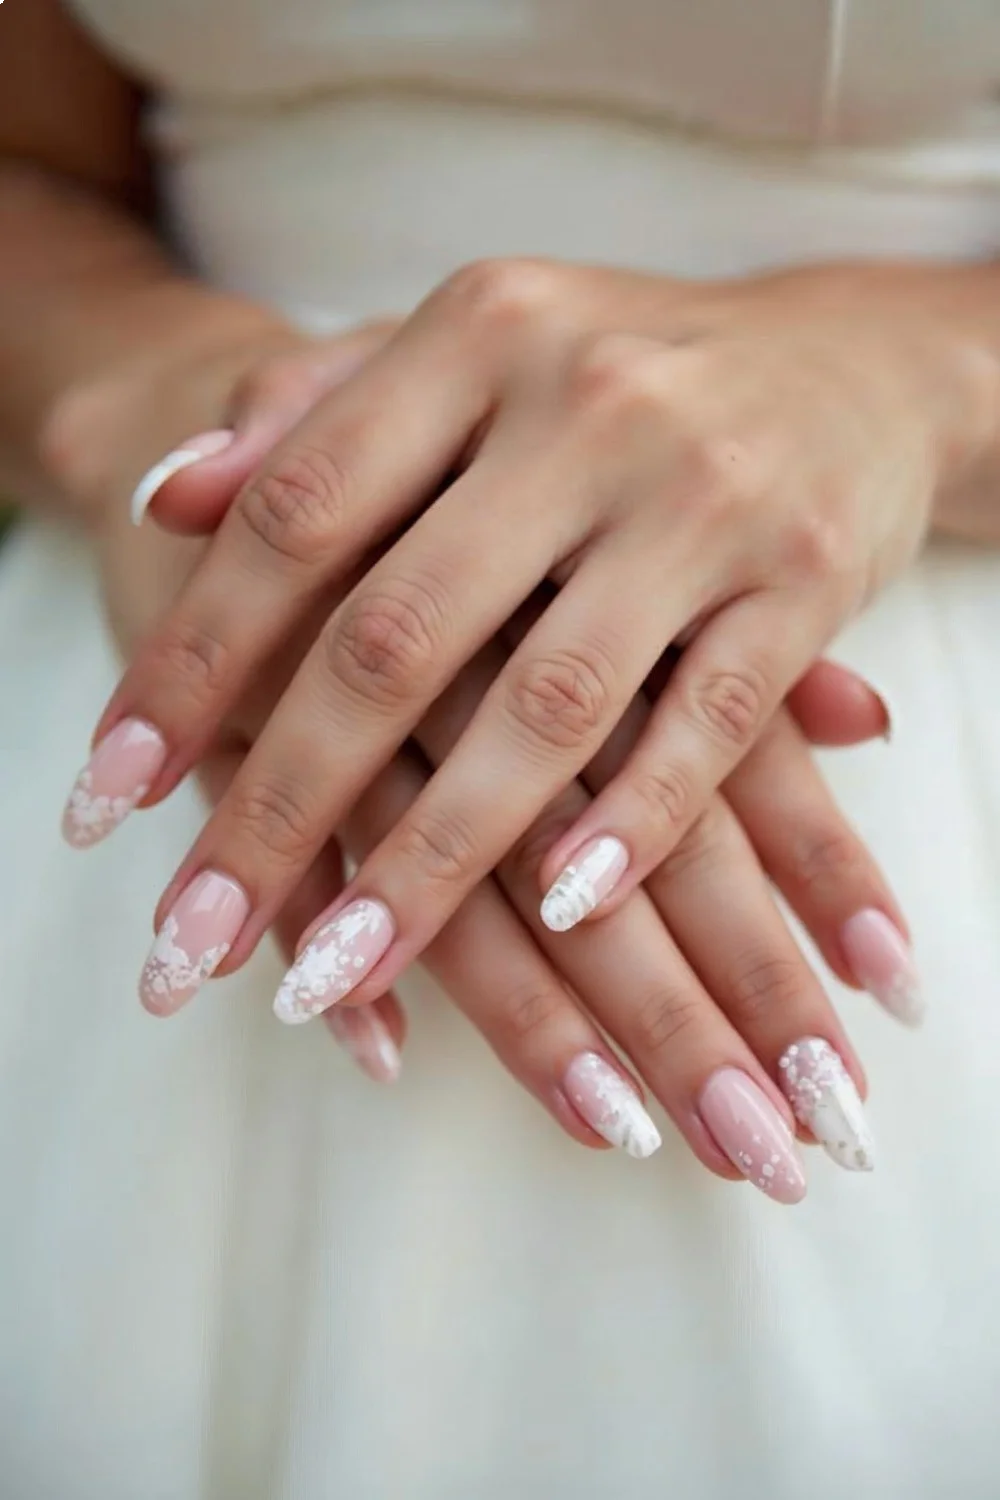
Milky White Ombré
Milky white nails create a soft, ethereal look that complements both warm and cool skin tones while photographing as clean and intentional. The ombré technique — transitioning from sheer at the cuticle to opaque white at the tip — adds dimension without pattern or embellishment.
This design requires layering technique rather than sponge application. Start with one coat of sheer white at the cuticle area only, let dry partially, then apply full coverage from mid-nail to tip, overlapping the sheer section slightly. The third coat focuses on the tip third only, creating gradual opacity increase.
Orly White Tips ($8-10) and Essie Marshmallow ($9-11) both have the right consistency for this technique — thin enough to layer without bulk but opaque enough to build coverage. The DIY gradient technique using polish rather than sponges prevents the texture problems that can occur with traditional ombré methods.
Difficulty: Intermediate
Time Required: 50-65 minutes
Best For: Bohemian weddings, lace dresses, brides wanting soft rather than stark whites
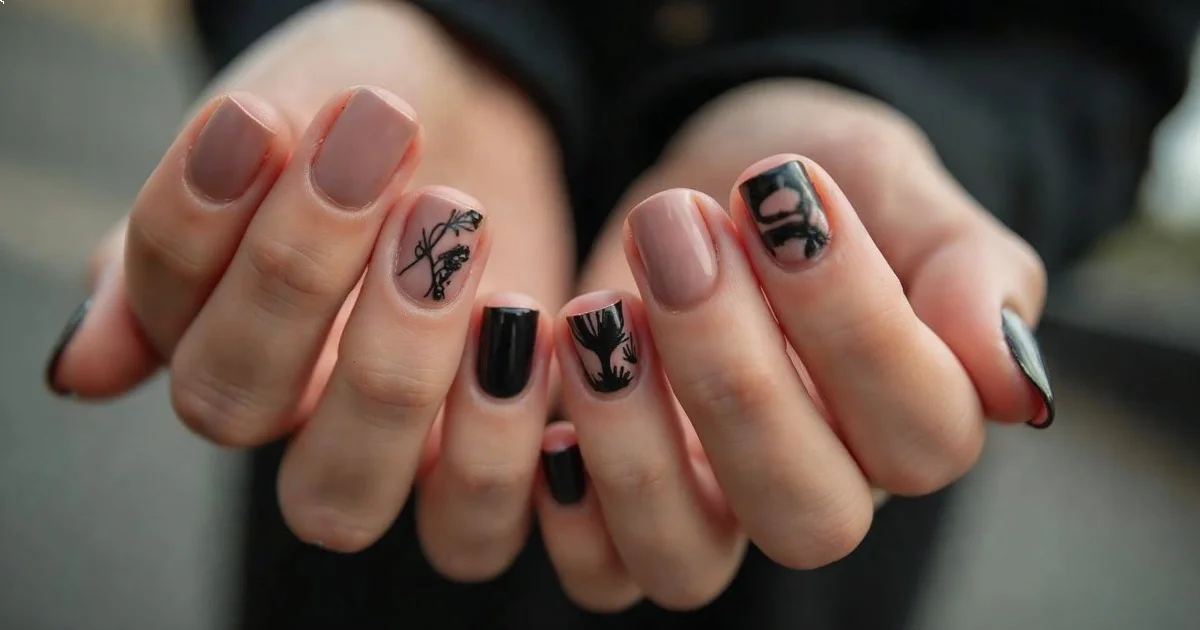
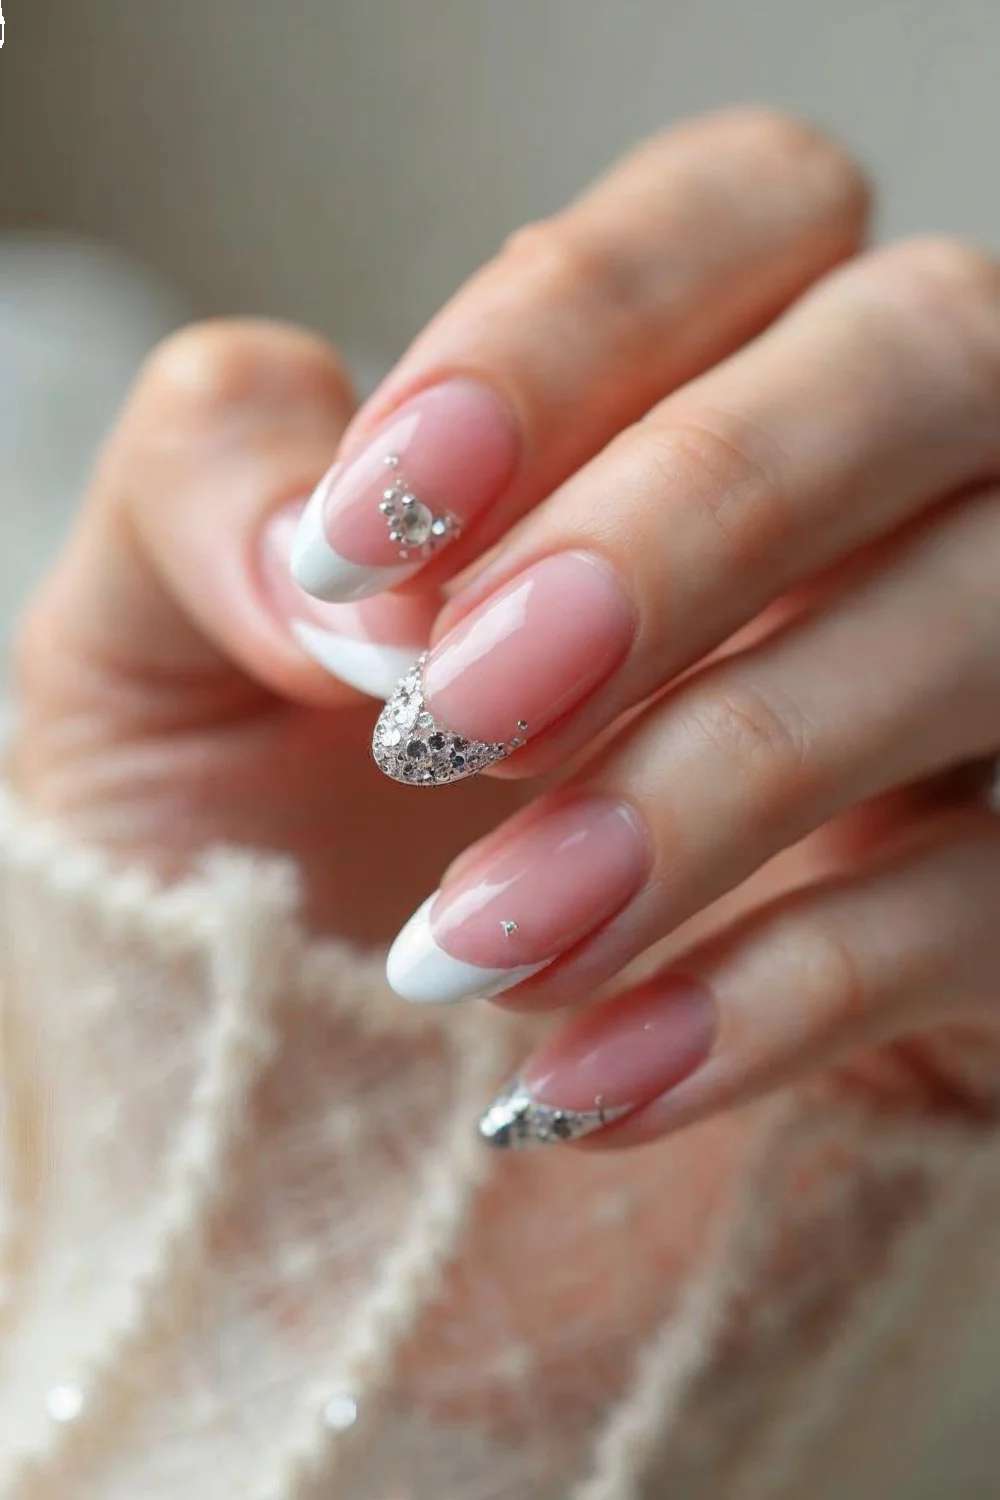
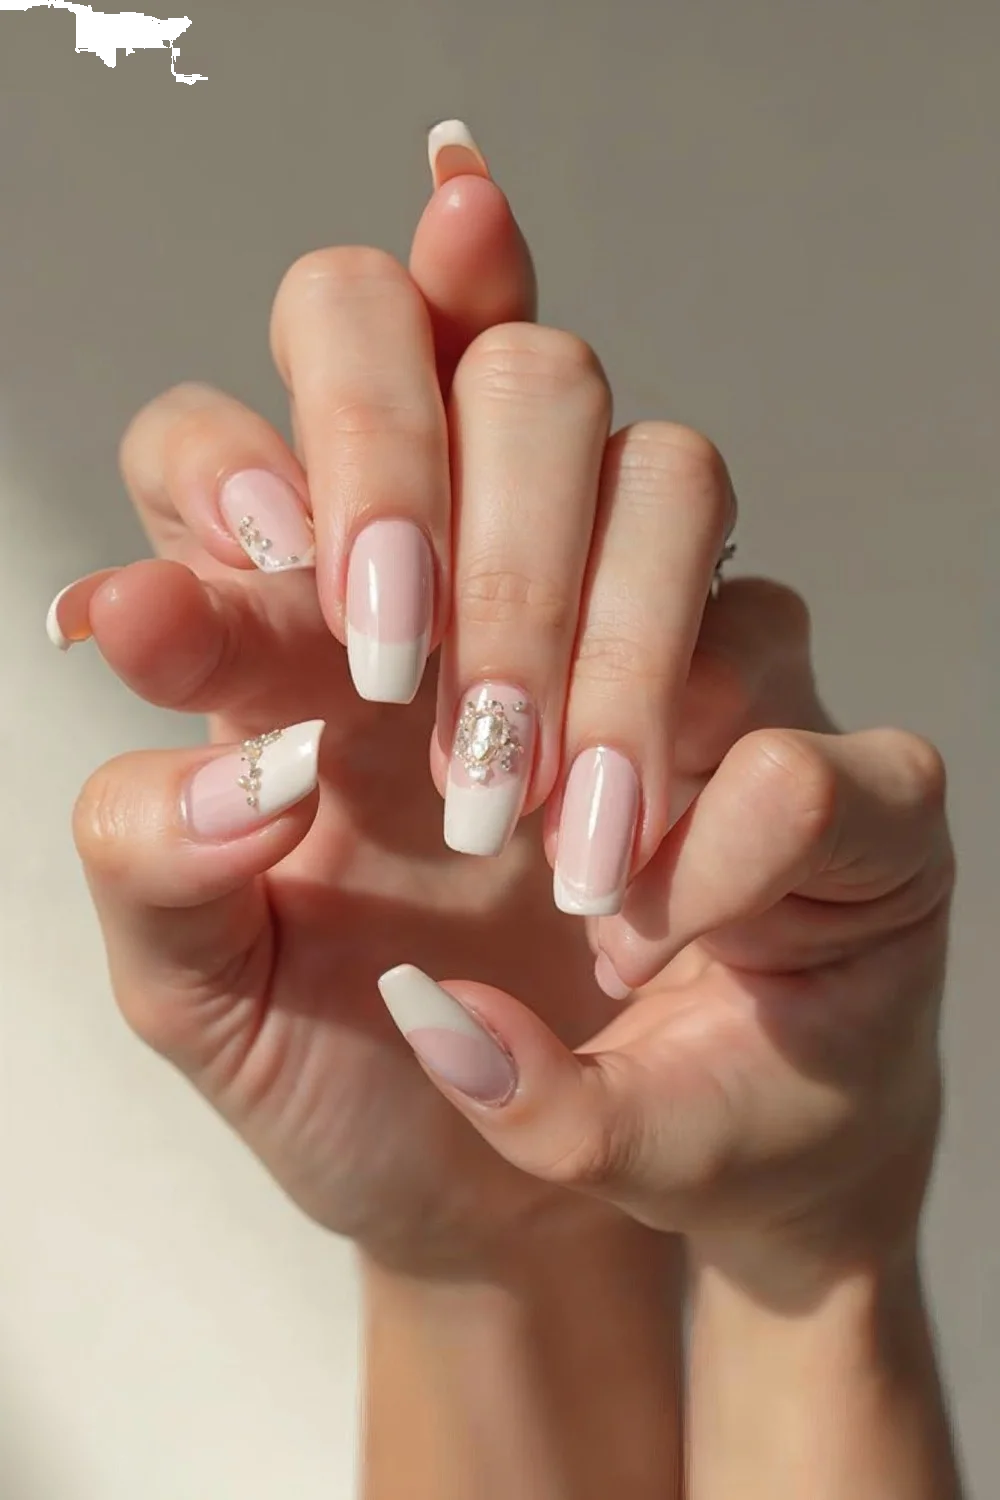
Pearl and Rhinestone Accent
Delicate pearl or crystal accents on one or two nails per hand create focal points without overwhelming the overall bridal aesthetic. Professional guidance suggests limiting embellishments to accent nails only — full sets of rhinestone nails photograph as costume-like rather than elegant.
Marianne Nails 3mm flat-back pearls ($6-8 per pack of 100) adhere best with gel top coat or nail glue. Place pearls on the ring finger near the cuticle area or along the smile line of French manicures. Swarovski flatback crystals in SS5 or SS7 sizes (approximately 2mm) work for more sparkle.
Application timing matters: for gel manicures, place embellishments on the tacky layer of color before curing, then cure with embellishments in place. Seal with gel top coat, curing again. For regular polish, apply embellishments to tacky top coat, let dry completely, then add a second top coat layer to encapsulate. This prevents pearls from popping off during the reception.
Difficulty: Intermediate to Advanced
Time Required: 60-75 minutes
Best For: Formal weddings, ballgown dresses, brides wanting subtle sparkle

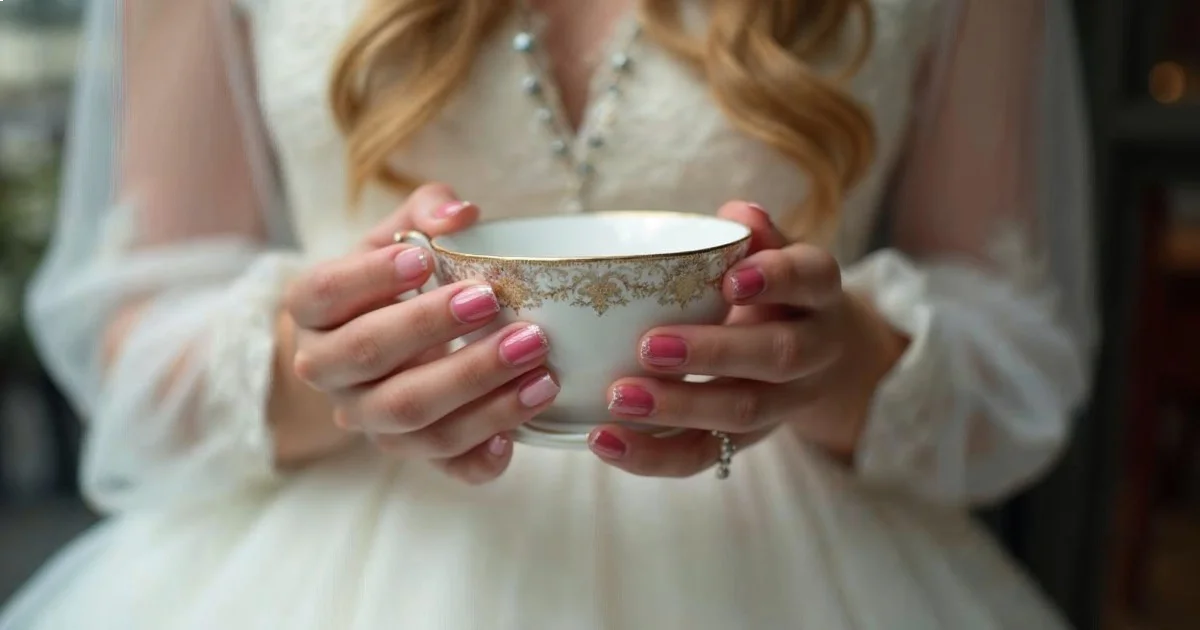
Soft Pink with White Floral Detail
Hand-painted floral accents on sheer pink bases create romantic, garden-wedding-appropriate nails. The key distinction from typical floral nail art: bridal florals should be delicate white or cream rather than multicolor, maintaining the elegant restraint appropriate for wedding aesthetics.
This design works best on one accent nail per hand — typically the ring finger to complement the engagement ring. Use a detail brush (Winstonia size 0 or similar, $4-6) and white gel polish or acrylic paint thinned slightly with water. Paint simple five-petaled flowers rather than complex roses; simple reads as intentional while overly detailed can photograph as busy.
China Glaze Pelican Gray mixed with white creates perfect shading for dimension. Paint petals first in pure white, then add center dots in pale yellow. Let dry fully, then seal with gel top coat or Seche Vite Dry Fast Top Coat ($10-12) for regular polish.
Difficulty: Advanced
Time Required: 75-90 minutes
Best For: Garden weddings, romantic dress styles, spring or summer ceremonies
Negative Space Half-Moon
Negative space designs leave portions of the natural nail exposed, creating modern minimalist looks that photograph as intentional. The half-moon technique — leaving the lunula area unpainted — updates the classic reverse French manicure with cleaner lines.
Achieving clean edges requires hole-reinforcement stickers ($3-5 for 100-pack at office supply stores) as guides. Apply base coat, let dry completely, place reinforcement sticker at the base covering the lunula, then paint color from sticker edge to free edge. Remove sticker while polish is still wet for the cleanest line.
Essie Bordeaux and OPI Lincoln Park After Dark work well for this technique — both have excellent opacity in one coat, preventing the need for multiple layers that can seep under sticker guides. Seal the entire nail including the negative space section with clear top coat to prevent visual texture differences.
Difficulty: Intermediate
Time Required: 45-55 minutes
Best For: Modern weddings, minimalist aesthetics, shorter nail lengths
Glazed Donut Chrome Finish
The glazed donut nail trend — popularized in recent beauty culture — creates an iridescent pearl finish that photographs with subtle dimension. For bridal applications, this works best in neutral pearl rather than colorful chrome.
Achieving this finish requires specific layering: sheer pink or nude base, chrome powder application over no-wipe gel top coat, then final glossy top coat seal. Beetles Gel Chrome Powder in Pearl White ($8-10) or Daily Charme Aurora Powder ($12-15) create the signature effect.
The technique differs from traditional chrome: after curing gel color, apply no-wipe top coat and cure for 60 seconds. While still warm from the lamp, use a silicone applicator or eyeshadow sponge to rub chrome powder into the surface. The warmth helps powder adhere. Dust off excess, then seal with regular gel top coat.
Difficulty: Intermediate
Time Required: 50-60 minutes
Best For: Contemporary weddings, Instagram-focused brides, satin dress finishes
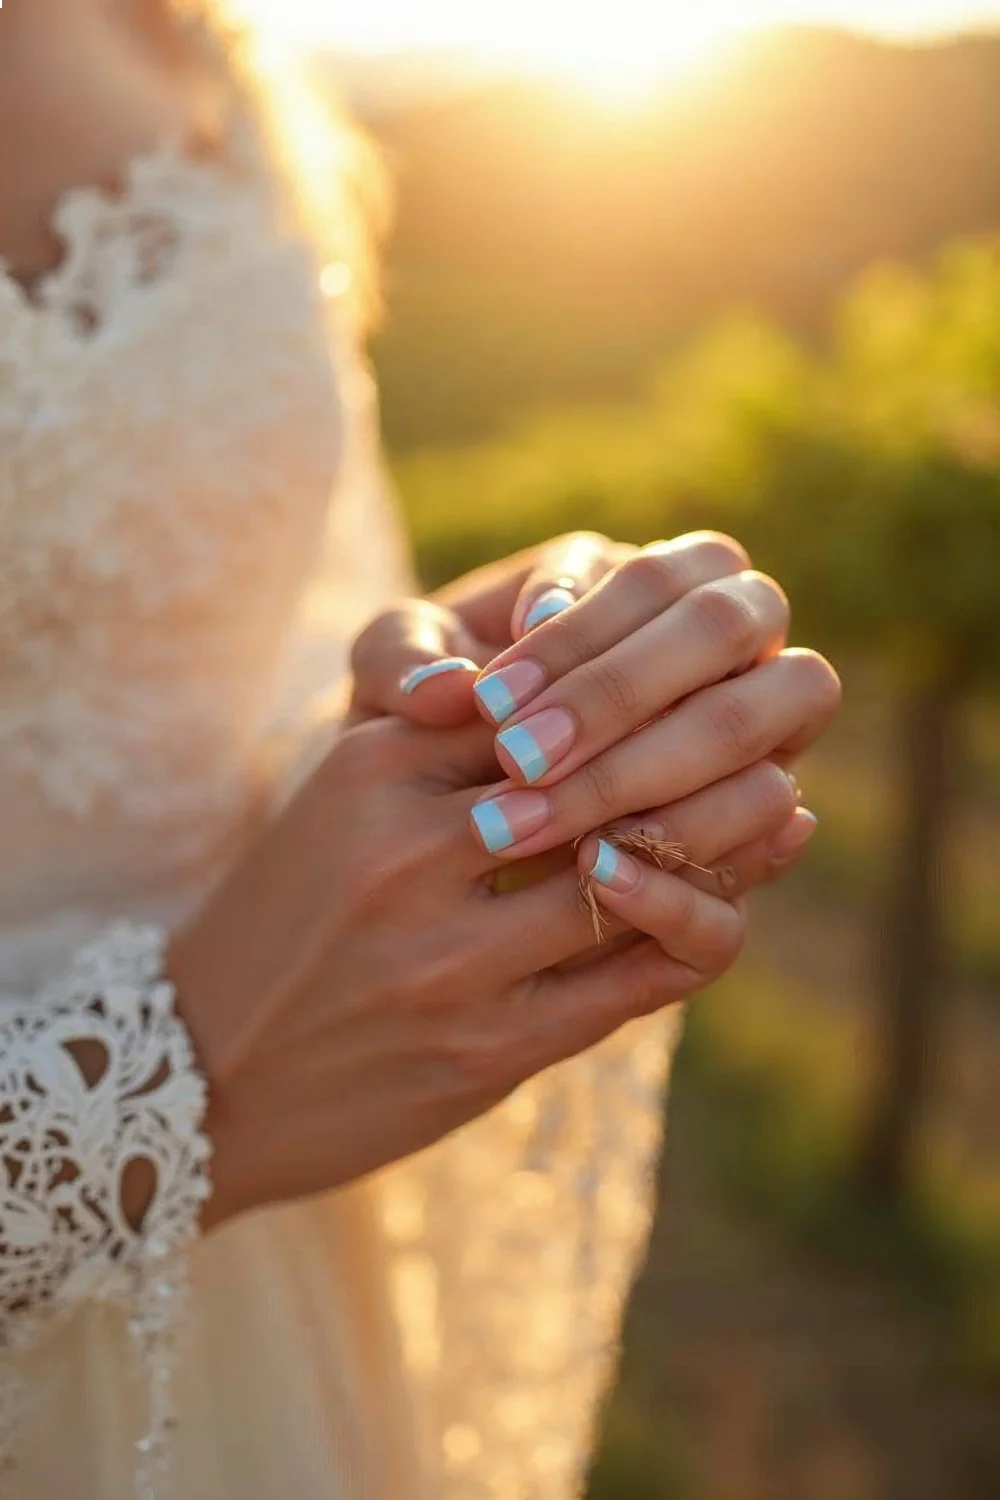
Baby Blue French Tips
Soft blue replaces traditional white in French tips for a "something blue" bridal tradition incorporation. The key: choosing genuinely pale blue rather than bright turquoise or navy. The subtle color shift photographs as intentional rather than casual.
OPI This Color Hits All The High Notes (from the Fiji collection, $10-12) and Essie Borrowed & Blue ($9-11) both provide the right shade — pale enough to read as bridal but saturated enough to show in photos. These work with traditional French manicure technique, painting 2-3mm tips.
Pair baby blue tips with sheer pink or nude bases rather than stark white. Sally Hansen Sheer Nirvana ($6-8) or OPI Bubble Bath ($10-12) create the subtle base that lets blue tips stand out without harsh contrast. This combination photographs softer than white bases.
Difficulty: Beginner to Intermediate
Time Required: 45-60 minutes
Best For: Spring weddings, traditional brides wanting subtle personality, blue color scheme weddings
Matte Nude with Glossy Accent
Mixing matte and glossy finishes on the same hand creates textural contrast that photographs with dimension. The technique: paint all nails in nude color, apply matte top coat to most nails, leave one or two accent nails with glossy finish.
OPI Matte Top Coat ($10-12) and Essie Matte About You ($9-11) both convert any polish to flat finish without changing the underlying color. The difference: OPI dries slightly faster but Essie is less prone to showing fingerprints during application.
For best results, apply color in two thin coats, let dry completely, then add finish. Paint glossy top coat on ring fingers first, let dry, then apply matte to remaining nails. This prevents matte particles from contaminating the glossy brush. Matte finishes show oils from skin more readily, so avoid hand lotion for 2-3 hours after application.
Difficulty: Beginner
Time Required: 40-50 minutes
Best For: Modern minimalist weddings, textured dress fabrics, editorial-style photography
Subtle Geometric Metallic Lines
Thin metallic lines — gold or silver — create modern geometric interest without busy patterns. The key: limiting to 2-3 lines per nail maximum, placed asymmetrically rather than in parallel stripes.
Striping tape (Born Pretty Nail Striping Tape, $4-6 for 10 rolls) creates the cleanest lines. Apply over fully dry base color, press down firmly, paint over with metallic polish, then immediately peel tape while metallic is wet. The wet removal prevents clean polish from lifting with the tape.
Sally Hansen Celeb City ($6-8) and Essie Good As Gold ($9-11) provide metallic opacity in one coat — crucial for this technique since multiple coats increase seepage under tape. For varying line widths, cut striping tape lengthwise with small scissors before application.
Difficulty: Intermediate to Advanced
Time Required: 60-75 minutes
Best For: Art deco weddings, geometric dress details, modern venue aesthetics
Sheer Pink with White Tips (Reverse French)
Reverse French manicures place the accent at the cuticle rather than the tip — a thin white line following the natural lunula curve. This inverts the traditional French while maintaining bridal-appropriate restraint.
The technique requires steady hand control: use a detail brush (not the bottle brush) to paint the white line approximately 1mm from the cuticle. Mistakes wipe away easily before drying. White needs to be opaque in one stroke — OPI Alpine Snow or Essie Blanc both have sufficient pigmentation.
Base the overall nail in sheer pink: OPI Bubble Bath for slightly peachy nude or Essie Ballet Slippers for cooler pink. Two coats provide even coverage. The white line goes on after base color dries completely. Seal everything with glossy top coat to unify the finish.
Difficulty: Advanced
Time Required: 65-80 minutes
Best For: Fashion-forward brides, unique wedding aesthetics, modern dress styles
Bridal Nail Design Comparison
| Design | Difficulty | Time Required | Longevity | Best For |
|---|---|---|---|---|
| Classic French Manicure | Beginner-Intermediate | 45-60 min | 10-14 days (gel) | Traditional weddings, timeless photos |
| Sheer Nude + Gold Accent | Beginner | 35-45 min | 10-14 days (gel) | Minimalist aesthetics, ring focus |
| Almond with Shimmer | Intermediate | 60-75 min | 10-14 days (gel) | Natural light venues, longer nail beds |
| Milky White Ombré | Intermediate | 50-65 min | 8-12 days | Bohemian weddings, soft aesthetic |
| Pearl/Rhinestone Accent | Intermediate-Advanced | 60-75 min | 7-10 days | Formal venues, ballgown dresses |
| Floral Detail | Advanced | 75-90 min | 10-14 days (gel) | Garden ceremonies, romantic style |
| Negative Space Half-Moon | Intermediate | 45-55 min | 8-12 days | Modern minimalist, shorter nails |
| Glazed Chrome | Intermediate | 50-60 min | 10-14 days (gel) | Contemporary venues, satin finishes |
| Baby Blue French | Beginner-Intermediate | 45-60 min | 10-14 days (gel) | Spring weddings, "something blue" |
| Matte/Glossy Mix | Beginner | 40-50 min | 8-12 days | Textured fabrics, editorial photos |
| Geometric Metallic Lines | Intermediate-Advanced | 60-75 min | 8-12 days | Art deco themes, modern aesthetics |
| Reverse French | Advanced | 65-80 min | 10-14 days (gel) | Fashion-forward, unique style |
Wedding Nail Preparation Timeline
Proper nail preparation matters more than the specific design choice for achieving flawless wedding day nails. Based on professional nail care protocols from OPI, begin preparation 3-4 months before the wedding date rather than waiting until the week before.
3-4 Months Before: Start strengthening weak nails if needed. Remove any existing gel or acrylic enhancements using proper removal technique to assess natural nail health. Begin taking biotin supplements (2,500-5,000 mcg daily) if nails are thin or prone to breaking — effects typically show after 6-8 weeks of consistent use.
2 Months Before: Schedule a trial manicure with your chosen design, whether DIY or professional. This reveals potential issues: color matching with dress, longevity concerns, or application difficulties. Test wearing your trial manicure for at least a week to assess real-world durability.
1 Month Before: Focus on healthy nail care practices including daily cuticle oil application (jojoba or vitamin E oil, applied before bed). Avoid harsh acetone removers — opt for acetone-free formulas or use acetone only when necessary. Keep nails at your desired wedding length to prevent last-minute breakage.
2 Weeks Before: Handle any necessary nail repairs so nails have time to stabilize. If doing professional services, this is the time for final shape refinement. Avoid getting gel manicures this close to the wedding — schedule them for 5-7 days before instead.
5-7 Days Before: Apply your final wedding manicure. Gel manicures hit their optimal appearance around day 3-5, so timing for 5-7 days before ensures you're in the sweet spot on wedding day. For regular polish, apply 1-2 days before to minimize wear time risk.
Day Before/Day Of: Avoid water exposure as much as possible — wear gloves for dishes or cleaning. Apply cuticle oil the night before for hydrated, photograph-ready hands. If minor chips occur, spot-fix with a thin layer of top coat rather than full removal and reapplication.
Key Finding: According to Allure's gel manicure research, gel polish longevity peaks between days 3-7 after application, making 5-day timing optimal for wedding day freshness
Choosing Your Wedding Nail Design
Selecting wedding nails involves balancing personal style with practical photography considerations. Most brides instinctively reach for whatever they find beautiful, but wedding nails serve specific functional requirements beyond typical manicures.
Match Your Dress Detail Level: Simple, clean-lined dresses pair best with minimalist nails — classic French, sheer nudes, or subtle shimmer. Heavily embellished dresses with beading or lace need equally detailed nails to avoid looking underdone; consider pearl accents or delicate florals. The visual weight should balance.
Consider Your Ring: Statement engagement rings with large center stones need simpler nail designs that don't compete for attention. Delicate bands or smaller stones can handle more elaborate nail art. Warm-toned metals (yellow gold, rose gold) pair best with peachy nudes; cool metals (white gold, platinum) match pink-based nudes.
Photography Matters: Flash photography can wash out extremely pale colors or make bright whites appear bluish. Slightly warmer shades photograph more consistently across lighting conditions. If hiring a photographer shooting primarily with natural light, you have more flexibility with true whites and pastels.
Venue Impacts Choices: Outdoor garden weddings suit florals and natural details. Modern urban venues pair with geometric or minimalist designs. Ballroom settings work with classic French or pearl accents. Your nails should feel cohesive with the venue aesthetic.
Length Affects Options: Shorter nails (under 4mm free edge) limit design possibilities — negative space and matte finishes work better than complex art. Longer nails can handle detailed florals, ombré techniques, and embellishments without looking crowded.
Gel vs Regular Polish: Gel manicures last 2-3 weeks but require UV curing and professional removal. Regular polish offers easier at-home touch-ups but typically lasts only 5-7 days. For destination weddings with week-long events, gel is practical. For single-day local weddings, either works.
Budget Reality: Professional bridal manicures run $45-85 depending on complexity and location. DIY execution costs $15-35 for supplies you'll reuse. Adding gel application at home requires a $25-40 LED lamp investment. Factor in engagement photo manicures and honeymoon upkeep when budgeting.
Skin Tone Coordination: Cool undertones pair with pink-based nudes (Essie Ballet Slippers, OPI Bubble Bath). Warm undertones need peachy nudes (Essie Lace Me Up, OPI Samoan Sand). Olive or deep skin tones can handle bolder colors like soft berries or deeper nudes that wash out lighter complexions.
Common Wedding Nail Mistakes to Avoid
Certain nail choices consistently photograph poorly or fail to last through wedding day demands. Professional nail technician forums frequently discuss these recurring issues brides face.
Choosing Trendy Over Timeless: Nails that feel extremely current often date wedding photos quickly. The glazed chrome trend, while beautiful now, may look as dated as 1990s square French tips in future decades. Lean toward classic designs with subtle modern updates.
Overcomplicating the Design: Nail art covering every finger reads as busy in photos and competes with dress, jewelry, and florals for visual attention. Limit detailed art to 1-2 accent nails per hand maximum.
Ignoring Hand Modeling Practice: Brides spend minimal time thinking about how they'll position hands for photos. Practice graceful hand placement before the wedding day — slightly curved fingers, hands at angles rather than flat, avoiding clenched fists. Awkward hand poses make even perfect nails look unflattering.
Waiting Too Long for Application: Applying gel or regular polish the day before risks smudging, denting, or incomplete curing. The 5-7 day window for gel or 1-2 days for regular polish balances freshness with stability.
Skipping the Trial: Committing to an untested design on wedding day invites problems. Colors may not complement your skin tone as expected. Application may prove more difficult than anticipated. Longevity might disappoint. Always trial run your exact intended design.
Neglecting Nail Health: Trying to force length or shape on weak, damaged nails leads to breaking at the worst possible moment. If nails are in poor condition, choose shorter lengths and focus on health over the months leading up rather than enhancement application.
Mismatching Undertones: Cool-toned whites with warm-toned dresses (or vice versa) creates subtle discord in photos. Match color temperatures between nails, dress, and metals for cohesive appearance.
Forgetting Maintenance Supplies: Bringing cuticle oil, top coat, and nail file to getting-ready location allows quick fixes. Most chips and snags are repairable with minimal supplies if caught immediately.