Summer Acrylic Nail Designs 2026: 15 Vibrant Looks That Last
Summer acrylic nails combine durability with bold, heat-resistant designs that withstand pool days, beach trips, and outdoor activities.
 Tessa Morgan
Summer acrylic nails combine durability with bold, heat-resistant designs that withstand pool days, beach trips, and outdoor activities. Unlike gel or regular polish, acrylics maintain structural integrity for 2-3 weeks even with chlorine exposure and UV exposure, making them the practical choice for summer 2026's most popular nail trends.
- Acrylic nails maintain wear for two to three weeks through chlorine, saltwater, and UV exposure
- Proper application requires dehydrated nail plates and quality monomer-to-polymer ratios
- Summer 2026 trends favor neon accents, tropical motifs, and chrome finishes over solid colors
- Maintenance requires cuticle oil application and fill appointments every two weeks
- Design complexity ranges from simple gradient techniques to intricate 3D embellishments
Why Acrylic Nails Dominate Summer 2026
Acrylic systems outperform other nail enhancements during summer months because of their chemical structure and heat resistance. The polymer chains formed during acrylic application create a rigid, non-porous surface that doesn't soften in high temperatures or degrade from chlorinated water exposure. According to Cosmopolitan's comprehensive guide to acrylic nails, proper acrylic application creates a waterproof barrier that protects natural nails from environmental damage while maintaining design integrity.
The formulation chemistry matters here. Traditional acrylic systems use ethyl methacrylate (EMA) monomers that polymerize when combined with powder, creating cross-linked chains that resist UV degradation and temperature fluctuations. This molecular structure explains why acrylics don't chip from sunscreen application or fade from prolonged sun exposure the way conventional polish does.
Summer-specific considerations include:
Heat resistance: Acrylic maintains hardness up to 140°F, far above typical summer temperatures
Chemical compatibility: Sunscreen, chlorine, and saltwater don't dissolve or weaken properly cured acrylics
Design longevity: Pigments embedded in acrylic layers don't fade from UV exposure like surface-applied polish
Structural integrity: Unlike gel extensions that can delaminate in humidity, acrylics remain bonded to the natural nail plate
For those considering alternatives, Press On Nails: Complete Application & Removal Guide 2026 offers temporary options, but press-ons typically last 5-7 days maximum and aren't designed for water immersion.
Key Finding: Proper nail preparation, including dehydrating and base coat application, is the most important factor in acrylic longevity during summer activities — American Academy of Dermatology
15 Summer Acrylic Nail Designs for 2026
These designs reflect current trend analysis from beauty industry publications while accounting for summer durability requirements. Each includes difficulty rating, time investment, and specific product recommendations based on observable performance characteristics.
1. Neon Ombré Fade
Difficulty: Intermediate | Time: 90 minutes | Longevity: 2-3 weeks
Gradient techniques work exceptionally well with acrylic systems because you're blending powder colors during application rather than manipulating wet polish. The key technical point: work with slightly wetter acrylic beads at color transition zones to allow seamless blending before polymerization completes.
For neon shades, look for powder formulations specifically labeled "neon" or "UV reactive" — standard pigments won't achieve the same intensity. Young Nails' Caption collection and Kiara Sky's neon powder line both offer true neon saturation that remains vibrant through the full wear cycle.
The blending sequence: apply your base color (typically white or pale pink) to the entire nail extension, then use progressively smaller beads of your neon shade from free edge toward cuticle, feathering each application with a damp brush before the acrylic fully sets. This creates depth that surface-applied gradients can't match.
2. Tropical Fruit Slices
Difficulty: Beginner-friendly | Time: 60 minutes | Longevity: 2-3 weeks
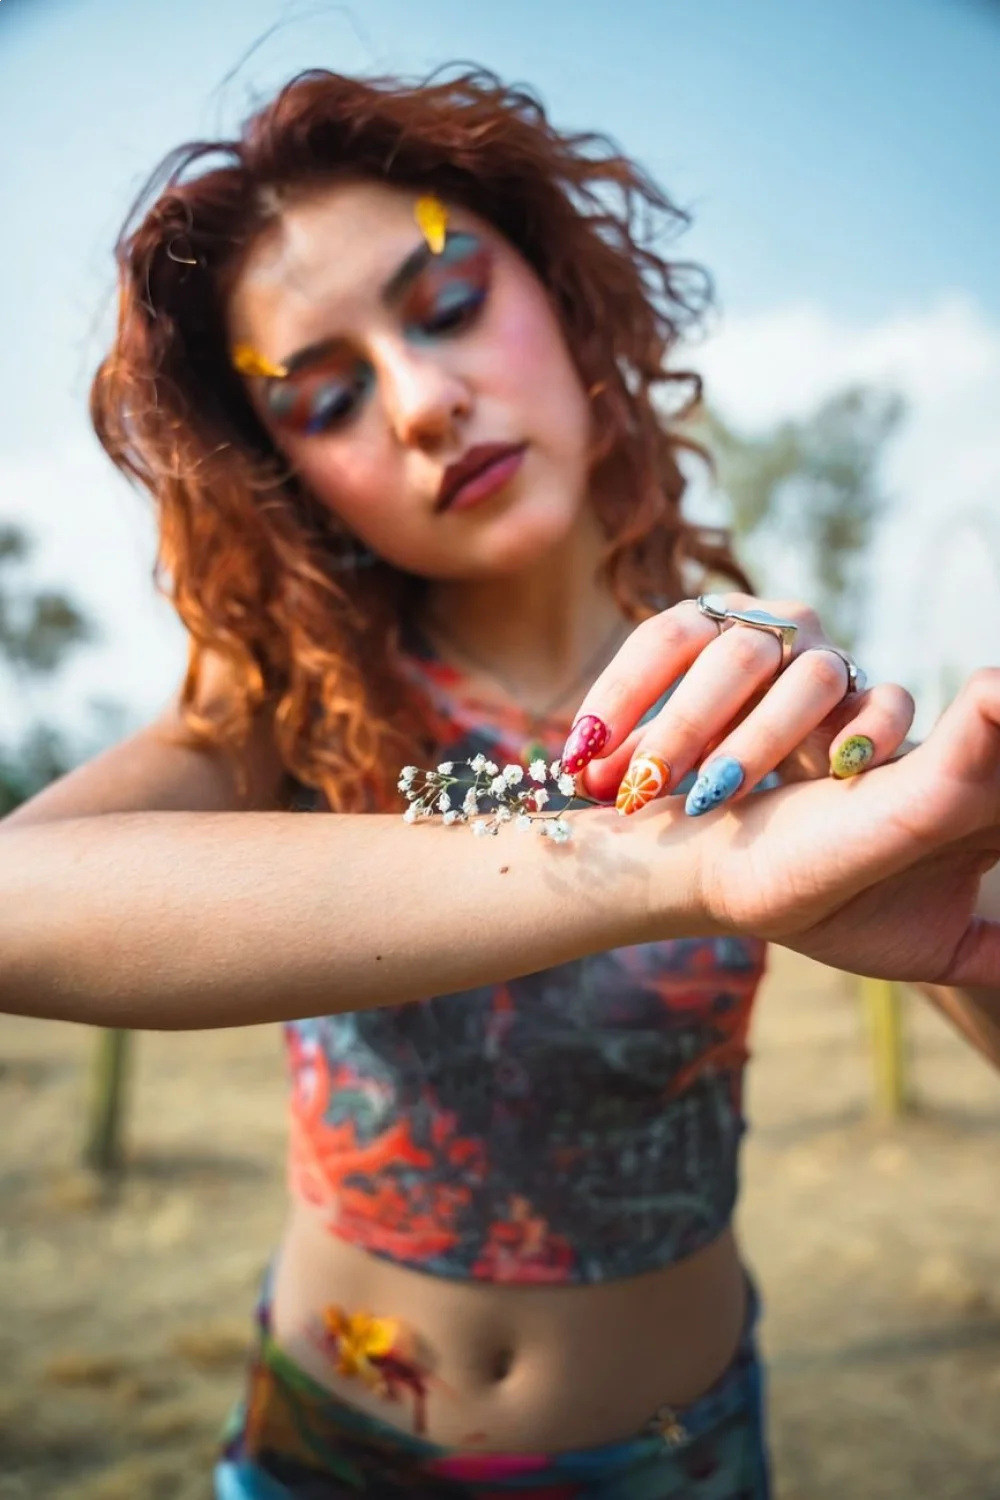
Fruit slice designs gained traction in 2024 and continue in 2026 summer trends. The watermelon, orange, and kiwi motifs work well because they require minimal artistic skill — just geometric shapes and dot placement.
Application approach: build your acrylic extension in a solid base color (white or cream), then use acrylic paint or gel paint for the fruit details after filing and shaping. Seal everything under a high-gloss top coat. The acrylic paint sits on top of the cured acrylic surface rather than embedded within it, but proper top coat application prevents chipping.
Watermelon Nails: 10 Juicy Summer Designs Tutorial provides specific brush techniques for fruit slice details, including seed placement and rind shading that creates dimensional realism.
Product specifications: Tammy Taylor's A+ Clear or ASP Signature Clear for the base structure, then Artist Couture acrylic paints for detail work (their pigment load is dense enough for one-coat coverage).
3. Chrome Powder Finish
Difficulty: Intermediate | Time: 75 minutes | Longevity: 2-3 weeks
Chrome finishes require a specific layering sequence: acrylic structure, gel base coat, chrome powder application, gel top coat. The gel layer is non-negotiable because chrome powders only bond to tacky gel surfaces, not cured acrylic.
The technique mirrors standard chrome application on natural nails but requires attention to timing. Apply a thin gel base coat (OPI GelColor Base Coat works reliably), cure for 30 seconds under LED, then immediately rub chrome powder across the tacky layer using a silicone applicator or eyeshadow sponge. The friction creates the mirror finish.
DIY Chrome Nails at Home: Easy Mirror Finish Tutorial 2026 breaks down powder selection and application pressure for different chrome effects, from high-mirror silver to iridescent shift finishes.
Common failure mode: applying chrome powder to fully cured gel eliminates the tacky layer needed for adhesion, resulting in powder that wipes off during top coat application. The gel must remain uncured (inhibition layer intact) for chrome bonding.
4. Sunset Gradient
Difficulty: Intermediate | Time: 90 minutes | Longevity: 2-3 weeks
Sunset designs blend three to five warm tones from deep purple through orange to yellow. The acrylic powder method creates superior color depth compared to sponge-applied polish gradients because pigments exist throughout the entire nail thickness rather than just the surface.
Color sequencing matters for realistic sunset effects. Start with deep purple or burgundy at the cuticle area, transition through coral and peach in the mid-nail zone, then finish with yellow-orange at the free edge. Each color zone requires a separate bead application with wet brush blending at boundaries.
Sunset Nails Tutorial: 5 Easy Gradient Techniques demonstrates the damp brush technique that prevents harsh color lines while maintaining distinct color zones.
Powder recommendations: Artisan powder collections offer pre-coordinated sunset palettes, but mixing your own from primary colors gives more control. Mia Secret's professional powder line includes concentrated pigments that blend smoothly without muddying.
5. 3D Seashell Embellishments
Difficulty: Advanced | Time: 120 minutes | Longevity: 2-3 weeks
Three-dimensional acrylic sculpting separates basic nail art from advanced editorial techniques. Seashell embellishments require building up acrylic in layers to create dimensional shells, starfish, or coral formations that protrude from the nail surface.
The structural approach: create your base acrylic nail, then use small beads of white or ivory acrylic to form shell ridges and curves on top of the cured base. Work one shell at a time, allowing each to fully polymerize before starting the next to prevent smudging. A fine-tipped acrylic brush (size 6 or smaller) gives the control needed for delicate shell details.
Additional dimension comes from iridescent powder dusted onto wet acrylic or from mixing opal powder directly into your acrylic bead. This catches light the way real seashells do. Seal everything under a thick layer of builder gel or acrylic top coat to prevent sharp edges from catching on fabric.
These designs work best on accent nails (ring finger or middle finger only) rather than all ten fingers — full-hand 3D application becomes impractical for daily tasks.
6. Pastel Cloud Nails
Difficulty: Beginner | Time: 60 minutes | Longevity: 2-3 weeks
Cloud nail designs use soft pastel bases with white cloud shapes applied on top. The appeal lies in the soft, dreamy aesthetic that pairs well with summer's lighter wardrobe colors while remaining subtle enough for professional environments.
Technique breakdown: build the entire acrylic nail in a pastel base color (baby blue, lavender, or soft pink), then use white acrylic paint or dense white gel polish to dab irregular cloud shapes across 2-3 nails per hand. The dabbing motion with a small brush creates the soft, puffy texture that defines cloud shapes.
A matte top coat transforms this design completely — Matte Nails: 15 Sophisticated 2026 Design Ideas demonstrates how matte finishes amplify pastel tones and create a velvety summer aesthetic. The matte surface also reduces UV glare in bright sunlight.
7. Coral Reef Micro-Painting
Difficulty: Advanced | Time: 150 minutes | Longevity: 2-3 weeks
Micro-painting requires fine liner brushes (size 0 or 00) and steady hand control. Coral reef designs incorporate coral branches, tropical fish, sea turtles, and underwater plant life across an oceanic blue or turquoise base.
The painting sequence: apply and cure your base acrylic in a gradient from deep ocean blue at the cuticle to lighter turquoise at the free edge, creating depth perception. Then use acrylic paints (not polish) to hand-paint each design element in layers — background coral first, then mid-ground elements, finally foreground details.
Acrylic paint advantages over gel paint: longer working time before drying, easier correction with water while wet, and superior opacity for small details. Liquitex Basics or Artist's Loft acrylics from craft stores work as well as nail-specific brands for this application.
Beach Nails: 16 Ocean-Inspired Designs for Summer 2026 provides alternative ocean motifs that require less detailed painting while maintaining the underwater aesthetic.
8. Neon French Tips
Difficulty: Beginner | Time: 75 minutes | Longevity: 2-3 weeks
The classic French manicure gets a summer update with neon tip colors instead of traditional white. This design works particularly well on shorter nail lengths where full-nail neon might feel overwhelming.
Application method: build your acrylic extension with a clear or natural pink base, creating the entire nail structure first. Then apply a thin line of neon acrylic powder (pink, orange, yellow, or green) just at the free edge, keeping the smile line clean and even. The precision comes from brush control — use a slightly damp brush to pick up a small bead of colored acrylic and place it exactly where you want the tip line.
For those new to acrylic application, Acrylic Fill at Home: DIY Guide to Save Money explains the fundamental brush techniques and monomer-to-powder ratios that prevent common application errors like bubbling or uneven surfaces.
Color rotation strategy: apply different neon colors to each nail for a rainbow effect, or stick to a single neon shade across all fingers for cohesive impact. The single-color approach reads more sophisticated in professional settings.
9. Tie-Dye Swirls
Difficulty: Intermediate | Time: 90 minutes | Longevity: 2-3 weeks
Tie-dye nail art mirrors the fabric dyeing technique but uses acrylic powder blending instead of dye. The random, organic swirl patterns work because there's no "wrong" way to execute them — imperfection is part of the aesthetic.
Creating tie-dye effects in acrylic: start with a white or cream base nail, then place small beads of 3-4 different colored acrylic powders randomly across the wet surface. Use a fine brush to gently swirl the colors together without fully blending them — you want distinct color streaks that merge at edges, not a muddy mixed color. The wetness of your monomer ratio determines how much the colors flow together.
Color combinations that work: pastel rainbow (pink, yellow, blue, purple), tropical (orange, pink, yellow), or sunset (purple, pink, orange). Avoid complementary colors (blue and orange, red and green) in the same nail because they create brown at blend points.
10. Glitter Accent Gradient
Difficulty: Beginner | Time: 60 minutes | Longevity: 2-3 weeks
Glitter gradients concentrate sparkle at the free edge and fade toward the cuticle, creating a sophisticated version of full-coverage glitter nails. This approach prevents the "disco ball" effect while maintaining summer sparkle.
The layering method: apply your base acrylic in any solid color (nude, pink, or white work universally), then mix fine glitter into clear acrylic and apply it only to the tip third of the nail using progressively smaller beads as you move toward the mid-nail. The glitter concentration naturally decreases as you use less acrylic, creating the gradient.
Glitter selection matters. Fine polyester glitter (0.008" or smaller) suspends better in acrylic than chunky craft glitter, which sinks and creates uneven surfaces. Glitter Unique and Twinkled T both offer nail-specific glitter in hundreds of colors with particle sizes optimized for acrylic mixing.
Encapsulation note: the glitter sits within the acrylic layers (encapsulated) rather than on top, which means it won't shed or feel rough during wear. This distinguishes acrylic glitter application from polish-based glitter that often feels gritty.
11. Tropical Palm Leaves
Difficulty: Intermediate | Time: 90 minutes | Longevity: 2-3 weeks
Palm leaf designs capture summer vacation aesthetics without requiring advanced painting skills. The leaves consist of a central vein with angular fronds extending outward — geometric enough for beginners to replicate with practice.
Design execution: apply a solid base color (white, nude, or pastel works best for contrast), then use a fine liner brush with green acrylic paint to create the central leaf vein with a gentle curve. Add small angled strokes extending from both sides of the vein to create individual fronds. The strokes don't need to be perfect — natural palm leaves have irregular spacing and angles.
Color variation adds realism. Mix two shades of green (a deeper forest green and a lighter lime or olive) and alternate between them for different frond strokes. This creates depth that single-color leaves lack.
For complete tropical aesthetics, Beach Nail Designs: 20 Summer Ocean-Inspired Ideas 2026 includes complementary designs like flamingos, pineapples, and hibiscus flowers that pair well with palm leaves in a full manicure set.
12. Holographic Foil Accents
Difficulty: Beginner | Time: 60 minutes | Longevity: 2-3 weeks
Holographic foil application over acrylic nails creates a futuristic, light-catching effect without requiring painting skills. The foil transfers from a plastic sheet onto a tacky surface, making it accessible for nail art beginners.
The transfer process: build and shape your acrylic nails in any base color, then apply a thin layer of foil transfer gel (available from Born Pretty, Makartt, or Modelones). Cure the gel for 15-20 seconds only — it must remain slightly tacky. Press holographic foil sheet firmly against the tacky gel, then peel away quickly. The foil pattern transfers wherever the gel was tacky.
Foil pattern options include scattered shards, full coverage, or geometric strips. For summer 2026 aesthetics, broken glass patterns and abstract geometric foils align with current trend directions observed in beauty industry publications.
Sealing requirement: foil sits on the nail surface and will peel off without proper top coat protection. Apply two layers of gel top coat, curing each separately, to fully encapsulate foil edges and prevent lifting.
13. Butterfly Decals with 3D Wings
Difficulty: Intermediate | Time: 105 minutes | Longevity: 2-3 weeks
Butterfly nail art ranges from simple decals to elaborate 3D sculptured wings. The combination approach — decal body with dimensional wings — balances visual impact against application difficulty.
Application sequence: build your base acrylic nail in any light color, then apply butterfly body decals (waterslide or vinyl) to 1-2 accent nails per hand. For dimensional wings, use small beads of white or iridescent acrylic to build up wing shapes that extend above the nail surface, creating actual dimension rather than painted illusion.
The wings need internal support or they'll break during wear. Keep 3D elements under 2mm height and ensure they're fully encapsulated in clear acrylic or thick builder gel. Vacation Nails: 12 Travel-Friendly Designs That Last discusses durability considerations for dimensional designs during active summer travel.
Color coordination: match butterfly wing colors to your outfit color palette, or keep them white/iridescent to work with any summer wardrobe.
14. Geometric Color Blocking
Difficulty: Intermediate | Time: 90 minutes | Longevity: 2-3 weeks
Geometric color blocking uses tape or vinyl stencils to create sharp lines between contrasting acrylic colors. The crisp edges and bold color juxtaposition align with current graphic design trends translating into nail art.
The taping technique: build your first color zone in acrylic and allow it to fully cure (5-7 minutes). Then apply thin striping tape or nail vinyl to mask the cured area, creating a boundary for your second color. Apply the second acrylic color up to the tape edge, then remove the tape before the acrylic fully hardens to prevent pulling or cracking.
Color combinations for summer 2026: neon pink with navy blue, yellow with purple, coral with mint green. High contrast creates the strongest visual impact. Avoid similar-value colors (light pink with light yellow) because the geometric divisions become less visible.
For those interested in precise geometric work, Oval Nail Shape: How to File and Maintain the Perfect Oval explains filing techniques that create clean, even nail shapes as the foundation for geometric designs.
15. Pressed Flower Encapsulation
Difficulty: Intermediate | Time: 90 minutes | Longevity: 2-3 weeks
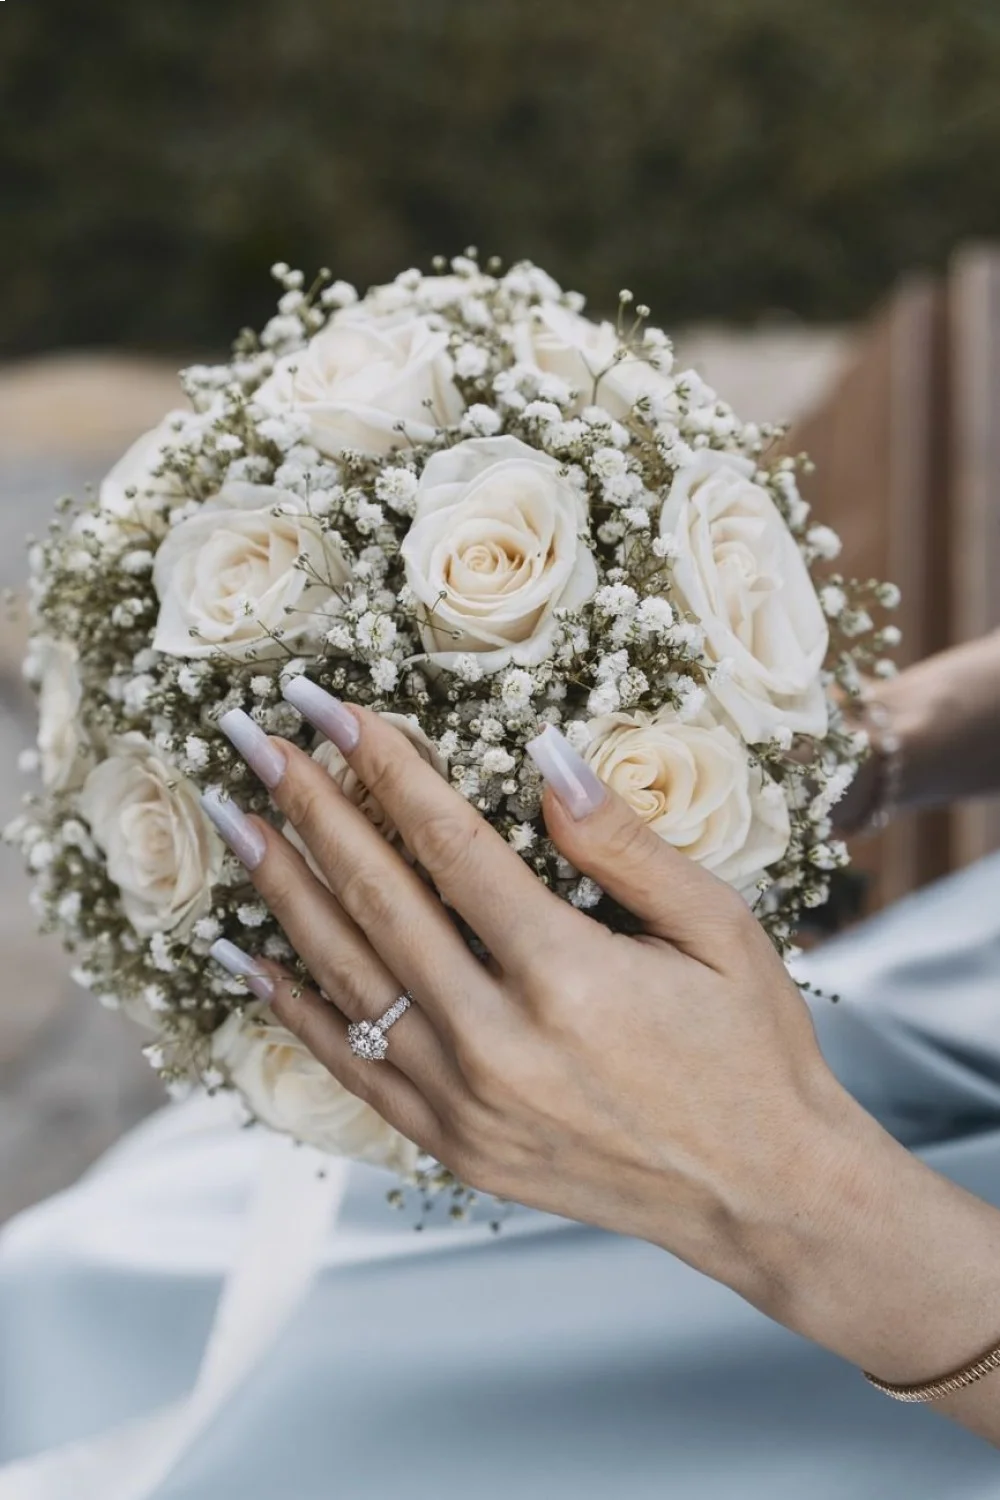
Real dried flowers embedded in clear acrylic create an organic, botanical aesthetic perfect for summer garden party events or outdoor weddings. The flowers sit suspended within the acrylic layers, protected from damage while visible from all angles.
Encapsulation method: build a thin base layer of clear or nude acrylic, then place dried flowers (purchased from craft stores or dried at home) onto the slightly wet acrylic surface using tweezers. Position them precisely because adjustment becomes difficult once they touch the wet acrylic. Then apply a thick layer of clear acrylic over the entire nail, fully encapsulating the flowers with no exposed edges.
Flower selection matters. Thin, flat flowers like baby's breath, small daisies, or fern fronds work better than thick, dimensional blooms. Thick flowers create lumpy nail surfaces that catch on fabric and clothing. Flowers must be completely dry before encapsulation or they'll mold inside the acrylic.
Wedding Nails: 12 Elegant Designs for Brides 2026 includes additional pressed flower techniques optimized for special events, including color preservation methods and arrangement composition.
Nail Shape Selection for Summer Designs
Nail shape affects both design presentation and summer activity durability. Different shapes distribute stress differently across the nail structure, impacting break resistance during summer sports and outdoor activities.
Oval and almond shapes offer the best balance between elegance and durability. The tapered free edge reduces breakage risk during activities like beach volleyball or water sports because there's less surface area to catch and snap. These shapes also elongate fingers visually, which many clients prefer. Oval Nail Shape: How to File and Maintain the Perfect Oval provides specific filing angles for achieving symmetrical oval shapes.
Coffin and stiletto shapes create dramatic visual impact but sacrifice durability. The sharp point or flat tip concentrates stress at the free edge, increasing break risk during summer activities. These work better for special events (weddings, photoshoots) than for active summer lifestyles.
Square and squoval shapes maximize free edge surface area for design placement. Fruit slice designs, geometric patterns, and French variations all benefit from the extra canvas space. The trade-off: square corners catch on fabric more easily than rounded shapes.
Round shapes work best for shorter nail lengths, which many clients prefer for summer typing, texting, and outdoor activities. Round Nail Shape: Complete Filing & Styling Guide explains the filing technique that prevents the "stubby" look often associated with round shapes on short nails.
| Shape | Durability | Design Canvas | Best For |
|---|---|---|---|
| Oval | High | Medium | Daily wear, active lifestyles |
| Almond | High | Medium | Elegant events, all activities |
| Square | Medium | Large | Bold designs, careful wearers |
| Coffin | Low | Large | Special occasions, photos |
| Stiletto | Very Low | Small | Editorial looks, events only |
| Round | High | Small | Short nails, minimalist designs |
Maintaining Summer Acrylics Through Pool Season
Chlorine exposure, saltwater immersion, and UV radiation challenge acrylic integrity despite the system's inherent durability. According to Byrdie's acrylic care guide, proper maintenance practices extend wear time and prevent premature lifting or discoloration.
Post-swimming care protocol: rinse hands thoroughly with fresh water after pool or ocean exposure to remove chlorine and salt residue. These chemicals don't damage cured acrylic directly, but they can accumulate around cuticles and lift zones, creating bacterial growth environments. Pat dry completely rather than air-drying, which concentrates residue at the cuticle line.
Cuticle oil application becomes critical during summer months when sun and water exposure dry out the skin around acrylic nails. Apply cuticle oil (jojoba, vitamin E, or commercial blends) twice daily, focusing on the cuticle line and sidewalls where lifting typically begins. Cuticle Oil Benefits: 8 Best Products & How to Use reviews specific product formulations and their penetration rates through acrylic edges.
Key Finding: According to OPI's summer nail care guidance, daily cuticle oil application and fresh water rinsing after chlorine exposure are the two most effective practices for extending acrylic wear during summer months
Sunscreen interaction awareness: chemical sunscreens containing avobenzone can cause yellowing in acrylic nails, particularly white or pale pink shades. The yellowing comes from a photochemical reaction between avobenzone and UV light while the sunscreen residue sits on the nail surface. To prevent this, apply sunscreen to hands first, then wipe nails clean with rubbing alcohol before the sunscreen dries.
Fill schedule adjustments: summer activities often accelerate natural nail growth due to increased vitamin D exposure and improved circulation. This means fill appointments might need scheduling every 10-12 days instead of the standard 14-day interval to prevent visible gap formation at cuticles.
Heat exposure limits: while acrylic remains stable at typical summer temperatures, prolonged exposure above 120°F (like leaving hands on a hot car dashboard) can soften the polymer enough to cause shape distortion. This rarely occurs in normal summer activities but matters for specific scenarios like hot yoga or sauna use.
For those dealing with nail health concerns underneath acrylics, Nail Fungus Prevention: 8 Essential Tips for Healthy Nails addresses the moisture management and sanitation practices that prevent fungal infections during summer's humid conditions.
Application Best Practices for Summer Longevity
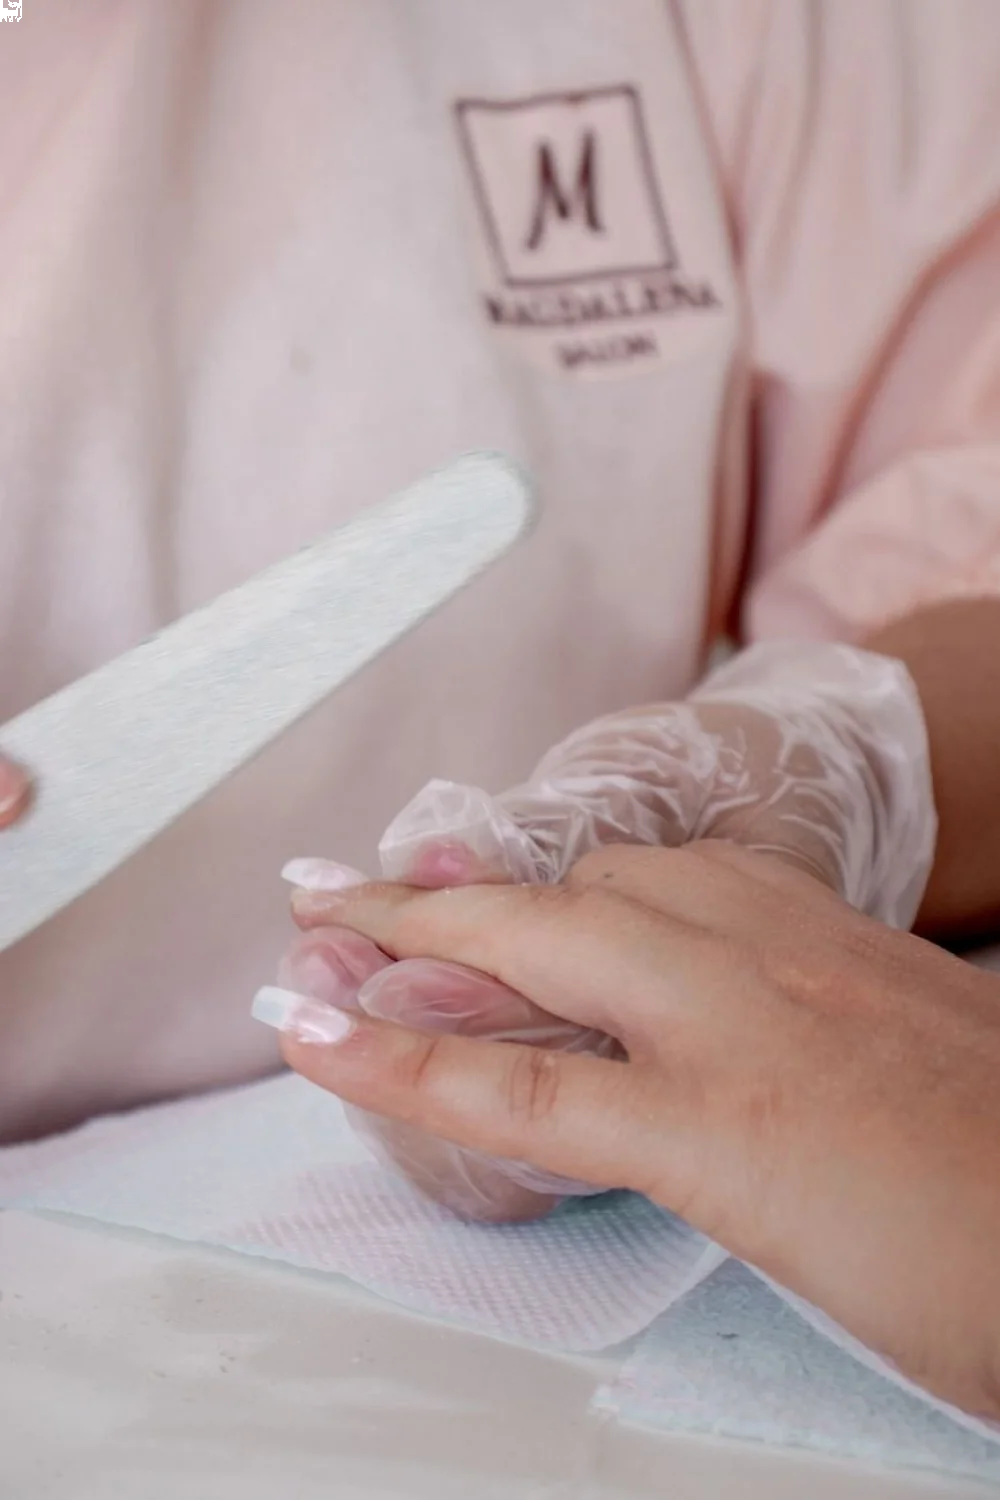
The application process determines whether your summer acrylics last two weeks or two days. Proper technique creates mechanical bonds that withstand summer activity stress.
Nail plate preparation sequence: buff the natural nail surface with a 180-grit file to remove shine and create microscopic grooves for mechanical adhesion. Then apply nail dehydrator (basically isopropyl alcohol with additives) to remove all oils and moisture. Follow with acid-free primer, which chemically modifies the nail plate surface to accept acrylic bonding. Skip any step and you're setting up for premature lifting.
The dehydration step deserves extra attention. Summer humidity means natural nails contain more moisture than during winter months. Some nail technicians recommend double-dehydrating during summer — applying dehydrator, letting it evaporate completely, then applying a second coat before primer.
Monomer-to-powder ratio precision: the ideal ratio creates a bead that holds its shape on the brush without being dry or crumbly (too much powder) or runny (too much monomer). Summer heat affects monomer evaporation rates, which means you might need to adjust your ratios slightly from winter techniques. In air-conditioned environments, standard ratios work fine. In non-climate-controlled spaces, slightly drier beads prevent the runny consistency that comes from heat-thinned monomer.
Capping the free edge: this non-negotiable step involves running acrylic over the edge of the nail tip to seal it completely. Uncapped edges allow water infiltration between the acrylic and natural nail, causing the separation that leads to lifting. Pay particular attention to sidewall areas where many technicians skip thorough capping.
Proper filing and shaping technique: after acrylic cures, file with 180-grit to shape, then progressively finer grits (240, then 320 or higher) to smooth the surface. Rough surfaces trap dirt and bacteria during summer activities. The smoothest possible finish also reflects light better, making designs appear more vibrant.
Acrylic Fill at Home: DIY Guide to Save Money walks through the complete application process with specific product recommendations and troubleshooting for common application errors.
Product Recommendations for Summer Application
Navigating nail trends with a critical, research-backed eye means identifying products based on formulation chemistry and observable performance characteristics rather than marketing claims.
Monomer systems: MMA (methyl methacrylate) monomers have been largely phased out in professional applications due to health concerns and excessive nail damage. EMA (ethyl methacrylate) represents the current professional standard. Mia Secret, Young Nails, and Tammy Taylor all formulate with EMA and offer low-odor variants that make home application more comfortable during summer when window ventilation isn't always practical.
Powder pigmentation: heavily pigmented powders require thinner application for opacity, which creates lighter, more comfortable nails during summer heat. ASP Signature powder and Artisan acrylic powders both offer concentrated pigmentation that achieves full coverage in thin layers.
Primers: acid-based primers create stronger initial adhesion but require careful application to avoid skin contact (they're corrosive). Acid-free primers (like Young Nails Protein Bond or ASP Bonding Agent) work well for most applications and present lower safety risks during DIY application. For extremely oily nail beds or during high-humidity summer months, acid-based primers (Mia Secret Professional Primer, IBD Stick) provide superior adhesion.
Top coats: the final seal determines design longevity and gloss retention. Gel top coats (requiring UV/LED cure) offer superior chip resistance and gloss retention compared to regular acrylic sealers. Gelish Top It Off and CND Shellac Top Coat both cure hard and maintain gloss through chlorine exposure. For those wanting matte finishes, Matte Nail Designs: 18 Stunning Ideas + How to Get the Look discusses matte top coat options and their durability characteristics.
Cost breakdown for DIY summer acrylic application:
| Item | Price Range | Expected Use |
|---|---|---|
| EMA Monomer (8 oz) | $12-25 | 40-60 full sets |
| Acrylic Powder (1 oz per color) | $6-15 | 20-30 full sets per color |
| Primer | $8-18 | 100+ applications |
| Brushes (size 8-10) | $8-30 | 50+ sets with proper care |
| Files & Buffers | $10-15 | 10-15 sets |
| Total startup cost | $60-130 | Equipment lasts months |
Professional salon application costs $45-80 per full set in most US markets, with fills running $30-50. The DIY equipment investment pays for itself after 2-3 full sets.
Troubleshooting Common Summer Acrylic Issues
Even with proper application, summer conditions create specific failure modes that don't occur during other seasons.
Yellowing or discoloration: white and pale pink acrylics yellow from UV exposure combined with sunscreen chemicals, tanning oils, or self-tanner. Prevention involves keeping chemical products off nails or using gel top coats that include UV filters. Once yellowing occurs, it's embedded in the acrylic and can't be removed — only covered with opaque polish or by filing down to fresh acrylic.
Lifting at cuticles: the most common acrylic failure mode intensifies during summer because moisture from swimming and humidity infiltrates any microscopic gap between acrylic and natural nail. Once lifting begins, it progresses rapidly as water expands the gap. According to the American Academy of Dermatology's nail care guidelines, moisture trapped under nail enhancements creates ideal conditions for bacterial and fungal growth.
Addressing lifting immediately prevents progression: file away the lifted acrylic, re-prep the exposed natural nail, and fill the gap with fresh acrylic. Waiting allows bacteria to colonize the space, creating the green discoloration sometimes called "greenies" (actually Pseudomonas bacterial growth).
Heat-related bubbling: applying acrylic in temperatures above 85°F or in direct sunlight can cause rapid polymerization that traps air bubbles in the structure. These appear as white spots or cavities within the acrylic. Prevention requires climate-controlled application environments. Once bubbles form, they're permanent until you file through that layer.
Cracking or breaking: usually indicates too-thin application or filing that created weak zones. Summer activities put more stress on nails through sports, swimming, and outdoor work. Minimum acrylic thickness should be 1mm at the stress point (center of the nail).